560SL - Fuel Distributor 0-Ring Replacement
Автор: TonyLiveTV
Загружено: 2022-07-07
Просмотров: 8268
Описание:
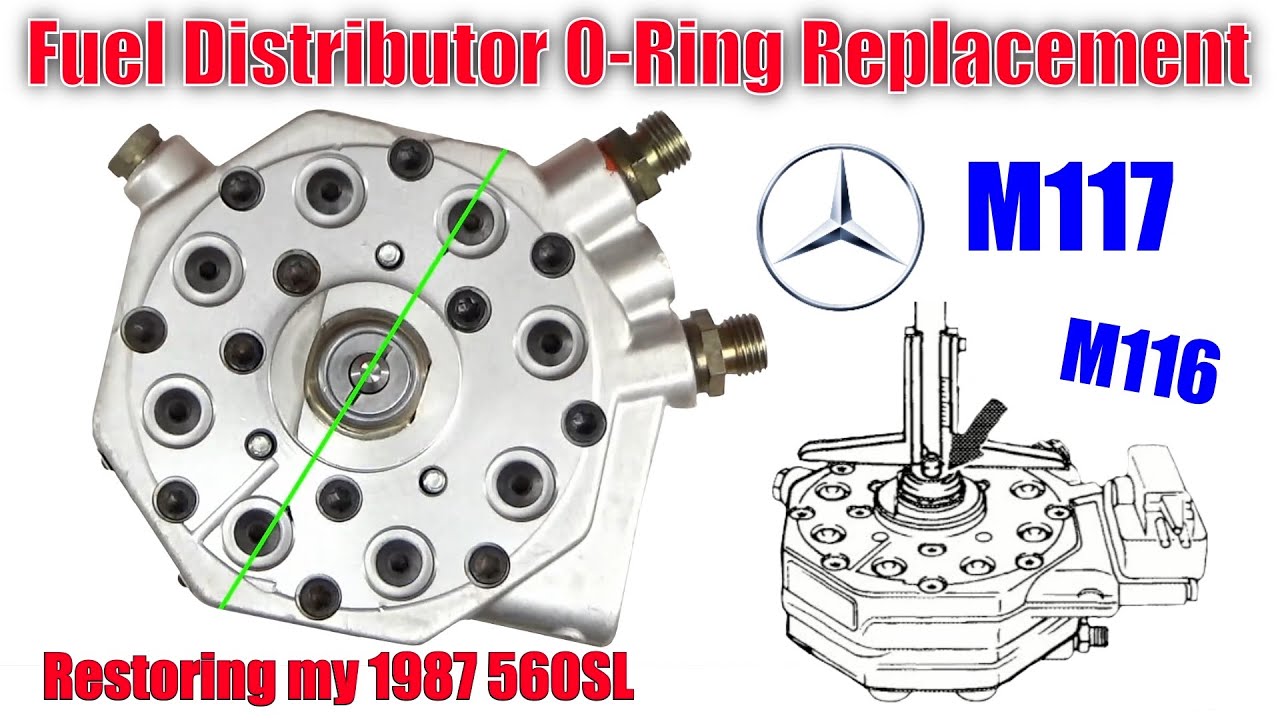
This Video: R107 - Fuel Distributor 0-Ring Replacement
All the R107 manuals and resources in one place — free and online.
👉 https://TonyLiveTV.com
I am documenting every part of this vehicle as I put it back together. The idea is to end up with the best documented 560SL rebuilds on the Internet.
In this video I pick up where I left off yesterday and replace the two sealing rings (o-rings) that are located on the bottom of the fuel distributor. The Mercedes-Benz documentation calls this procedure "renewing sealing ring for control piston", but I'm titling this video Fuel Distributor 0-Ring Replacement because it makes more sense to me.
I want everyone who visits my channel to know about a friend of mine. His name is Tasos and his videos inspire me to be more like him. You can find his YouTube channel at:
/ tasosmoschatos
Disclosure: My videos are not sponsored. I only recommend products I’ve personally purchased and use. Some of the links below are affiliate links, which means I may earn a small commission at no additional cost to you if you purchase through them. As an Amazon Associate I earn from qualifying purchases.
For this job you need a fairly accurate caliper. I recently purchased the Kynup Digital Caliper Tool and I really like it. It seems to be quite accurate as I have tested it with a caliper:
https://amzn.to/3NZp32J
In this video I also used an ultrasonic cleaner. I really like the one I have. The one I have is a 6L/1.7 gallon with strong heater and digital timer. This one has a 300 watt heater and 180 watts for ultrasonic cleaning. You will see in this video that it is very effective:
https://amzn.to/3ymnu8N
Of course you can no longer purchase this and I have not found a reasonably priced one with a high output heater and strong ultra-sound like the one I purchased.
You MUST keep things clean! Don't use just any ordinary paper towel. Paper towels will leave small fibers behind. What I use are these Lint Free Cleanroom Wipes:
https://amzn.to/3nK8RXW
You will also need some common tools like a 12mm and 17mm open end to remove the injector lines and a screwdriver to remove the fuel distributor. There are no torque specifications for this job.
This video is very detailed and is intended for the absolute beginner (ME). This is how I did things. If you see a problem, let me and the world know by leaving a comment.
Here are the main topics for the content I will be covering in this video:
Chapter Links:
00:00 Introduction
00:10 Overview
05:12 Parts Review
08:05 Removing The Fuel Distributor
08:57 Found Stuck Control Piston
10:07 Removing Control Piston Cap
15:11 Removing Stuck Control Piston
17:18 Removing Control Piston Spring
19:43 Removing The EHA
24:10 Ultrasonic Cleaner Test #1
26:16 Ultrasonic Cleaner Results Fail
26:23 Ultrasonic Cleaner Test #2
28:31 Ultrasonic Cleaner Results Success
30:18 Ultrasonic Clean Control Piston
35:51 Ultrasonic Cleaner Results
37:42 Ultrasonic Clean Control Piston Spring & Retainer Nut
43:28 Ultrasonic Cleaner Results
45:34 Reassemble The Fuel Distributor Fail
49:00 What Went Wrong?
50:02 Reassemble The Fuel Distributor Final
55:02 Calibrate Control Nut Distance
56:19 Reassemble The Fuel Distributor Success
57:34 Replacing Hose Clamp of Mixture Control
59:43 The Recap
Повторяем попытку...
Доступные форматы для скачивания:
Скачать видео
-
Информация по загрузке:


