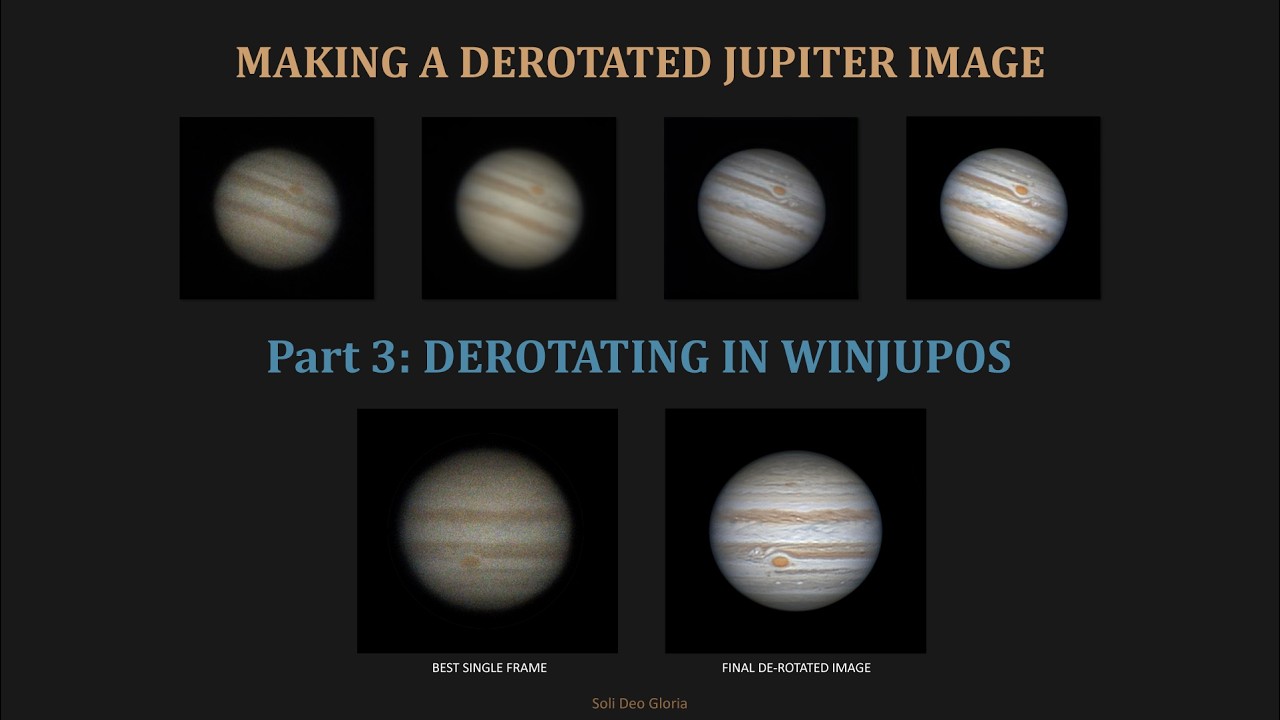
Making a Derotated Jupiter Image - Part 3: DEROTATING IN WINJUPOS
Автор: Gobart_EAA
Загружено: 2026-02-22
Просмотров: 7
Описание:
In the third part of the tutorial, I will show the process of derotation and integration of sharpened photos in the WinJUPOS program. The goal of this part of the processing is to calculate derotation of stacked and sharpened images and their integration into a single derotated photo. This photo will contain much more detail than each individual stacked and sharpened image.
Tutorial content:
Part 1: Stacking in Autostakkert
Part 2: Sharpening in Registax
Part 3: Derotating in WinJUPOS
Part 4: Final Processing of the Derotated Image
All videos of this tutorial were recorded from the balcony of my apartment in Pula, Croatia, on the night of 19/20. January 2026
Equipment for imaging and processing:
Celestron 8 XLT (203mm F/10 Schmidt-Cassegrain) optical tube,
Celestron NexStar Evolution mount,
1.25" ZWO ADC,
1.25" GSO APO Barlow 2.5x,
1.25" Astronomik L filter (type 2c),
Uranus-C camera.
Software: Windows 11, Firecapture, Autostakkert 4, Registax 6, Photopea.
Computer: Lenovo ThinkBook 16 G6 IRL (CPU: 13th Gen Intel(R) Core(TM) i5-1335U, 16 GB RAM, 512 GB SSD, Intel UHD Graphics)
Video production software: OBS Studio, Microsoft ClipChamp.
Comments and suggestions are more than welcome, thanks :-)
Повторяем попытку...
Доступные форматы для скачивания:
Скачать видео
-
Информация по загрузке: