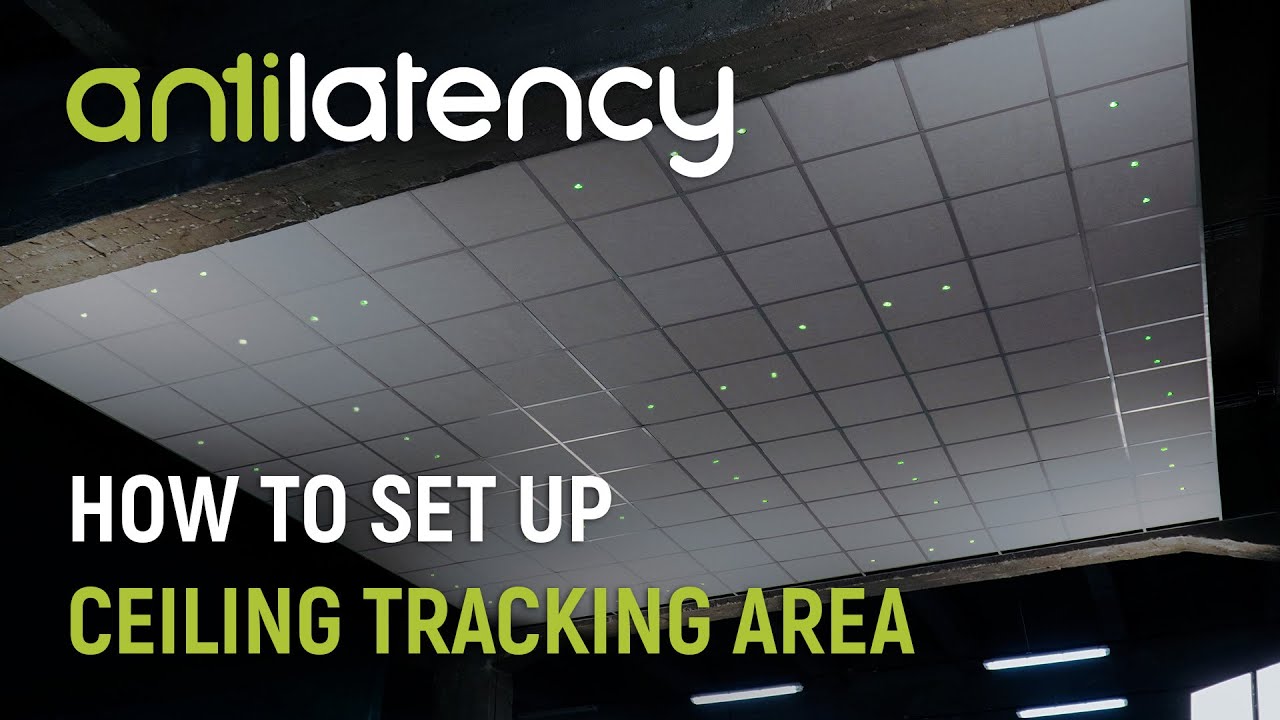
Ceiling Tracking Area Setup tutorial / Antilatency tracking system
Автор: Antilatency
Загружено: 2021-03-01
Просмотров: 8917
Описание:
“Ceiling Tracking Area Setup tutorial / Antilatency tracking system”
In this video, you will learn how to assemble and set up the ceiling tracking area using the ceiling grid. This setup is easy to install and customize, and is also affordable for most indie studios.
-------------------------------------------------------------------------
In order to assemble and install the ceiling tracking area, you need to do the following:
1. Mount the ceiling grid,
2. Prepare the ceiling tiles,
3. Prepare bars with markers,
4. Embed the bars in the ceiling,
5. Connect the markers to the power supply,
6. Set the ceiling height in AntilatencyService
-------------------------------------------------------------------------
In addition to Antilatency markers, you'll need:
a ceiling grid, for example, an Armstrong suspended ceiling system
wires; (a 1mm² wire. For instance, red and black speaker wires 2 x 1.00 mm²)
ferrules; (terminal insulated bootlace ferrules (8mm) 1mm²) - 4 ferrules for each marker
a power supply with an output voltage of 18V, like a Mean Well PS-400-18 (https://www.meanwell.com/webapp/produ... )
-a network cable. You can use a standard one for a computer
-to calculate the output current use this formula N x 0.1A (minimum), where N is the number of markers
-also, you'll need an instrument to cut and crimp the ends of the wires
Visit our website to learn more: https://antilatency.com/
Social Media:
LinkedIn: / antilatency
Twitter: / antilatency
Reddit: / antilatency
VK: https://vk.com/antilatency
#alt #trackingsystem #vr #ar #xr #virtualproduction #robotics #drones #antilatency #ceilingsetup
Повторяем попытку...
Доступные форматы для скачивания:
Скачать видео
-
Информация по загрузке: