etrailer | Complete Breakdown of the Camco Aero-Flo RV Roof Vent Cover w/ Swing Open Lid
Автор: etrailer
Загружено: 2014-10-29
Просмотров: 9626
Описание:
Click for more info and reviews of this Camco RV Vents and Fans:
https://www.etrailer.com/RV-Vents-and...
Check out some similar RV Vents and Fans options:
https://www.etrailer.com/dept-pg-RV_V...
https://www.etrailer.com
Don’t forget to subscribe!
/ etrailertv
Full transcript: https://www.etrailer.com/tv-install-c...
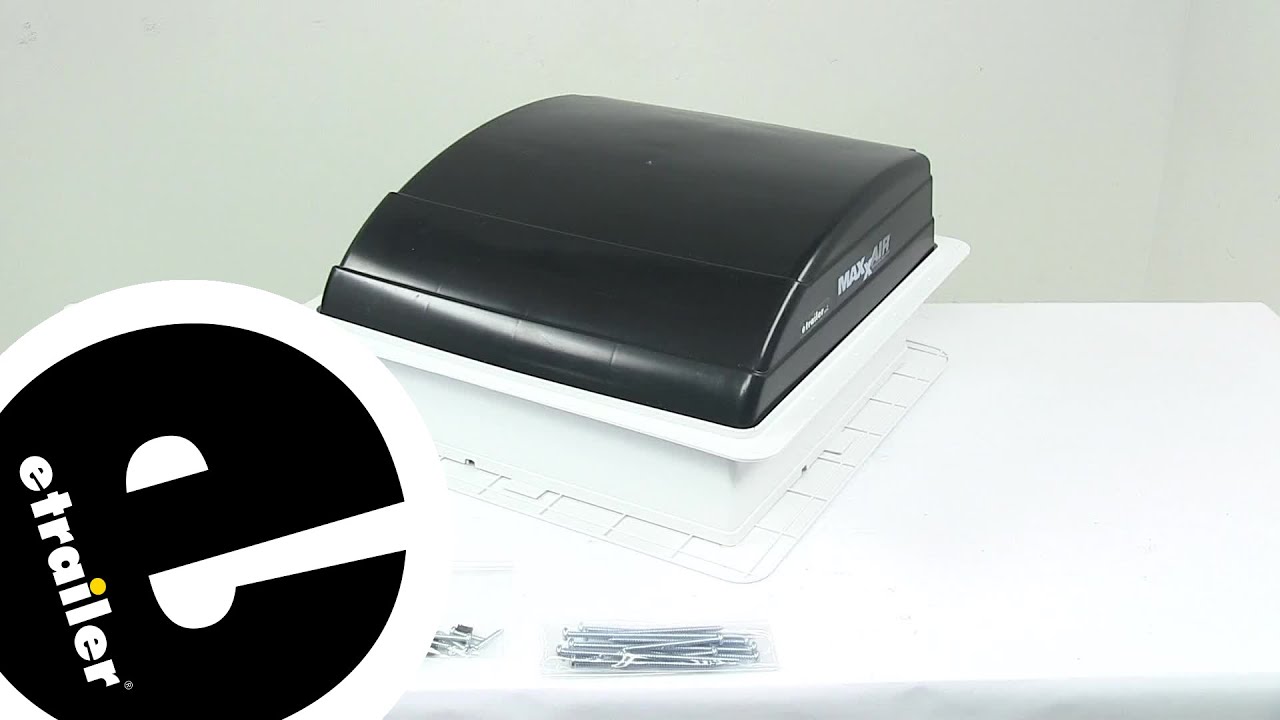
Today we're going to be taking a look at, as well as doing a quick installation of, the Camco Aero-flo RV roof vent with a swing-open lid and in a white color, part number CAM40421. Let's go over a couple features here of our aero vent cover. Right here on both the sides as well as the back it has slots built into it that allow air to enter the vent cover on three sides. Yet it allows your vent cover to remain open while it's raining outside. The aero vent cover allows air into the camper or trailer, yet keeps any rain and dirt and debris from getting inside. A quick safety tip is to make sure that the roof of your camper, enclosed trailer, or RV can support the weight of a person before you begin this installation. Now we're going to begin here up on the roof of our enclosed trailer.
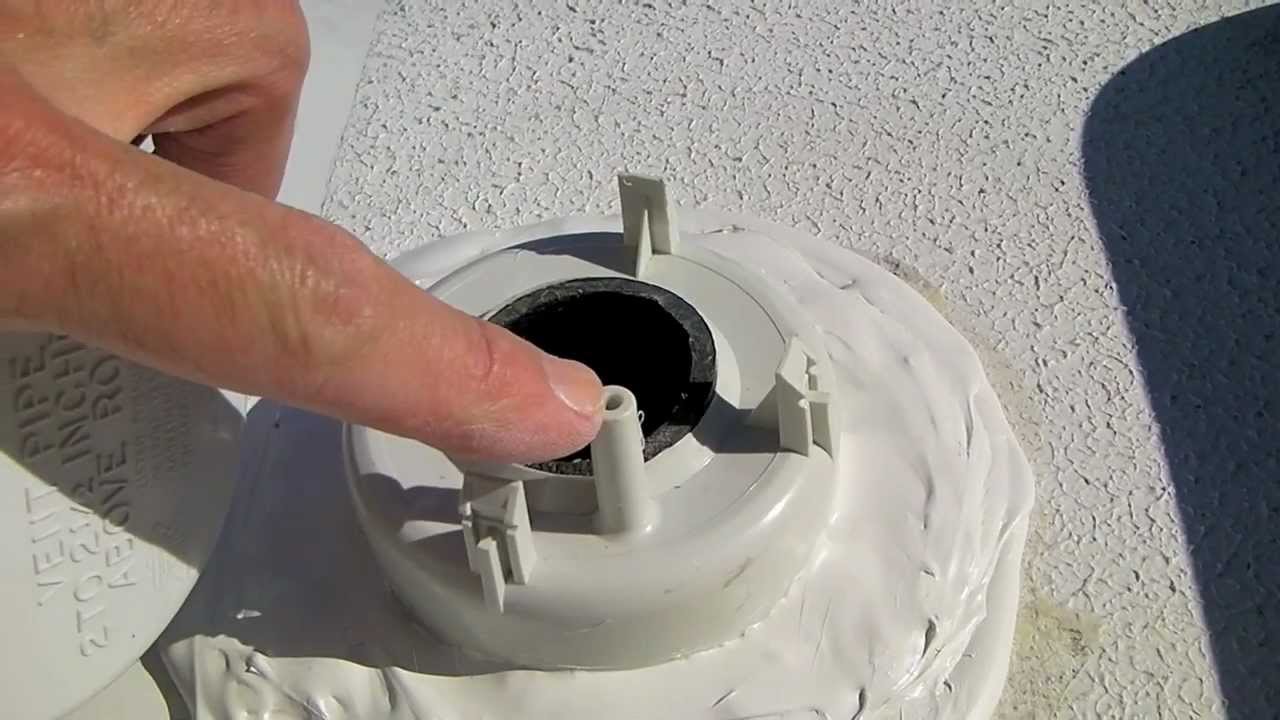
This will be the same type of installation if you we're putting it on top of a camper or a motorhome, anything that has a standard-style vent like this. Here's what our new vent cover looks like. Go ahead and set the top half off for now. Here's what the underside looks like or the bottom. You'll notice that there's some slots in it, and there's two different slots because it will give you a little bit of adjustability when you're mounting it to the frame of your vent cover. We'll then go ahead and take our base here, going to center it up.
If you fill in in the little grooves with the sharpie or the marker, it will make it easier to line up your brackets that we're going to need to attach. Next we're going to be putting these little brackets here that come like this, the little l-brackets, they'll go in there like this. What you'll want to do is line them up with as close to the corners as possible, but yet make sure you leave yourself enough room that when you drill the hole you'll be able to install the hardware. In our case we'll go ahead and line them up like this. We'll have to come it looks like to the inner one.
In our case we're going to be using the inner hole on both, is what lines up the best. Go ahead and repeat that over here on this other side. Next we're going to need to go ahead and go inside the camper our trailer or have someone else crank the vent lid up so that we can go ahead and mark the frame of the vent for where we need to drill our hole. Then go ahead and put a mark here on our frame here that we're going to need a hole, so we'll need to drill a hole through right there. Put a mark right there. We'll then go ahead and repeat this process over on the other side.
Another quick tech tip here is to help keep any debris from when you drill the holes through from going down into your camper or trailer, we went ahead and placed just some paper towels here over the screen to keep any shavings from falling down in. Next we're ready to install our bracket. Now before we do that we'll need to take the small carriage bolt that comes with it, slide it under like that. Then line back up our bracket here. Go ahead and take our bracket, put the machine screw through, and on the inside we'll put a flat washer, a lock washer, and a hex nut. Next we're ready to set the base down onto the brackets and the carriage bolts. With our base set down in place we'll need to install the hardware that secures it. There will be a flat washer, a lock washer, and a hex nut. It is normal for there to be a gap underneath, and you do not want to put caulk around that and seal that off; otherwise the condensation and moisture that may accumulate in there over time will not have a way to get out. Next we'll go ahead and take the lid or the top of the vent cover, we're going to need to line up the grooves. Once you get all three in, go ahead and close it down. Back here at the back there's a nut that's already pushed into the lower half of the vent cover. We have a screw that's threaded into the top half. We want that to line up. Then go ahead and take our Phillips-head screwdriver, go ahead and repeat that over here on the other side. With that, we're ready to hit the road. That will do it for the installation of the Camco Aero-flo RV roof vent cover with swing-open lid in the white color, part number CAM40421, on our enclosed trailer. .
Повторяем попытку...

Доступные форматы для скачивания:
Скачать видео
-
Информация по загрузке: