How to Install the Hydrastar Electric Over Hydraulic Actuator on a 2023 East To West Ahara Fifth Whe
Автор: etrailer
Загружено: 2024-12-10
Просмотров: 1039
Описание:
Click for more info and reviews of this Hydrastar Brake Actuator:
https://www.etrailer.com/Brake-Actuat...
Check out some similar Brake Actuator options:
https://www.etrailer.com/dept-pg-Brak...
Search for other popular East to West Ahara Fifth Wheel parts and accessories:
https://www.etrailer.com/vehicle/2023...
https://www.etrailer.com
Don’t forget to subscribe!
/ etrailertv
Full transcript: https://www.etrailer.com/tv-install-h...
How we doing today, neighbors Ian with etrailer here. Today I'm excited to bring you the Hydrastar Electric-Over-Hydraulic Brake Actuator on our 2023 East to West Ahara. It's going into a couple features and then that install. And this electric-over-hydraulic actuator is gonna be a great option for those who wanna stay away from surge brakes. So instead of having it push against anything that's going to cause the brakes to apply, this is gonna work with your brake controller and proportionally apply the brakes as much to the trailer as you press up in the tow vehicle. It's also gonna work with that manual override.
So if you wanna use just your trailer brakes, and since you got those nice new disc brakes that this is gonna be powering, that's gonna be a wonderful addition to your camper. I did want to touch base, between the two actuator options we've got on our website at the moment, there's a 1,600 PSI, which we're running here for our disc brakes. There's also a 1,200 PSI option, which is gonna be for your drum options. This will run up to a triple axle. We're just running a tandem on this, which is completely fine as well.
But this will go all the way up to that triple axle if need be. Now the actuator is not gonna be the hardest part of the install, in my opinion. You're still gonna have to put on the disc brakes to be able to convert those over for this to even work. And if you're running the 1200, of course that'd be the drum brake conversion if you're going that route. But with this we are running the disc brakes, and we're going to be tying into an existing 7-way.
The truck already has a brake controller. So these little things are gonna be things you need to be thinking about. When you're hooking this up, you're gonna have to have that 7-way, you're gonna have to have the brake controller and you're gonna have to switch over to disc brakes if you're moving to the 1600 PSI version of this. But we'll go through the whole install. I'll walk you through that process, and then you can check out the other videos if you wanted to see how to do the disc brakes and the line run and everything there.
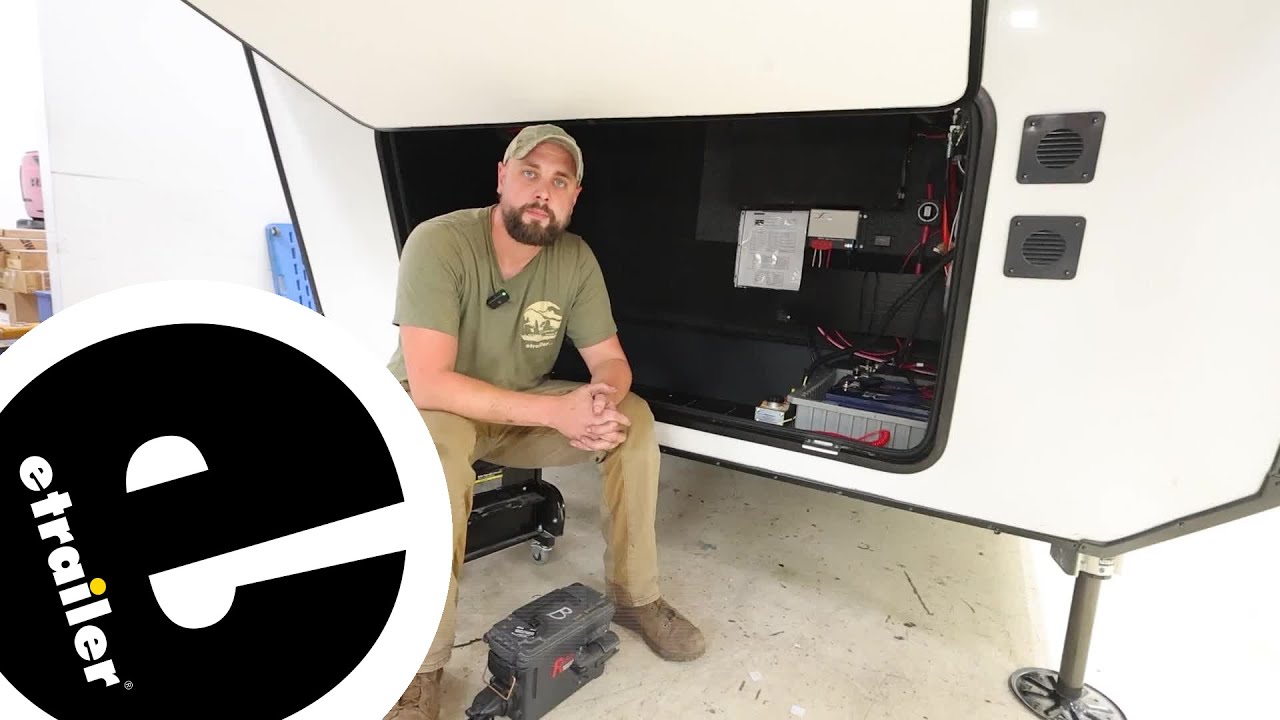
We did do the line run kit for this, and we'll walk through the whole process of getting this hooked up. And if it's not something that after watching this, you feel like you want to try to tackle because it is a very time consuming process, and lucky for us here at the studio, we're able to take our time and really walk through it. But for DIYers, we'll go ahead and walk through it. For everybody else that doesn't feel like trying to do this yourself, check our dealer locator on our website. That's gonna get you a trained professional that'll get all that thrown in. But otherwise, let's get into the install. We will need to find a place for our actuator to live. We're gonna want something level because it does have to be level. We want it also somewhat secured from the elements. It can't be out in the open, or stepped on or anything of the sort. So we've got this front compartment here where our batteries live. I'm gonna be mounting that right next to that battery box, just using some self-tappers here. And then it actually has the bracket already built into the actuator. So it's not something we need to worry about. But before we place it, you'll wanna get your line ran done. So everything going back to your brake system in the rear of the vehicle, just wanna make sure that we can get this fitting here. You'll just remove the red cap and that will thread in. And then the best thing to do is go ahead and get that tightened down with that three eighths wrench. And I would suggest using a line wrench on those, because it'll keep you from accidentally rounding out the edges of that fitting there. And snug that down until you feel good resistance. Now as we go to bleed the actuator, you may find that you'd have a leak and that's no big deal. We can just tighten that back up. We're just gonna go pretty snug right now. (drill whirls) To go over how we've got the wiring set up for the actuator, our situation is gonna be a little bit different, because we've got an additional breakaway battery box that we've got tied into the system. So that is gonna be kind
Повторяем попытку...
Доступные форматы для скачивания:
Скачать видео
-
Информация по загрузке:


