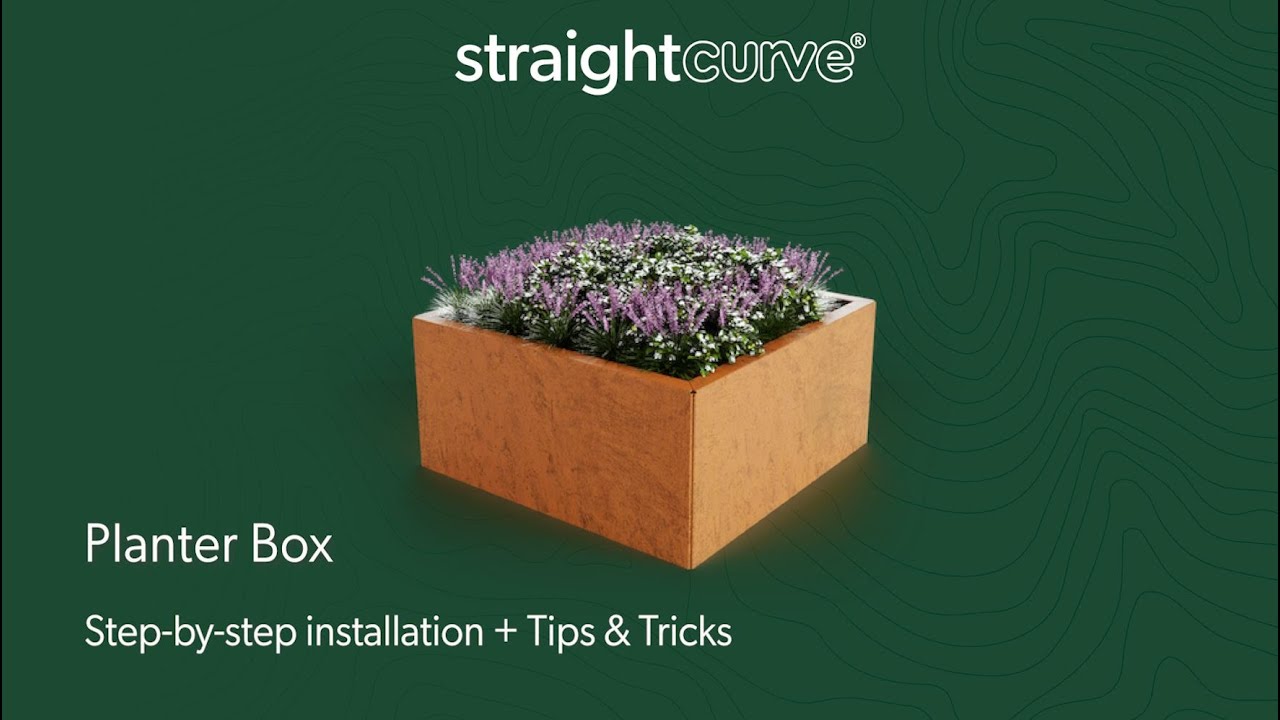
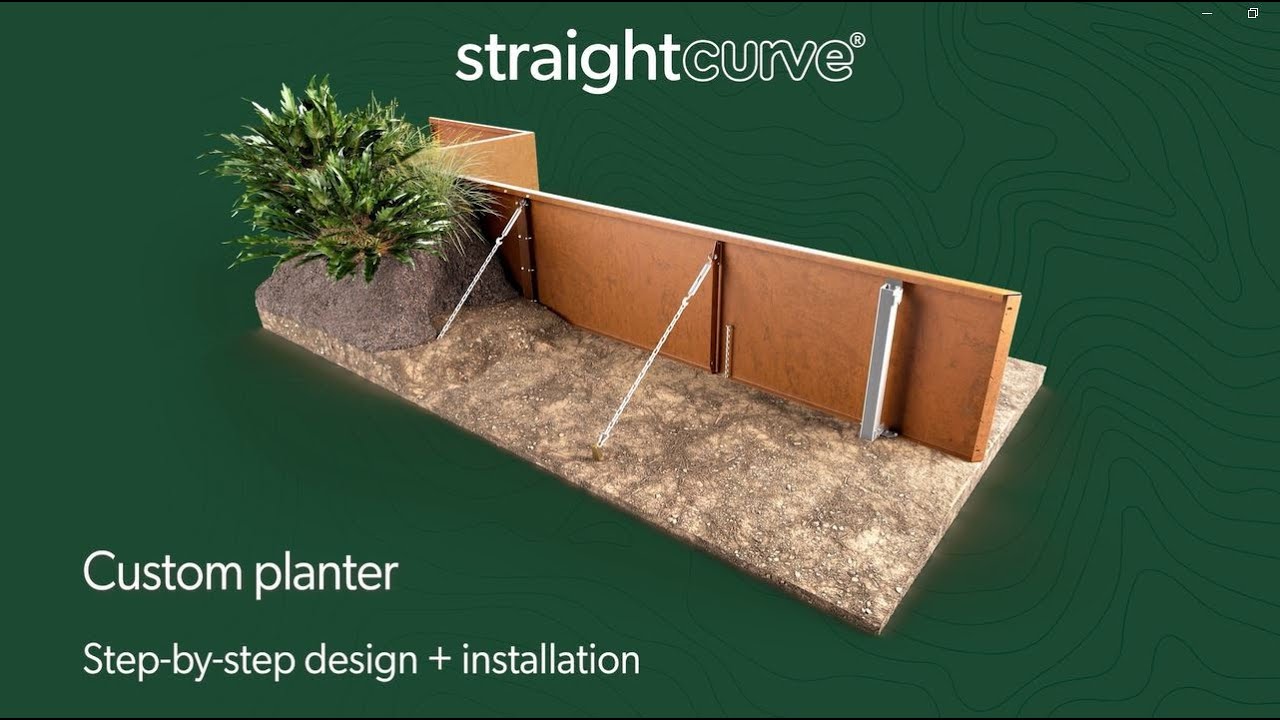
Design your own Straightcurve® Planter
Автор: Straightcurve Garden Edge
Загружено: 2023-08-21
Просмотров: 1599
Описание:
This video shows the steps to create your very own, custom designed planter with our variety of planter panels and accessories. We will show you how to sketch your design and based on this to calculate what you need to order and how to put it together.
We really have made this super easy for you to become your own landscape designer!
www.straightcurve.com
0:00 DESIGN
0:06 Step 1: Sketch out your planter box shape including dimensions of all sides
0:21 Step 2: Measure up; on your sketch, mark out all panel sizes required to build your design.
0:31 Step 3: Jot down the number of panels of each lenght needed for your design
1:01 Step 4: Make a note your sketch of how many bracing of each type you need
1:26 Step 5: Add Tek screws-all joins are fixed with Tek screws which you can add to your order. Our webshop authomatically calculates the amount of screws you'll need, you just have to add the required number.
1:33 INSTALLATION
1:40 STRAIGHT JOIN
1:44 Step 1: For a straight join (two panels in a line) use the Straight Join Set (A). Separate the pieces in the set
1:59 Step 2: Stand the first two panels together on a flat surface and insert top connector piece (A1), align guide holes and screw
2:15 Step 3: Slide in foot joiner (A2), align guide holes and screw
2:49 Step 4: Fit back rib (A3) flush to align guide holes and screw.
3:19 CORNER JOIN
3:24 Step 1: When creating a standard right angle corner(90°) use the Corner join set. Break apart the pieces in the set.
3:37 Step 2: Take strip piece and use pliers to shape into staircase pattern.
3:57 Step 3: Stand the two panels at the right angles to each other and butt together
4:01 Step 4: To join, insert top connecter 'staircase piece', align guide holes and screw
4:21 Step 5: Slide in foot joiner, align guide holes and screw
4:44 Step 6: Firmly grip and hammer arrow shaped wedge pieces into angled slots at back to fully secure the join.
5:05 REVERSE CORNER JOIN
5:09 Step 1: For a reverse corner stand the two panels in the L shape formation and butt them together
5:18 Step 2: Position the back fixing plate, align and screw through the guide holes.
5:36 END RESULT
Повторяем попытку...
Доступные форматы для скачивания:
Скачать видео
-
Информация по загрузке: