DIY Windscreen Replacement Made Simple – How to Install a BMW E36 Windshield in a Home Garage Guide
Автор: SPANNER RASH
Загружено: 2025-09-29
Просмотров: 1379
Описание:
DIY Windscreen Replacement Made Simple – How to Install a BMW E36 Windshield in a Home Garage Guide
Fitting a front windscreen seems quite a daunting task. We haven't done this before but having cracked the front screen of our BMW E36 Compact we now needed to replace it. We are painting our Compact and treating all of the rust areas, two of which were the corners of the roof at the top of the windscreen. The rust was spreading under the corners of the windscreen, so it had to come out to address it fully.
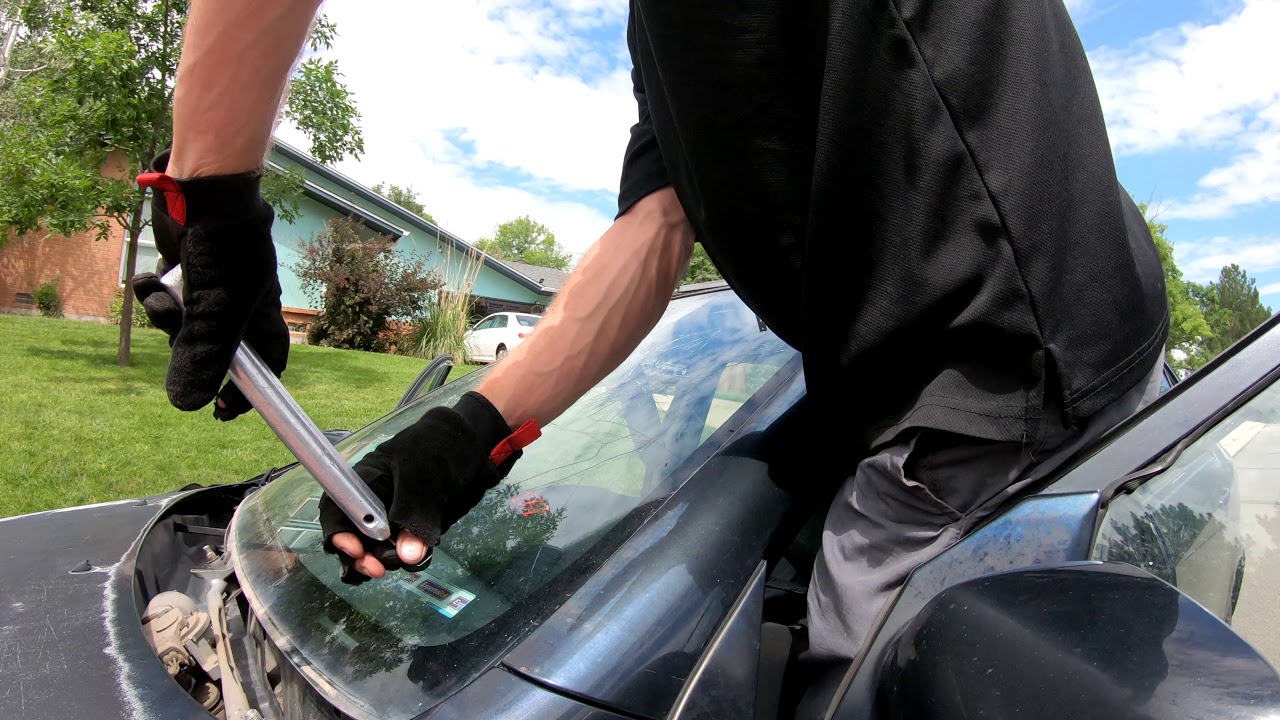
We made the mistake fo not buying the correct kit to remove the screen. We used guitar strings to cut the adhesive, but although it did work after a fashion, we now know that the professional kits have a far more effective cutting wire. We also found that the wire might damage the windscreen surround if you were not careful. We think that if we had the correct kit we wouldn't have cracked the screen.
Use VEVR5OFF to get 5% OFF the suction cups: https://s.vevor.com/QTXWXS or https://s.vevor.com/QTXXEV
Windscreen Adhesive 3 Tubes Plus Primer: https://ebay.us/jQSLuu
Windscreen Removal Kit: https://ebay.us/oKrcSs
BMW E36 Windscreen Top Seal: https://ebay.us/f8Texy
With the original screen out we cleaned all of the broken glass and adhesive that fixed the original window. This took a while but it is worth putting the effort in to get a good result.
We sourced a replacement window and collected it. We also bought a specific sealing strip for the top of the windscreen. The replacement window had the correct green tint and a green top border sun strip.
We bought the correct adhesive to fit the window. It is recommended that you have at least 2 cans of adhesive, but to be sure we bought three. Having fitted the screen we now know that one can would have been enough, but we did use it all. The adhesive also came with a small can of primer.
To make sure that the windscreen would be postioned correctly, first we dry fitted it. Then we put masking tape in a number of positions around the screen running from the body of the car onto the screen, cutting it where it passed between them, so that we could match them up when fitting.
Once we had cleaned off the old adhesive we used some Scotch bad to slightly roughen the surface, around the windscreen opening so that the adhesive will bond well, we also did this on the inside of the windscreen where it would sit against the adhesive. Before applying the adhesive we wiped all of the mating surfaces with and alcohol wipe to remove any grease or debris from them.
The adhesive sets very quickly so you need to be organised when you open the can to be ready to fit the screen straight away. The adhesive tubes come with the correct shaped nozzle to make the adhesive the right, triangular shape when you squeeze it out.
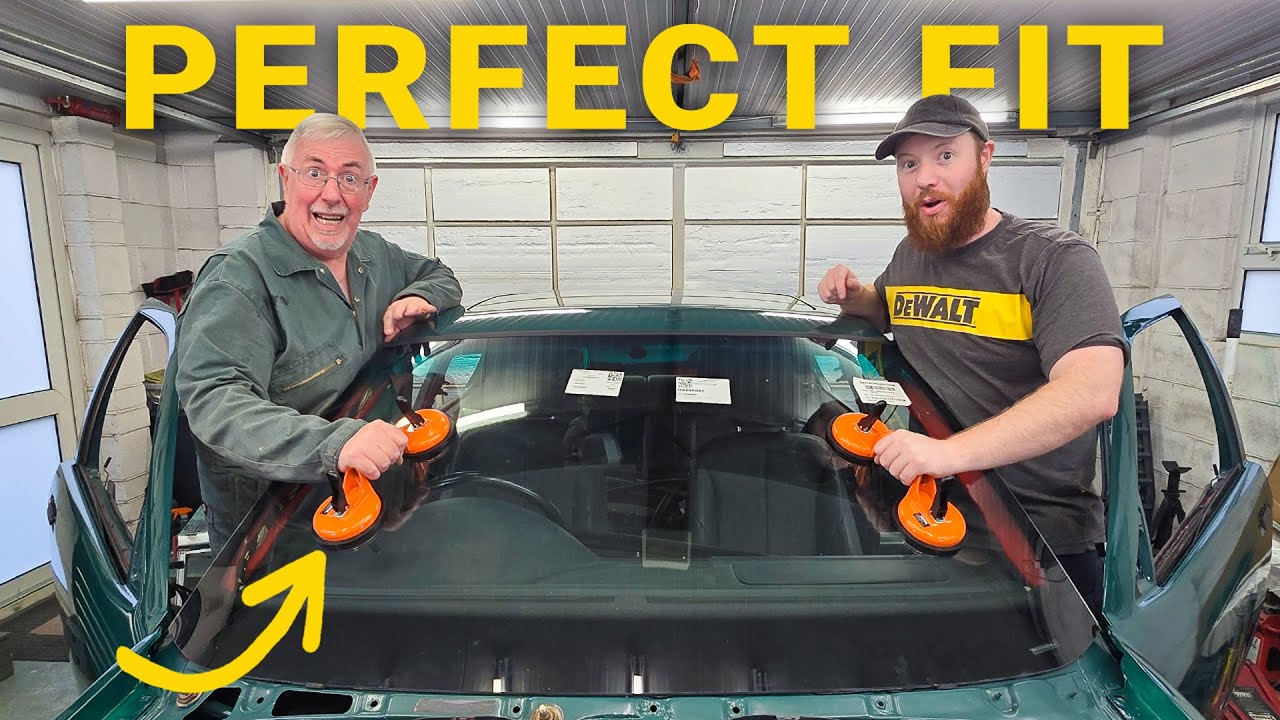
To move the screen about we were lucky to have been given some suction handles from Vevor. We would recommend that you make sure you have a set of these to handle the windscreen. Without them it would have been very difficult to carry and move the screen when we were fitting it.
Once fitted we pressed the screen down gently to make sure that the adhesive was compressed so that it would seal properly. The data sheet said that you could drive the car away after one hour, and testing some adhesive that we had practiced with, we could tell that it had set quite quickly, on the outside, but it took a little longer for it to become completely solid, but we could see how secure it would have been quite quickly.
Overall we found fitting a screen quite easy. As long as you are methodical and reasonably well organised it didn't give many challenges. Using the Vevor suction handles made moving the screen a lot easier. We did cause more damage to the old screen just moving it around without using them.
Повторяем попытку...
Доступные форматы для скачивания:
Скачать видео
-
Информация по загрузке: