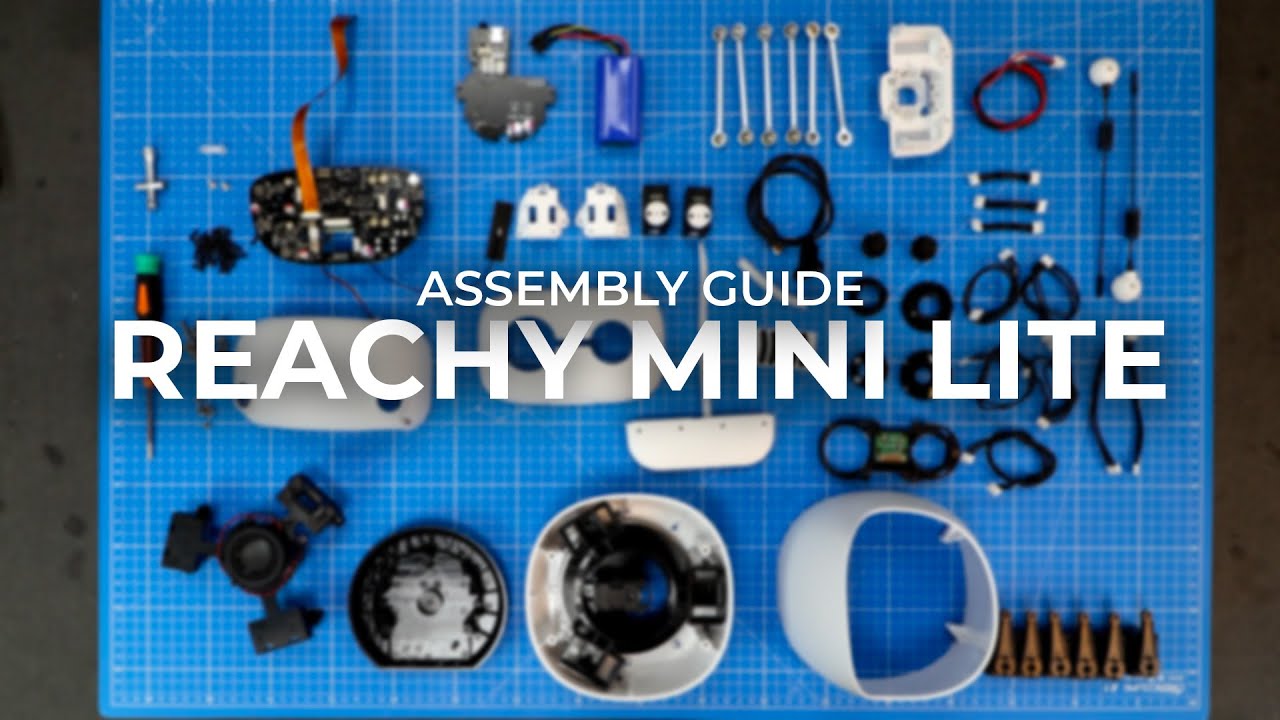
Reachy Mini Beta Assembly guide
Автор: Pollen Robotics
Загружено: 2025-11-13
Просмотров: 2997
Описание:
To help you assemble your Reachy Mini Beta, we’ve prepared a video guide that complements the printed assembly manual included in your kit. It walks you through every step to build your Reachy Mini with ease.
If you have any questions, our team is here to help:
💬 Discord: / discord
🐦 X (Twitter): https://x.com/pollenrobotics
💼 LinkedIn: / pollen-robotics
----------------------------------------------------------------
TIMESTAMPS ↓
FOOT ASSEMBLY
00:00:00 - Apply the foot pads.
00:01:14 - Install the USB extension cable.
00:02:55 - Mount the body PCB.
00:04:30 - Connect the cables to the body PCB.
LOWER BODY ASSEMBLY
00:05:05 - Insert the ball bearing.
00:05:44 - Fit the body down assembly to the foot assembly.
00:06:14 - Mount the base foot motor to the body turning unit.
00:07:14 - Position the body turning assembly on the body down assembly.
00:08:25 - Secure the body turning assembly to the body down assembly.
BODY ASSEMBLY
00:10:15 - Screw the Stewart main plate in place.
00:13:10 - Connect the base foot motor.
00:14:13 - Screw the link rods onto the motor arms.
00:18:05 - Connect Motors 1 and 2.
00:18:44 - Connect Motors 2 and 3.
00:19:31 - Connect Motors 4 and 5.
00:20:19 - Connect Motors 5 and 6.
00:20:53 - Insert all motors into the Stewart main plate.
00:22:55 - Clip the motor cables into the body down assembly.
00:24:46 - Screw the speaker into the tricap.
00:25:39 - Position the tricap.
00:27:01 - Connect Motors 3 and 4.
00:27:44 - Route the cables.
00:28:04 - Secure the tricap with screws.
00:30:47 - Screw the bottom head onto the link rods.
00:35:17 - Route the cables through the bottom head.
00:35:49 - Route the cables through the head PCB.
00:36:10 - Screw the head PCB in place.
00:37:38 - Position the top shell.
00:38:42 - Screw the top shell in place.
HEAD ASSEMBLY
00:41:08 - Place the lenses in the glasses holder.
00:41:38 - Insert the fisheye lenses into the caps.
00:42:14 - Snap the fisheye lenses into the glasses holder.
00:43:07 - Position the Arducam camera.
00:43:35 - Screw the Arducam camera in place.
00:44:08 - Screw the glasses assembly onto the front head shell.
00:45:51 - Plug in USB-C.
00:46:06 - Attach the cases to the antenna motors.
00:46:46 - Mount the motor assembly to the back head shell.
00:50:11 - Connect the antenna motors.
00:51:13 - Slide the back-head assembly onto the Reachy Mini body.
00:51:45 - Screw the back head in place.
00:53:35 - Attach the cable holder.
00:54:29 - Connect the speaker and motor cables.
00:55:22 - Connect the power and USB extension cables.
00:55:48 - Connect the flexible printed cable to the top head PCB.
00:56:23 - Slide the top-head assembly onto the back head.
00:56:31 - Connect the flexible printed cable to the head PCB.
00:57:18 - Plug the USB-C cable into the head PCB.
00:58:09 - Attach the front head.
00:59:20 - Assemble the antennas.
01:00:00 - Attach the antennas to the head.
Повторяем попытку...

Доступные форматы для скачивания:
Скачать видео
-
Информация по загрузке: