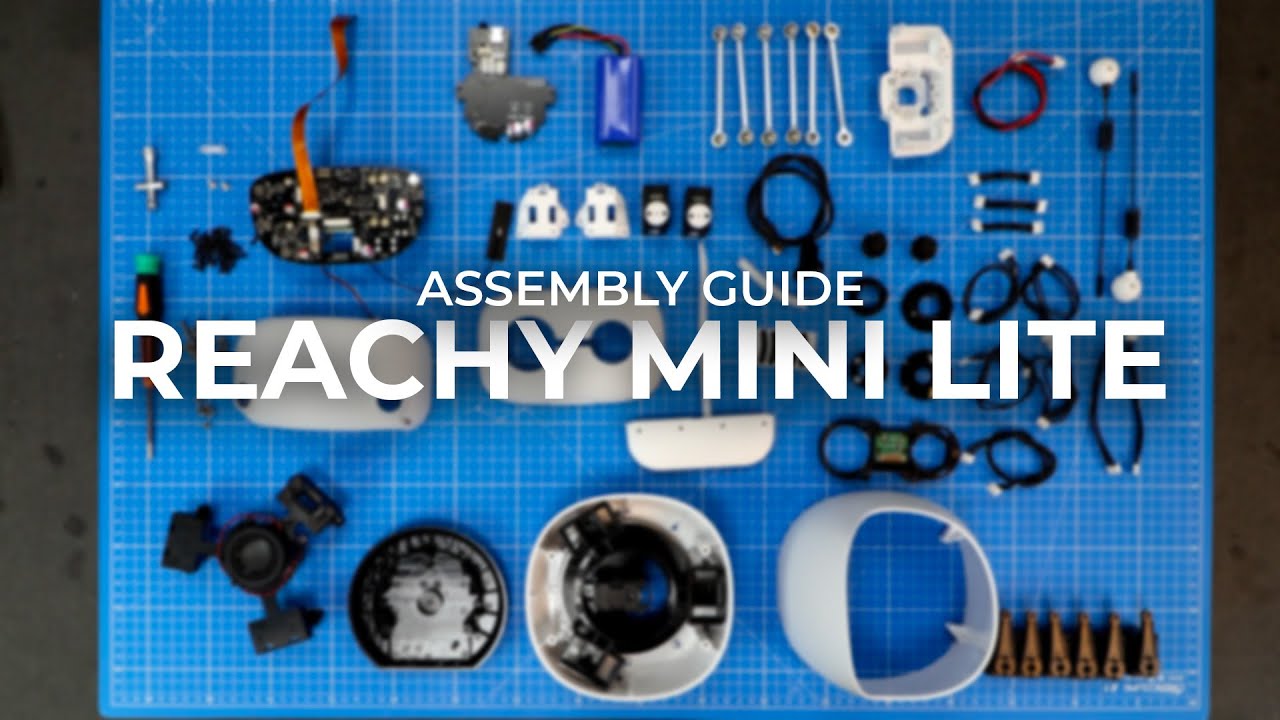
Reachy Mini LITE assembly guide.
Автор: Pollen Robotics
Загружено: 2026-01-05
Просмотров: 1335
Описание:
If you have any questions, our team is here to help:
💬 Discord: / discord
🐦 X (Twitter): https://x.com/pollenrobotics
💼 LinkedIn: / pollen-robotics
----------------------------------------------------------------
TIMESTAMPS ↓
00:00 - FOOT ASSEMBLY
00:14 - Set all parts aside
00:30 - Stick Foot Pads
01:18 - Fix the USB Extension Cable and add the protective sleeve
02:58 - Insert the Power Board
03:17 - Fix the Power Board
04:06 - Connect the cables to the Power Board
05:26 - Position the Bottom Assembly
07:20 - Fix the Foot Assembly to the Bottom Assembly
08:15 - Connect the Foot Motor
08:53 - BODY ASSEMBLY
09:15 - Screw the link rods onto the motor arms
12:22 - Connect Motor 1 to 2
13:11 - Connect Motor 2 to 3
13:36 - Connect Motor 4 to 5
13:55 - Connect Motor 5 to 6
14:24 - Insert all motors into the Bottom Assembly
15:54 - Clip the motor's cables into the Bottom Assembly
19:00 - Position the Tricap
19:19 - Route the cables
19:51 - Connect Motor 3 to 4
20:40 - Route the cables
22:02 - Check rotation
22:24 - Screw the Tricap
23:56 - Screw the Bottom Head onto the link rods
27:50 - Route the cables through the Bottom Head
28:45 - Connect the flexible camera cable (step for reference only)
28:51 - Route the cables through the Head PCB
29:16 - Screw the Head PCB
30:19 - Position the Top Shell
30:53 - Screw the Top Shell
32:12 - HEAD ASSEMBLY
32:18 - Place the lenses in the Glasses Holder
32:30 - Insert the Fisheye Lenses into the caps
32:54 - Snap the Fisheye Lenses
33:39 - Screw the Glasses Assembly onto the Front Head Shell
34:40 - Attach the cases to Antenna's motors
34:59 - Fix Antenna's Assembly to Back Head Shell
36:30 - Connect the Antenna's motors
36:52 - Slide the Back Head Assembly onto the Reachy Mini body
37:14 - Screw the Back Head
38:00 - Fix the Cable Holder
39:45 - Connect Speaker and Motor Cables
40:07 - Connect Power and USB Extension Cables
40:25 - Slide the Top Head Assembly onto the Back Head
40:39 - Connect the Flexible Printed Cable to the Head PCB
40:50 - Connect the Flexible Camera Cable on the Front Head
41:42 - Fix the Front Head
42:56 - Fix the Antennas
Повторяем попытку...
Доступные форматы для скачивания:
Скачать видео
-
Информация по загрузке:


![Почему реактивный двигатель не плавится? [Veritasium]](https://imager.clipsaver.ru/F6UB0V2Fct4/max.jpg)