Install: Stealth Hitches Hidden Trailer Hitch Receiver w/ Towing Kit on a 2014 BMW 3 Series
Автор: etrailer
Загружено: 2020-11-14
Просмотров: 7054
Описание:
Click for more info and reviews of this Stealth Hitches Trailer Hitch:
https://www.etrailer.com/Trailer-Hitc...
Check out some similar Trailer Hitch options:
https://www.etrailer.com/fitguide.htm
Click for more info and reviews of this Stealth Hitches Trailer Hitch:
https://www.etrailer.com/Trailer-Hitc...
Check out some similar Trailer Hitch options:
https://www.etrailer.com/fitguide.htm
Search for other popular BMW 3 Series parts and accessories:
https://www.etrailer.com/vehicle/2014...
https://www.etrailer.com
Don’t forget to subscribe!
/ etrailertv
Full transcript: https://www.etrailer.com/tv-install-s...
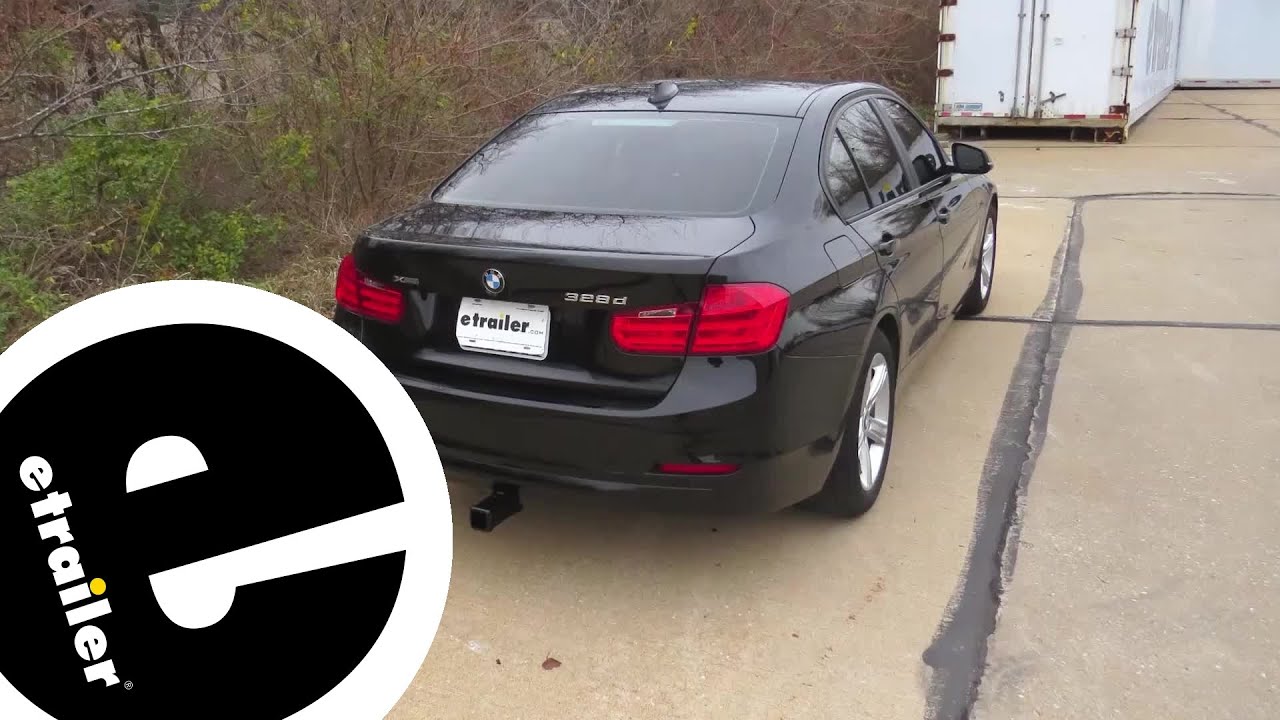
Narrator: Today on our 2014 BMW 3 Series, we're going to be installing our Stealth Hitch. And this is what our hitch is going to look like when it's installed. As you can see, you don't even know that it's there. It's hidden completely behind the bumper. Located on the bottom it is a place to install various attachments. There is your two-inch receiver, so this is for your bike racks and cargo carriers, but is not designed for towing trailers.
If you went with the towing option, you would get a ball mount, and this inserts directly into your Stealth Hitch. You'll also get wiring included with it, so that way you'll have all the necessary lighting for your trailer. So you'll be able to use it with your accessories, with your trailer, basically, whatever you need it for.If you ordered the towing package, you'll also receive wiring to have all the lighting you need on your trailer. There's a magnetic base that attaches to your wiring that keeps it sucked up out of view on the bottom of your hitch when you're not using it and easily pulls down when you're ready to use it. This four pole flat connector will give you all of your necessary lighting, including your left turn signal, right turn signal, tail lamps and brake lamps.
So you'll be DOT compliant in all states.When you're ready to insert one of your accessories, you'll want to remove the rubber plug from the bottom, the rubber plug from the side. And if it was locked, you would want to use your key and unlock it. Ours is already unlocked. You would then simply take your accessory, whichever you desire and just push it up into place. Once it snaps in, you can press the lock in.
You want to make sure that it's pressed in and locked completely, and you can put the dust cover back over your lock.This accessory here, is a two-inch by two-inch receiver, and it's designed for all of your rack mounted accessories. It uses a 5/8 inch hitch pin and clip. Now one doesn't come included with the hitch, but you can pick one up here at etrailer.com. And now I've got some measurements for you to help you when deciding on accessories. From the ground to the top inside edge of the receiver tube, it measures about 11 inches.
This is important when determining if you need to drop rise or raise shank any of your accessories. And since it is so low, I would recommend a raised shank on your accessories. From the center of the hitch pin hole, to the edge of the rear bumper, it measures about a half an inch. This is important when determining if any of your folding accessories can be placed in the upright storage position without contacting the bumper.To remove your accessory first, you'll unlock it. Then you'll twist the knob here until it stops and your assessor will just drop right out. The knob will also stay in that fully turned position to make it easy to insert your next accessory. For when you're ready to hook up your trailer, you'll want to insert your ball mount located on your cross tube itself, you'll find your safety chain loops, and there's a nice big opening there. So you should be able to accommodate just about every size safety chain. A two inch ball comes included with our hitch and it's rated for 6,000 pounds. The ball mount itself has a raised shank to help it fit on your more average trailer sizes. Our ball sits about 18 and a half inches off the ground.We'll begin our installation at the back of the vehicle with the trunk open, we need to remove both the passenger and driver's side tail light assemblies. There's a plastic cover that we're going to need to remove. There's a small pin here that we'll use our flat bladed screwdriver to unthread. This will allow us to remove our cover, exposing the bolts that we need to remove below. We'll then use our 10 millimeter socket to remove the inaudible 00:03:40.We also need to remove the one bolt down here. We'll repeat the same process on the other side, we can now pull our tail light rearward to release it. I do recommend using a trim panel tool, that's plastic to help pry it towards the rear. As there are some tabs that need to come out of so
Повторяем попытку...
Доступные форматы для скачивания:
Скачать видео
-
Информация по загрузке: