etrailer | Setting up the Curt Trailer Hitch Receiver on a 2015 BMW 3 Series
Автор: etrailer
Загружено: 2015-12-18
Просмотров: 30423
Описание:
Click for more info and reviews of this CURT Trailer Hitch:
https://www.etrailer.com/Trailer-Hitc...
Check out some similar Trailer Hitch options:
https://www.etrailer.com/fitguide.htm
Click for more info and reviews of this CURT Trailer Hitch:
https://www.etrailer.com/Trailer-Hitc...
Check out some similar Trailer Hitch options:
https://www.etrailer.com/fitguide.htm
Click for more info and reviews of this CURT Trailer Hitch:
https://www.etrailer.com/Trailer-Hitc...
Check out some similar Trailer Hitch options:
https://www.etrailer.com/fitguide.htm
Click for more info and reviews of this CURT Trailer Hitch:
https://www.etrailer.com/Trailer-Hitc...
Check out some similar Trailer Hitch options:
https://www.etrailer.com/fitguide.htm
Search for other popular BMW 3 Series parts and accessories:
https://www.etrailer.com/vehicle/2015...
https://www.etrailer.com
Don’t forget to subscribe!
/ etrailertv
Full transcript: https://www.etrailer.com/tv-install-t...
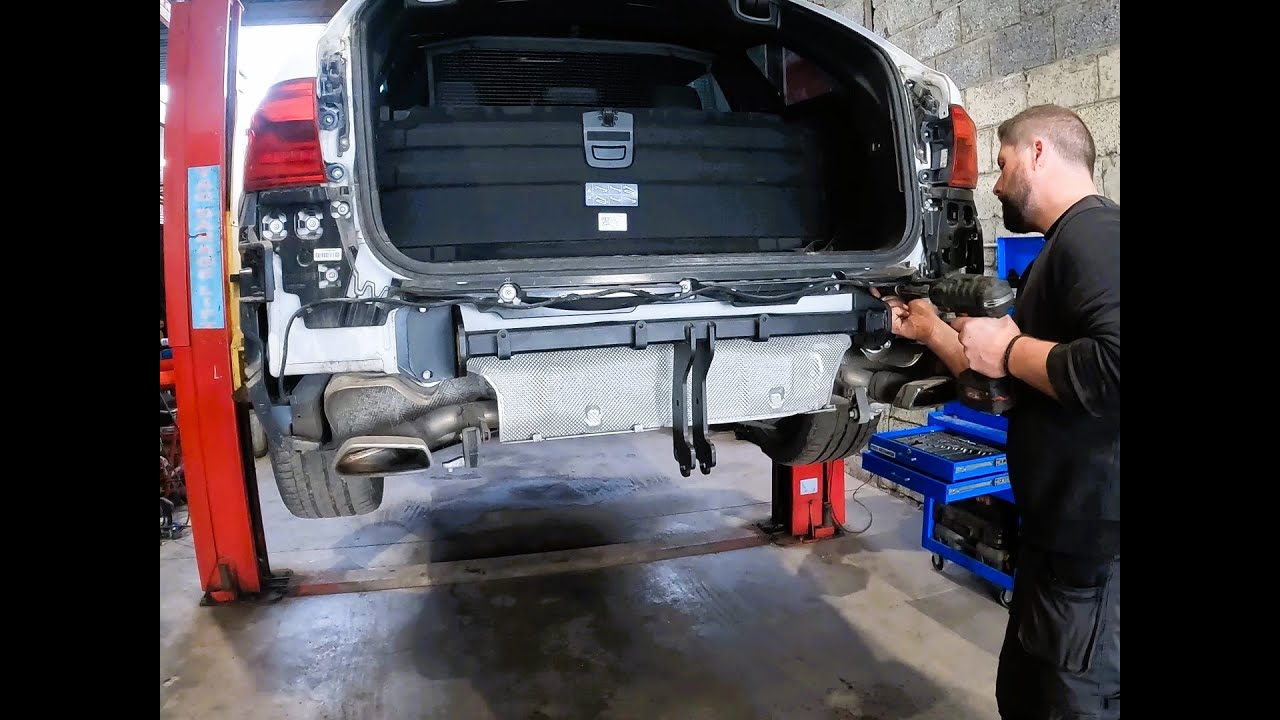
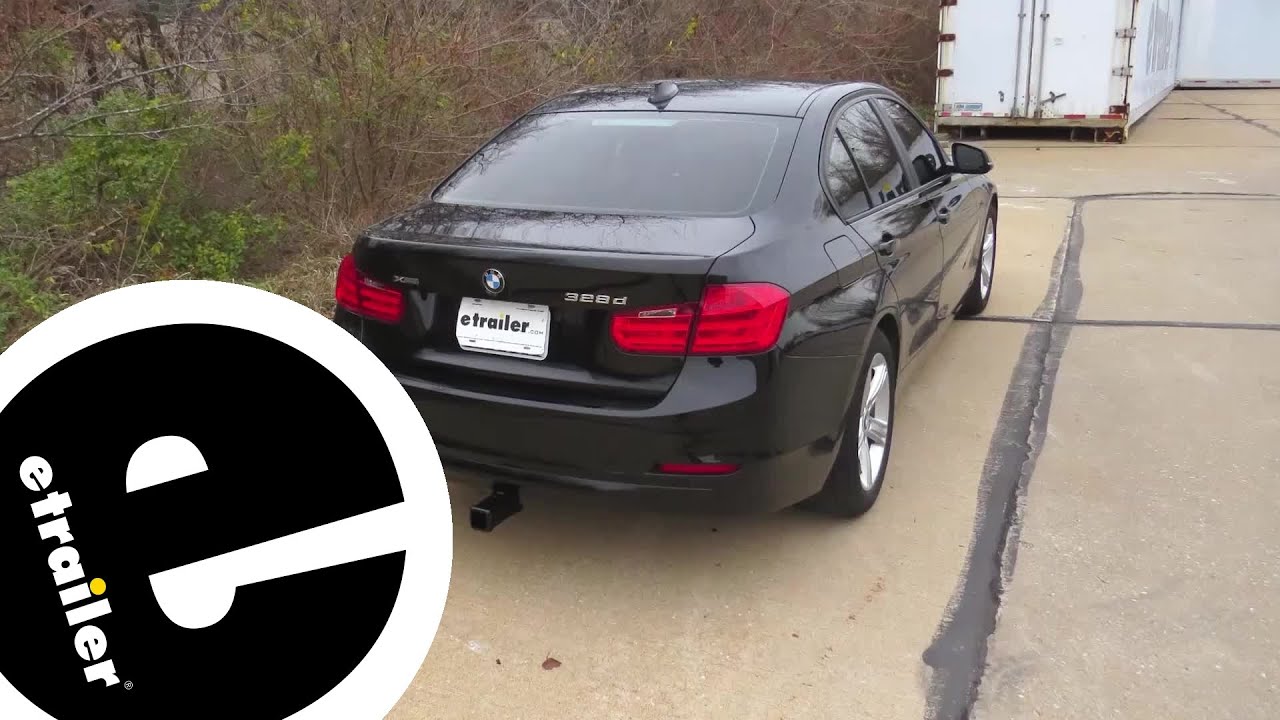
Today on our 2015 BMW Three Series we're going to be taking a look at and installing the CURT Class One Inch and a Quarter Receiver Hitch, part number C11367. As you can see we have our hitch installed. It's going to be nice and tucked away underneath the back side of the vehicle. You're going to have that inch and a quarter by inch and a quarter receiver tube capable of carrying up to two hundred pounds of ton weight and a trailer with a gross weight of two thousand pounds. It's going to have those nice tie downs for your chains on either side. With a half inch hole drilled straight through you're going to be able to slide in your pin to secure your trailer to your receiver. From the center of the hitch pin hole to the outer most edge of the bumper is going to be about three and a half inches. From the top of our receiver tube to the ground is going to be about eleven and seven-eighths inches. With these dimensions they will help you in selecting cargo carriers or bike racks for the back end of your BMW. Now, let's go ahead and take a look at how it installs. First thing we're going to need to do is going to be opening up that rear trunk.
Once you have the rear trunk open, then we will go ahead and go over to the tail light assemblies to remove the covers. Locate the screws, and then thread them out. You can use a flat head screwdriver if you choose, or standard screwdriver. Then just help you thread them out a little bit easier. Once you have the plastic screws removed, go ahead and set them off to the side.
We'll repeat this on the other side as well. Now go ahead and pull off the cover to expose the tail light assembly, placing that cover off to the side with the screw that you pulled out. We'll repeat that on the other side as well. Now with the ten millimeter socket we'll go ahead and remove the tail light assemblies. With both of those removed we'll repeat that same process on the other side. Go ahead and remove the tail light assemblies. You want straight back and out just like so. Locate the wires and go ahead and disconnect them.
Press in the tab here and pull out. With them disconnected go ahead and remove it from the housing and set the wire off to the side, placing the tail light in the back of the trunk, or wherever you see fit. Grab the tail light. Pull it straight back and then disconnect. Remove the wires and set them off to the side. Now with the same socket that we used to remove the tail light assemblies, we're going to go ahead and un-thread the two bolts located on top of the bumper. Go ahead and repeat that on the passenger side.
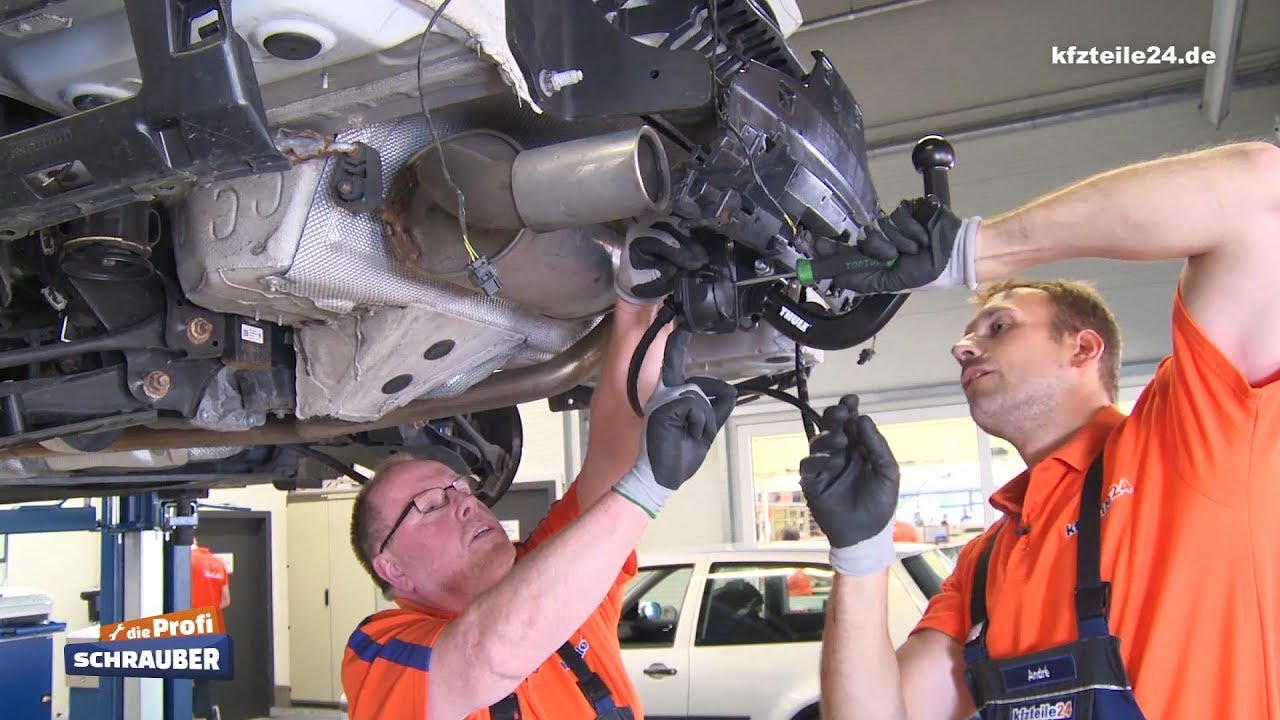
Pull it out of the way and set it with the rest of your hardware. On the passenger and driver side located inside the wheel well we will need to remove the screws that fasten into the bumper, since we do need to remove the bumper for this installation. Use an eight millimeter socket to do so. They'll look like that once you pull them out. Now, let's go ahead and repeat that same process on the driver's side. On the bottom side of the vehicle we will then have three of the same fasteners that we're in the wheel well on each side totaling six, as well as three star bits here in the center. We'll need to remove to unfasten the bumper. This is going to be a key twenty torque bit to remove these three on the back side. There's one out of the way. Let's get these other two. For easier access to the heap-shelled 00:04:09 bolts that we need to do next we're going to need to drop down the exhaust. First step in doing so is going to be to remove the connector here to the exhaust sensor. Press in the tab and pull down on it. Once you have the exhaust sensor removed, then we'll locate the exhaust hangers and remove those, too. There's going to be one here on the driver's side and one in the same place on the passenger's side. Just for safety
Повторяем попытку...

Доступные форматы для скачивания:
Скачать видео
-
Информация по загрузке: