Water/Methanol Injection Install (Throttle Body Spacer) - Mazda CX-7
Автор: gobigboi
Загружено: 2025-04-13
Просмотров: 413
Описание:
Direct injection spark ignition (DISI) engines have a serious bottleneck when it comes to fueling. Larger fuel injectors do not exist, thus max fuel and power is limited to the stock fueling system.
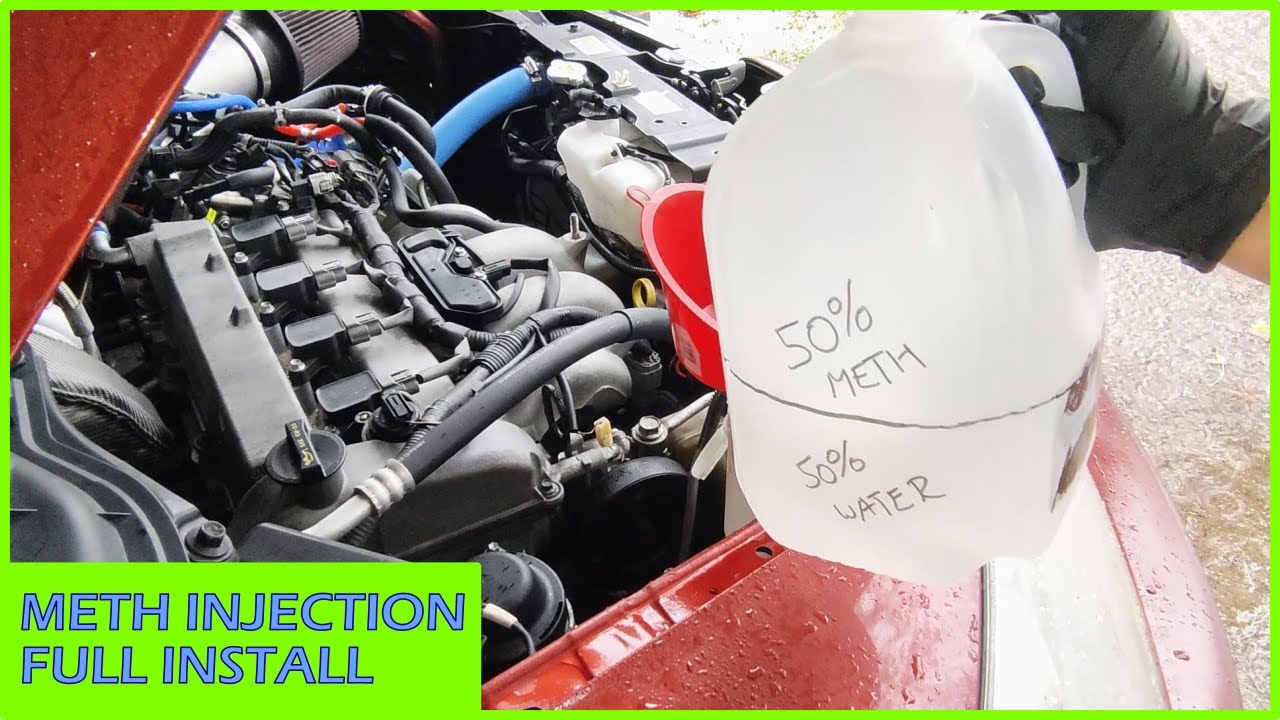
The easiest and cheapest way to add more fuel to the Mazda 2.3L MZR engine is to add a water/methanol injection (WMI) system. This is done by injecting a mixture of distilled water and methanol (usually 50% of each) to the air intake before it reaches the combustion chamber.
A throttle body spacer is the simplest way to do so. More fuel means more power!
Step drill bit: https://amzn.to/4jzZYLB
Relay: https://amzn.to/4lvxYdB
Switch: https://amzn.to/4lqVWqm
Wire: https://amzn.to/4luKsCm
Wire loom: https://amzn.to/3G7COOd
WMI full kit: https://amzn.to/4299JdI
WMI pump: https://amzn.to/42KobZK
WMI tubing: https://amzn.to/4lAkxtc
WMI check valve: https://amzn.to/3E8jrUB
WMI nozzle: https://amzn.to/4jB1RHT
Boost juice: https://amzn.to/4jbFb15
00:00 – Intro
00:11 – Remove intercooler
00:44 – Remove boost tube (throttle body side)
00:55 – Remove throttle body
01:35 – Remove washer fluid reservoir
02:22 – WMI parts
02:33 – Install WMI reservoir bung
03:54 – Leak test washer fluid reservoir
04:00 – Install washer fluid reservoir
05:00 – Connect WMI tubing to washer fluid reservoir
05:26 – Remove horn (low tone)
05:59 – Mount WMI pump
07:04 – Connect WMI tubing from reservoir to pump
07:20 – Assemble throttle body spacer
09:51 – Assemble WMI check valve
11:09 – Leak test WMI setup
11:53 – Connect WMI pump to ground
12:18 – Install throttle body spacer
12:47 – Install throttle body
13:03 – Torque throttle body
13:17 – Connect WMI tubing from throttle body spacer to pump
13:41 – Add water/methanol to washer fluid reservoir
14:13 – Install intercooler
15:17 – WMI controller parts
15:28 – Remove glovebox
15:55 – Remove interior trim
16:11 – Install WMI controller
17:20 – Install WMI switch and relay
17:52 – Install interior trim (passenger)
18:16 – Install glovebox
18:39 – Connect WMI controller to harness
18:52 – Install interior trim (driver)
19:03 – Engine bay wiring
19:28 – Remove MAP sensor
19:40 – Splice MAP harness
20:01 – Install MAP sensor and harness
20:10 – Connect WMI pump to power
20:21 – WMI pump wiring
20:35 – All finished
As an Amazon associate, I may earn commissions from qualifying purchases.
Повторяем попытку...
Доступные форматы для скачивания:
Скачать видео
-
Информация по загрузке: