Ep. 124 INSTALLING THE COMMUNITY MOSAIC MANDALA PROJECT, PHASE II!
Автор: Mazzoni Mosaics
Загружено: 2022-10-10
Просмотров: 965
Описание:
Ep. 124 INSTALLING THE COMMUNITY MOSAIC MANDALA PROJECT, PHASE II!
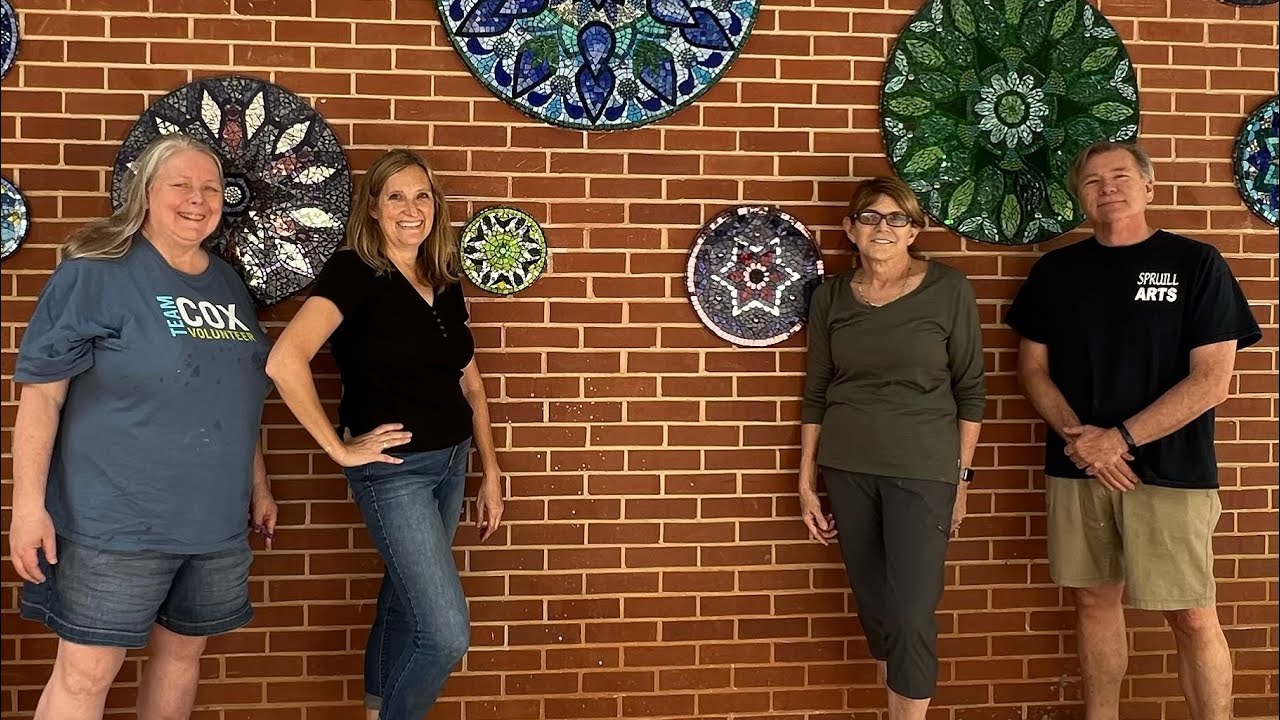
The mandalas continue to be a team effort! We first placed the templates for the mandalas on the wall, fairly evenly spaced yet random and made chalk outlines once they were set. An effort was made to not place the same color next to itself, but with only three main colors it did happen in a few places. When we were determining the location of each one, we also aligned the Wedi washer holes with the grout joints where we would be drilling. The eighteen mandalas make a swath of gorgeous color on the wall!
0:36 We are tracing the placement with chalk so we will know where to put the skim coat of thinset. This will even out the surface of the wall and help adhere the mandalas. The washer holes were marked with Sharpie so the holes drilled would line up precisely.
0:55 We mixed three small batches of Laticrete 254 thinset (less than 1 gallon ea.) by hand for the whole job. A paddle was not needed for this small amount. The drill holes had anchors inserted to hold the screws securely. This method (screw and glue) ensures that the mandalas won't slide down the wall prior to the thinset curing. On the back of each mandala, we spread thinset using a 1/4" notched trowel. All the notches need to be parallel when spreading so they collapse and create a good bond without voids.
Then a lovely montage that mostly shows Ken working ensues. Martha was mixing the thinset and cleaning tools and buckets. Linda was spreading the thinset, providing emotional support and coffee plus sweet bread. Ken had the fun job of screwing the mandalas to the wall. I was doing all the things in between. We were all adding the skim coat at different times. Linda and Martha came behind Ken and cleaned up any thinset that may have dripped.
2:50 The last mandala is attached to the wall! Yay!
I followed behind Ken and attached the pre-cut pieces of glass with Apoxie Sculpt where the screws were located. Once installed, they looked finished, but still needed to be grouted and cleaned.
4:17 The next day I return for grouting the last bits on each one. The larger mosaics have two screw holes and the small ones just have a center hole. The day was absolutely beautiful! 65 and sunny.
6:10 One final volunteer helps out by handing me my container of grout so I don't have to jump down off the crate! Yay! I think she's sad she didn't get to help but thank goodness she was there and DID help!!! Then I go through and buff off the little grouted areas.
7:48 LAST STEP!!! I go through and give the mandalas a final cleaning and really make them sparkle! The big mandalas from Phase I had cobwebs around the edges and waterspots from rain throughout the year. I enjoyed working on them so much and giving them one last look!
That's Putting It Together Ep. 124! Thanks for watching. See you next time.
WATCH NEXT:
Ep. 104 MOSAIC BACKGROUND FOR THE LEMON QUEEN, Millie's Mosaic Eyes, Starting a Geometric Mosaic! • Ep. 104 MOSAIC BACKGROUND FOR THE LEMON QU...
COME SAY HI:
Instagram: / mazzonimosaics
Facebook: https://www.facebook.com/profile.php?...
Pinterest: / _created
Website: https://mazzonimosaics.webs.com/
ONLINE SHOPS:
Etsy: https://www.etsy.com/shop/MazzoniMosaics
Fine Art America: https://fineartamerica.com/profiles/j...
Повторяем попытку...
Доступные форматы для скачивания:
Скачать видео
-
Информация по загрузке:


