Recording Audio on Laptop with Audio Interface
Автор: 23dB Productions
Загружено: 2026-02-26
Просмотров: 21
Описание:
Laptop Recording Training Manual
1. Purpose of This Manual
This guide provides step-by-step instructions for recording audio using a laptop in the CPCC Podcast & Content Production Room.
It covers:
Connecting the audio interface (Connect 6)
Configuring a Digital Audio Workstation (DAW)
Setting up input and output devices
Matching frame rates for video sync
Creating tracks and recording properly
Verifying signal before recording
Download Lewitt Control Center app to laptop if you don’t see this interface as an option for an audio interface. (Win https://www.lewitt-audio.com/download..., Mac https://www.lewitt-audio.com/download... )
2. Equipment Overview
When recording with a laptop, the following equipment is used:
Connect 6 audio interface
Two phantom-powered condenser microphones 48v
USB-C cable connection
Laptop
Digital Audio Workstation (DAW) software
Example: Logic Pro
Any DAW may be used (GarageBand, Pro Tools, Adobe Audition, etc.)
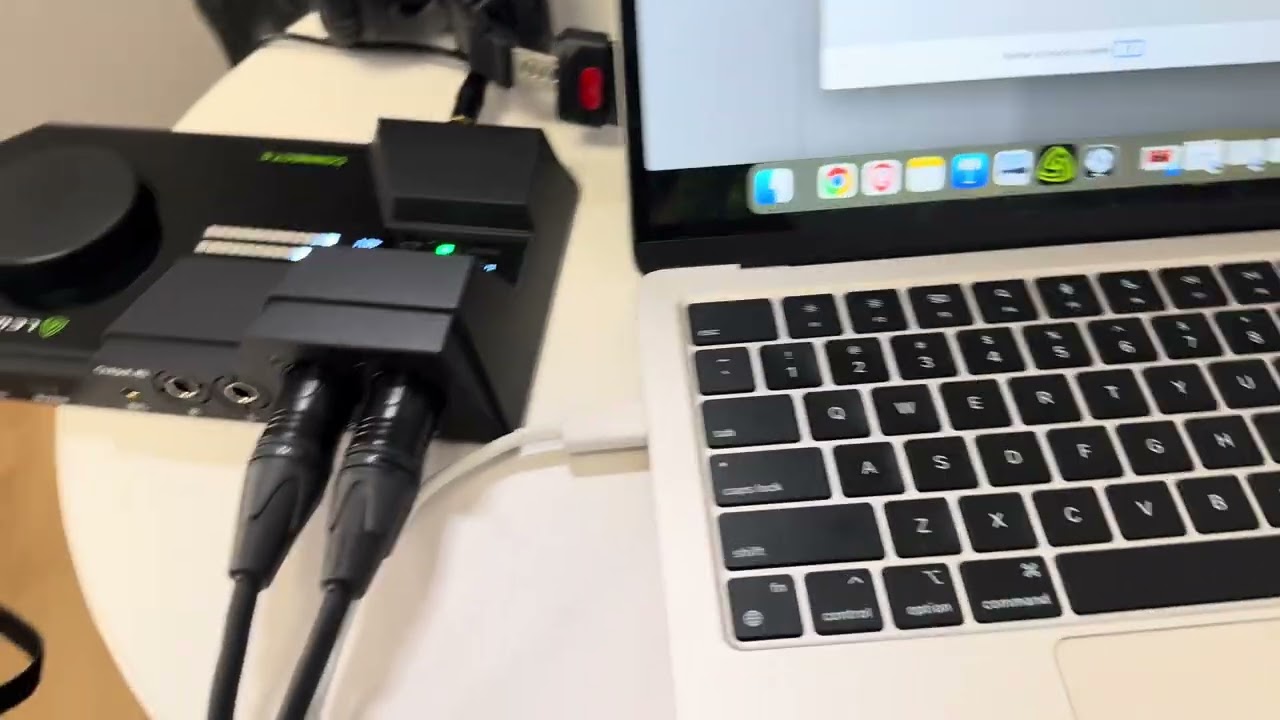
3. Step 1: Physically Connect the Equipment
Before opening your recording software:
Connect the USB-C cable from the Connect 6 audio interface to your laptop.
Ensure the interface is powered.
Confirm microphones are connected and powered.
Verify signal activity on the interface.
Once connected properly:
Your computer should recognize the audio interface automatically.
4. Step 2: Open Your DAW (Digital Audio Workstation)
You may use:
Logic Pro
GarageBand
Pro Tools
Adobe Audition
Any DAW capable of selecting an external interface
The process is similar across all platforms.
5. Step 3: Select Input & Output Device
In your DAW settings:
Navigate to Audio Preferences or Settings.
Set:
Input Device → Connect 6
Output Device → Connect 6
Important:
Both input AND output must be set to the Connect 6.
If this step is skipped, audio may:
Not record
Not play back
Default to internal laptop microphone
6. Step 4: Match Frame Rate (If Recording Video)
If you are recording:
Audio on laptop
Video on phone/tablet/camera
You must match frame rates to avoid sync issues later.
Example:
If your phone records at 30 fps, ensure your DAW session or video project matches 30 fps.
If frame rates do not match:
Audio may drift
Sync issues may occur during editing
Always confirm video frame rate before recording.
7. Step 5: Create New Session
When starting a new recording:
Open a New Project / Session.
Choose number of tracks.
Since this is a two-microphone room:
Select 2 audio tracks if recording two speakers.
Select 1 track if only one microphone is being used.
Each microphone should be assigned to its own track.
8. Step 6: Assign Inputs to Tracks
Assign:
Track 1 → Input 1
Track 2 → Input 2
You can verify this by tapping each microphone:
Tapping Mic 1 should activate Track 1 meter.
Tapping Mic 2 should activate Track 2 meter.
If tapping does not show signal:
Recheck device settings
Confirm Connect 6 is selected
Confirm microphones are powered
9. Step 7: Record-Enable Tracks
Before recording:
Click the “Record Arm” or “Record Ready” button on each track.
Confirm meters are active.
Check headphone monitoring.
You should see live signal movement when speaking or tapping microphones.
10. Step 8: Begin Recording
Once everything is verified:
Press Record.
Speak into microphones.
Monitor levels visually and through headphones.
Confirm:
Signal is not clipping (distorting)
Signal is strong and consistent
11. Verifying Proper Recording
During recording:
Tap microphone to confirm signal
Speak at normal volume
Watch waveform being created
If you do not see waveform movement:
STOP and troubleshoot immediately.
12. Common Troubleshooting
No Audio Signal
Check input device setting
Confirm Connect 6 selected
Confirm tracks are record-armed
Confirm phantom power is active
Playback Not Working
Check output device setting
Ensure Connect 6 selected as output
Audio Not Syncing with Video
Confirm matching frame rate
Confirm consistent sample rate
13. Best Practices
Always test record 10 seconds before full session
Name your session immediately
Save project before recording
Monitor levels throughout recording
Keep separate tracks for each speaker
14. Shutdown Procedure
After recording:
Stop recording.
Save session.
Export files if needed.
Close DAW.
Disconnect laptop.
Power down interface if required.
15. Quick Recording Checklist
Before hitting record:
✔ Connect 6 connected to laptop
✔ Input and output set to Connect 6
✔ Frame rate matches video device
✔ Correct number of tracks created
✔ Tracks record-armed
✔ Signal verified by tapping mic
✔ Test recording completed
16. Summary
Recording with a laptop at CPCC requires:
Proper hardware connection
Correct DAW configuration
Accurate track setup
Pre-record verification
23dBProductions.com
Повторяем попытку...
Доступные форматы для скачивания:
Скачать видео
-
Информация по загрузке: