PIR sensor Arduino , Home Automation
Автор: Embedded With Mehedi
Загружено: 2024-12-08
Просмотров: 289
Описание:
Home Automation with Arduino & PIR Sensor: Smart Motion Detection System
Welcome to our detailed guide on creating a motion detection system using Arduino and a PIR sensor. This tutorial is designed to walk you through every step required to set up a home automation project that can detect motion in your home and trigger an automated response, like turning on lights, sending notifications, or activating security alarms.
Whether you are a beginner or experienced in electronics, Arduino, or home automation, this video will cover everything you need to know. We’ll take a detailed look at how PIR sensors work, how to wire them up with an Arduino, and how to write the code needed to get your motion detection system up and running.
Project Overview:
In this video, we will show you how to create a smart home automation system by integrating a PIR motion sensor with an Arduino board. The PIR sensor detects motion in its environment by measuring infrared radiation changes. When the sensor detects motion, it will send a signal to the Arduino to trigger an action. In this project, we’ll trigger an LED light, but this can be adapted to control anything, from lights to alarms to other home appliances.
The benefits of motion sensing in home automation are vast, from increasing energy efficiency to improving security. Motion sensors can be used to automatically turn on lights, activate security cameras, send alerts, or even control smart thermostats to adjust home temperature based on movement.
What You’ll Need:
Before you get started, make sure you have the following components for the project:
Arduino Uno or any other compatible Arduino board (e.g., Arduino Nano, Arduino Mega, etc.)
PIR Motion Sensor (Passive Infrared Sensor) – This is the core of the project, used to detect motion.
LED or Relay Module (for controlling a device like a light or fan)
Breadboard and Jumper Wires for easy circuit connections
Resistors (if needed for specific wiring configurations)
Arduino IDE installed on your computer
Power Source for the Arduino (either USB or external power supply)
Optional: Home Automation Platform (e.g., Blynk, Home Assistant) for advanced integration
Why Use a PIR Sensor?
A PIR sensor works by detecting the infrared radiation emitted by the human body (or any warm object). When a person moves in front of the sensor, it registers a change in infrared energy and outputs a signal. These sensors are highly effective for basic motion detection tasks and are widely used in security systems, automatic lighting, and other motion-based automation.
In this project, we’ll use the PIR sensor to detect movement, and once motion is detected, we’ll use an Arduino to perform an action. The LED light will act as a simple indicator, but in a real-world scenario, you can use this setup to control other devices connected to the Arduino.
Step-by-Step Process:
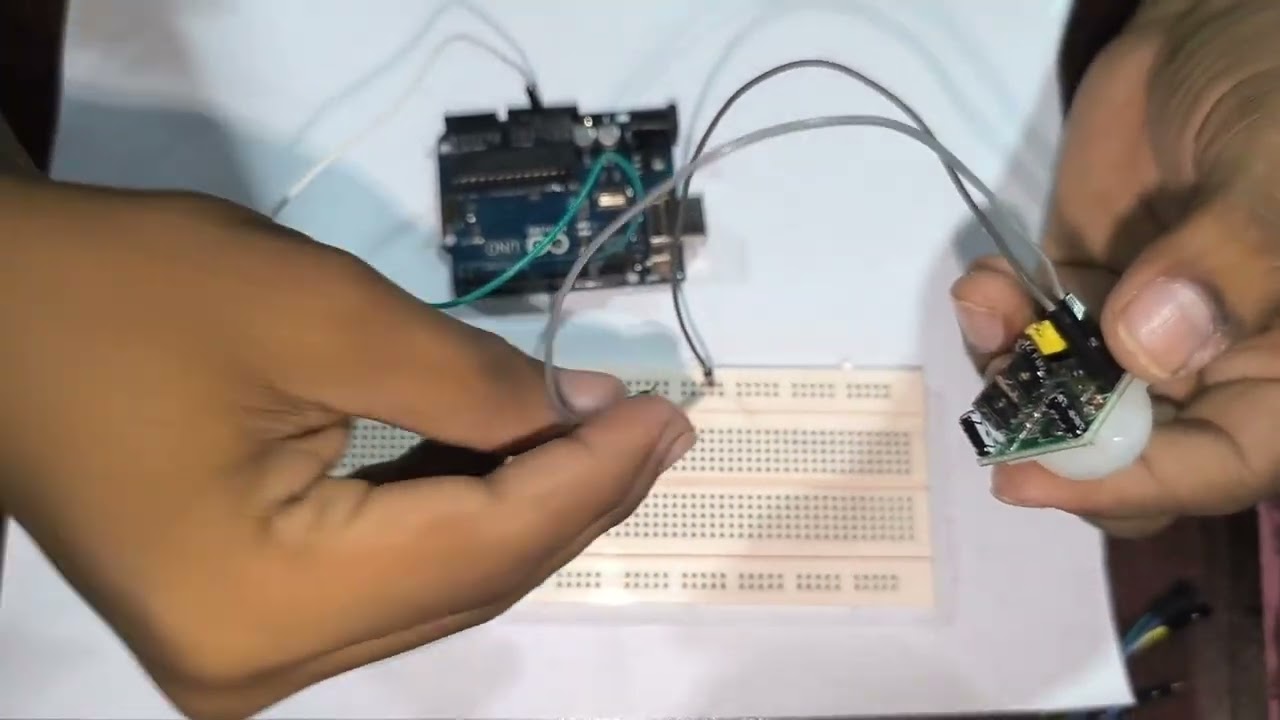
1. Wiring the PIR Sensor to Arduino
To start, we’ll wire the PIR sensor to the Arduino. The PIR sensor has three pins:
VCC: Power supply (5V)
GND: Ground
OUT: Signal pin that sends a high or low signal when motion is detected.
The VCC and GND pins are connected to the 5V and GND pins on the Arduino. The OUT pin connects to one of the digital pins (for example, pin 2) on the Arduino.
Next, we will wire an LED to the Arduino to visualize the action when motion is detected. Connect the longer leg (positive leg) of the LED to a digital pin (e.g., pin 13) and the shorter leg (negative leg) to the ground, using a resistor in between.
2. Writing the Arduino Code
Now that we’ve wired the components, we’ll move on to programming the Arduino. The code will read the output from the PIR sensor and, if motion is detected, trigger the LED light. Here's a simple sketch for this setup:
Повторяем попытку...
Доступные форматы для скачивания:
Скачать видео
-
Информация по загрузке:


