How to rebuild F-100 4×4’s four-wheel drum brake system. Step by step to remove & replace 4X4 hubs.
Автор: Classic Truck Performance
Загружено: 2021-08-19
Просмотров: 19017
Описание:
1972 Ford F-100 project and, within a working week’s time, had the old girl fired up and running! That was great and all, except for one major problem: she had no brakes—like none whatsoever. Fortunately, we knew where to go for all the answers to that four-wheel drum problem. Just as we did with the seemingly tired 360 FE engine, we powered up our laptop and went straight to DuralastParts.com once again. This time around, our search engine (fingers) took us down the virtual road on the hunt for F-100 4×4 drum brake parts—the entire brake system, to be exact. From the drums to the new shoes and wheel cylinders to the master cylinder and power booster—even the self-adjusters and brake hoses—our laundry list of required stopping components were all offered by Duralast and available locally the same day. Fortunately, the only major difference between this and a standard (2×4) four-wheel drum brake job was having to deal with the front hub locking mechanism and pressed lug studs. The use of an iPhone (photographic reference) and a heavy-duty arbor press ensured those issues were not just that—an issue. As our lead tech Jason Scudellari recalls, “This is the first 4×4 all-drum brake overhaul I’ve ever done, but the Duralast parts made it easier than I’d anticipated.” Normally, we’d be addressing a front drum brake situation by explaining the advantages of upgrading to disc brakes, followed by a step-by-step conversion process. Well, this isn’t one of those stories. This time around, using Duralast OE-quality replacement parts, we’re going to properly rehab this 1972 F-100 4×4’s four-wheel drum system! Seeing as the F-100’s brake shoe anchors were in good, reusable condition, and the system was dry and no fluid draining was required, we began the rebuild by installing the driver side (right and left) wheel cylinder (Duralast PN 33642) first.
Do you know which is the leading (forward-most) brake shoe, the long or the short one? We’ll give you a hint: it’s not the long one. We used Duralast’s non-riveted friction (PN 228) drum brake shoes.
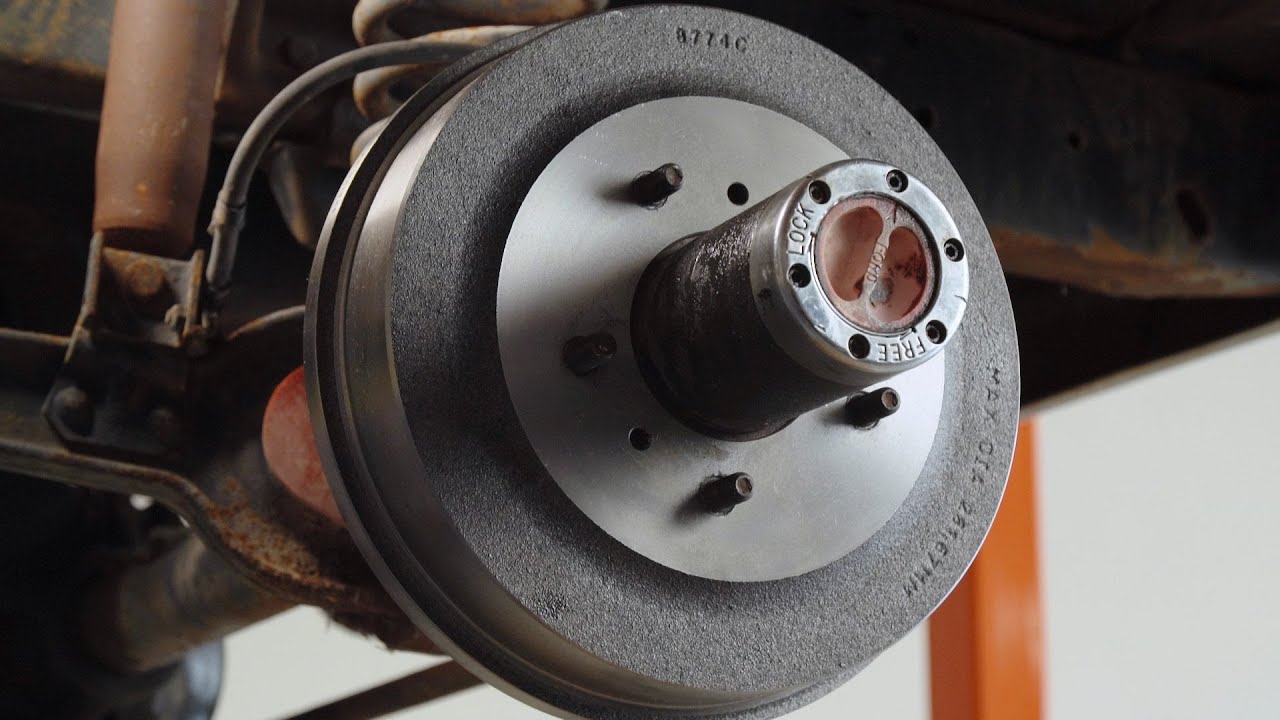
As mentioned, we made sure to hold onto all the brake shoe mounting bits and pieces—while the self-adjusting kit (Duralast PN H2540) accommodates new springs/cables for the driver side self-adjusters, the original shoe retaining springs were reused. As mentioned, the drums/hubs are a unit, and thus in order to replace the drums, the hubs must be pressed off. (Note that after the drums were separated, the lug studs were re-pressed securely back into the hubs.)Our new Duralast brake drum (PN 8796C) was “pressed” onto the original front hub by torquing the lug nuts down with an impact. With a freshly greased inner wheel bearing in place, the refreshed drum/hub assembly could then be reinstalled onto the spindle and secured with the internal locking mechanism primary nut. In the exact opposite order as it came apart, the outer hub bearing was reassembled and, save for final brake pad adjustment, our front wheel brakes are done, for the time being.Now onto the rear. And since we had no hub retention to deal with, the back drums simply slid off with a little coaxing from a rubber mallet. And just like the front, the brake shoe components were photographically cataloged before being removed. With the shorter of the two (PN 263) Duralast brake shoes set in the appropriate leading position, the driver side rear assembly was assembled using their complete (PN H2544) self-adjusting kit.Our new drums (PN 8789) were then slipped onto the axle flanges and the brake shoe’s drag adjusted properly before we moved onto the final portion of our revive and drive process.Along with being relatively dry (from the fluid to the seals), the master cylinder and power booster were two items we didn’t want to take any chances with after just having completely gone through all four drum brake assemblies. So, off they came. One of the main components of our brake system rehab is the new Duralast dual-circuit master cylinder (PN NM1389). Prior to installation, it was thoroughly bench-bled. We obtained Duralast’s remanufactured power brake booster (PN 54-73515) to replace our worn-out original—and since it comes powdercoated (as shown), no painting was required before we united it with the actuator rod and installed it onto the firewall. Using the original steel brake lines (which will at some point need to be replaced), the new pre-bled master was installed before the entire system was completely bled (shown here being done reverse-style with a syringe). With the ease of acquisition and installation coupled with the mental security knowing we’ve now got OE-quality components beneath the old F-100, our initial voyage back on the road was a total success … and petrified bias-ply LT tires for a set of U.S. Mags Indy series wheels with fresh 31×10.50×15 Falken Wildpeak A/T radials.
Повторяем попытку...
Доступные форматы для скачивания:
Скачать видео
-
Информация по загрузке: