How to Upload and Display Images in PHP
Автор: vlogize
Загружено: 2024-03-19
Просмотров: 9
Описание:
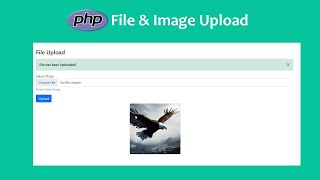
Learn how to implement image upload and display functionality in PHP step-by-step. This guide covers the process of uploading images to the server and displaying them on a webpage using PHP.
---
Disclaimer/Disclosure: Some of the content was synthetically produced using various Generative AI (artificial intelligence) tools; so, there may be inaccuracies or misleading information present in the video. Please consider this before relying on the content to make any decisions or take any actions etc. If you still have any concerns, please feel free to write them in a comment. Thank you.
---
When building dynamic web applications, incorporating image upload and display functionality is a common requirement. PHP, being a server-side scripting language, provides robust capabilities for handling file uploads and rendering images on web pages. Below, we'll outline a step-by-step guide on how to achieve this:
Uploading Images
HTML Form: Start by creating an HTML form that allows users to select and upload an image file. Use the <input type="file"> element to enable file selection.
PHP Script: Write a PHP script to handle the file upload process. In the script, use the $_FILES superglobal array to access the uploaded file data. Validate the file type, size, and any other relevant criteria to ensure security.
Move Uploaded File: After validation, move the uploaded file from the temporary directory to a permanent location on the server using the move_uploaded_file() function.
Displaying Images
Retrieve Image Path: When a user requests to view uploaded images, fetch the paths of the images stored on the server from a database or a predefined directory.
HTML Output: Generate HTML code dynamically to display the images on the webpage. Use <img> tags with the src attribute set to the path of each image.
Looping: If there are multiple images to display, iterate through the array of image paths and output <img> tags for each image.
Security Considerations
File Type Validation: Ensure that only allowed file types (e.g., JPEG, PNG) are accepted for upload to prevent malicious file uploads.
File Size Limit: Set a maximum file size limit to prevent the upload of excessively large files that could consume server resources.
File Name Sanitization: Sanitize the file names to remove any potentially harmful characters to prevent directory traversal attacks.
Storage Location: Store uploaded files outside of the web root directory to prevent direct access by users, thus enhancing security.
Conclusion
Implementing image upload and display functionality in PHP involves handling file uploads securely and efficiently. By following the steps outlined above and incorporating security best practices, you can create a robust system for uploading and displaying images in your PHP-based web applications.
Повторяем попытку...

Доступные форматы для скачивания:
Скачать видео
-
Информация по загрузке:


![Ethical Hacking Full Course [2025] | Ethical Hacking Course For Beginners | Edureka](https://ricktube.ru/thumbnail/V7Lnm8FQ_GI/mqdefault.jpg)


