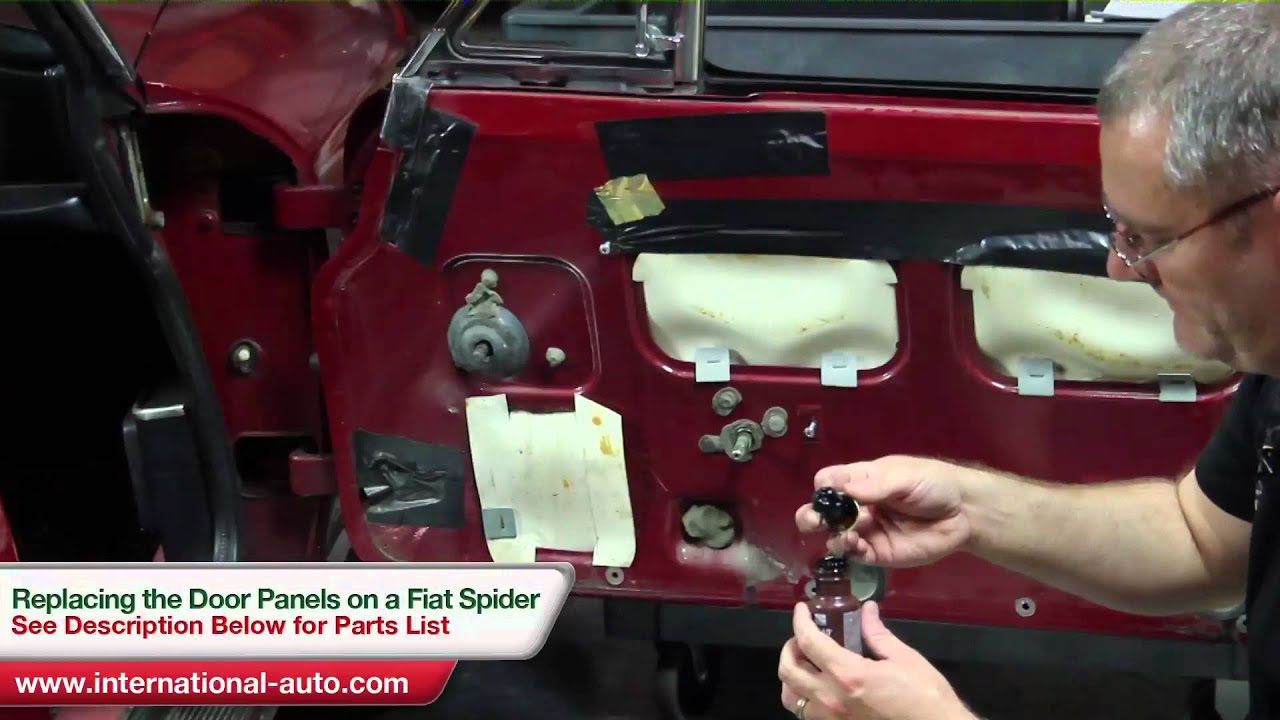
Fiat Distributor Rebuild - International Auto Parts
Автор: InternationalAutoWeb
Загружено: 2012-06-15
Просмотров: 20392
Описание:
International Auto Parts Home Page:
http://www.international-auto.com/
See Distributor Breakdown video for full parts list:
• Fiat Distributor Breakdown - International...
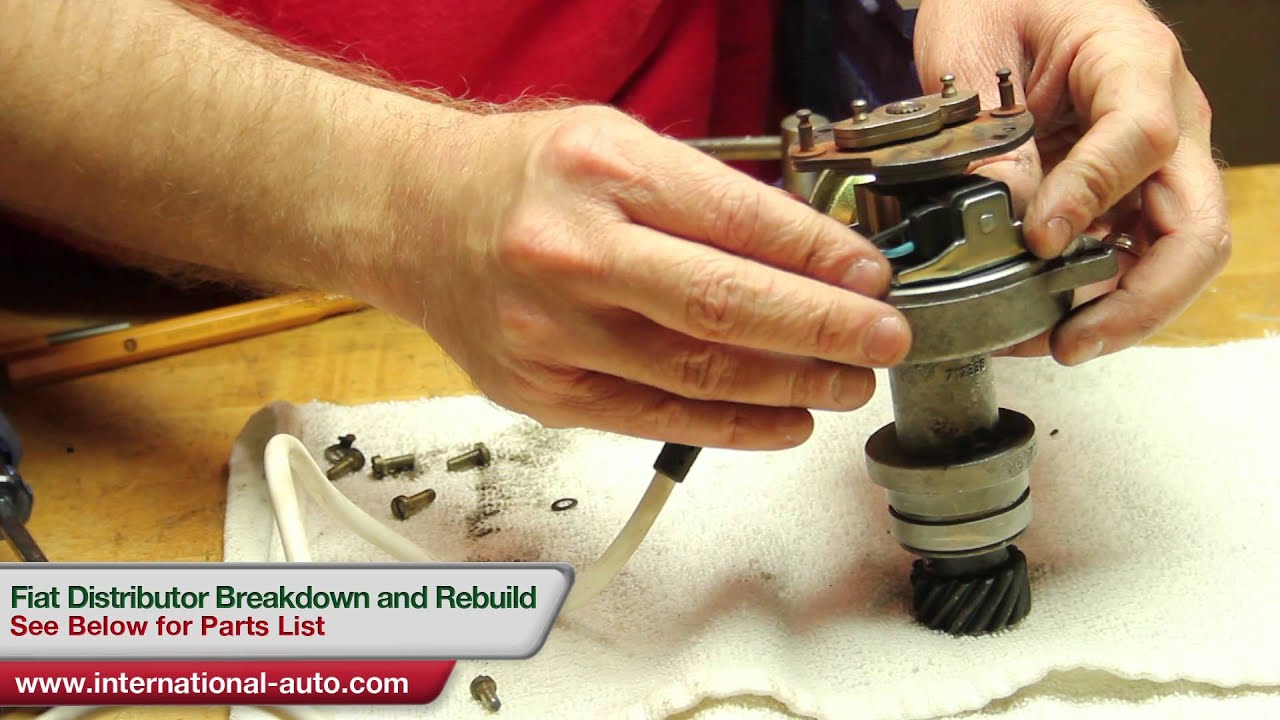
Fiat Distributor Rebuild
This is a tech tip from International Auto Parts on how to rebuild a Fiat Distributor.
Tools you are going to need:
1. Flat & Philips head screwdriver
2. Socket
3. Ball pin hammer
4. Assortment of punches
5. Scraps of leather
6. Vice
7. O ring picks
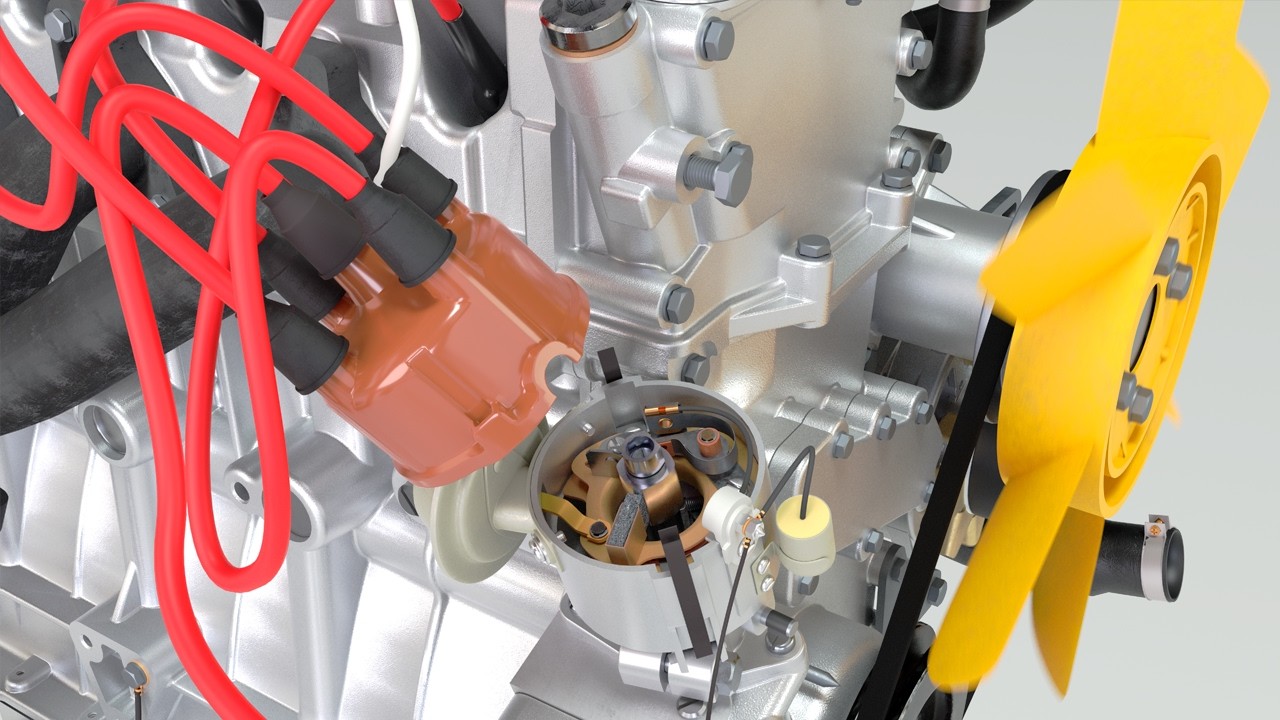
The first thing we are going to do is put the lower bearing in. You want to check the surface to make sure it is good and smooth with no burs or anything. This way you know the bearing will fit firmly and not spin. The bearing should just snap into place since it is not a press fit at all.
Next you will install the seal. You want to make sure you put it in though correctly. Put it in with the wide opening facing up towards you. Once you set the seal in there just start pressing firmly down with your hand till it gets firm. Then you will use a socket to drive it the rest of the way. You want to make sure the socket is smaller than the "OD" and larger then the "ID" so that it doesn't damage the seal. They also make tools to install seals, but since we didn't have one this works great. Tap the socket with the hammer and it should go in with very little effort.
Next put the upper bearing in place. Same procedure as the lower bearing and should slide into the housing smoothly. Then put the felt washer in, followed by the plastic washer. Make sure the notches are in the proper location for the plastic washer though. Then you will put the advancement plate on. The male portion of the advancement plate is going to stick down through the hole. Then slide the distributor shaft into place. Stick the bottom neck in the vice and you will drive the shaft the rest of the way with a hammer and punch. Make sure the prongs line up with the holes in the weighted advance plate on the top (Not the vacuum plate). This shouldn't take much effort at all; if you are feeling resistance then you need to stop and check to see what is causing the resistance.
Next put the thick washer on followed by the gear. Start the pin and then use the leather scraps in the vice again to protect the gear while you tap the pin in. You will want to drive it most of the way with the hammer and then switch to the punch as it gets closer to the gear. Make sure to tap the pin below the surface of the gear.
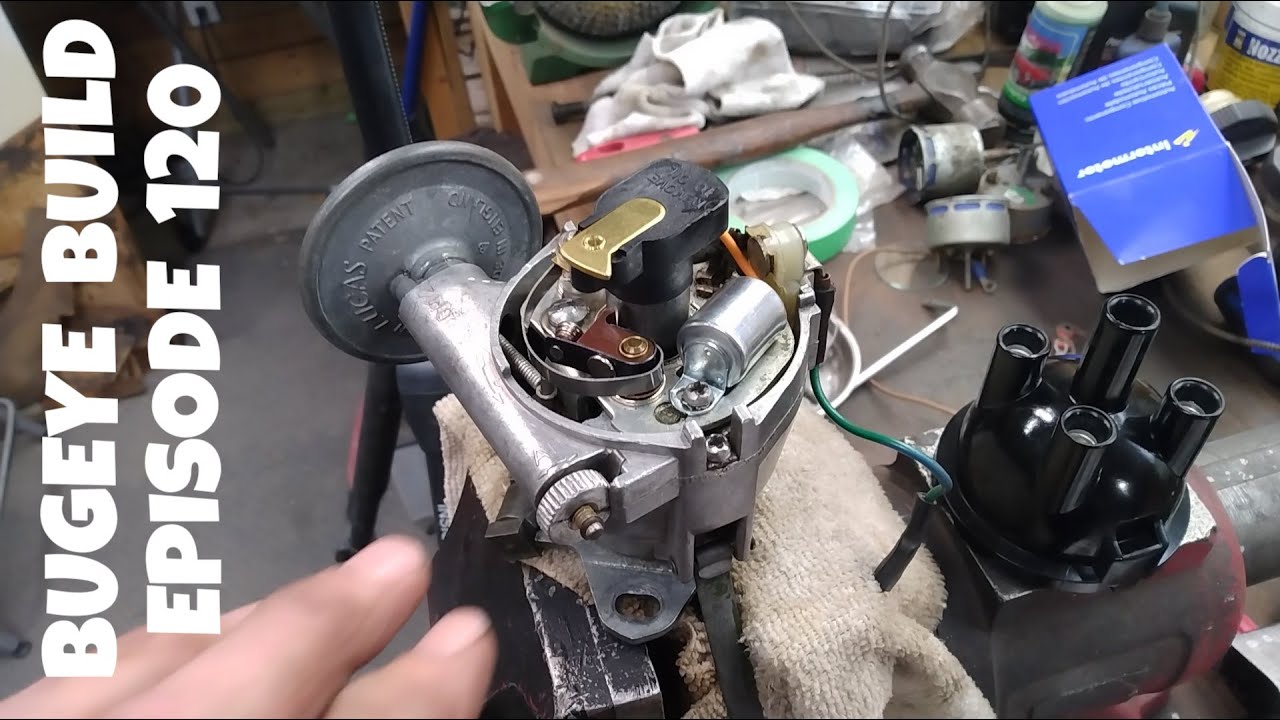
Next put the vacuum advance back on. The plastic socket needs to snap over the ball (these should come pre-greased, but if not you may want to grease). This can be difficult to put into place what you will want to use a flat head screwdriver like you used to pop it off with. Insert the screwdriver between the bracket and the clip and press it in place. You can use the hole in the top of the distributor to line it up and then it should snap into place. Then put your three screws back in.
Next we will put the electronic pick up back on. Put the strip side down towards the plate and line the holes up best you can. Now when you go to put the pickup in one hole is round and one is slotted. The hole that is slotted is the one that goes towards the vacuum advance and the one that is round goes back to where the harness comes in at. You want to start both screws. Just start the screws though you don't want to tighten them up yet. The wires of the pickup actually have a grove they fit into that goes down through the advancement plate. The harness should just snap into place and then you put the last screw in.
Now what you will want to do is line up one of the points of the reluctor wheel with the point on the pickup itself. This is where your clearance is actually made at. You are going to have to use a non magnetic fuel gauge or you can just tear the flap of the box off that the new pickup came in since it is the exact dimension it needs to be. What you are going to do is slide it in and make sure once again that the point of the wheels line up with the point on the pickup. You are going to push the pickup up with your finger until it holds the cardboard in place and then tighten the screw and now you can see what the clearance should look like.
Next you are going to put the weights back on the advancement plate on the top. The springs can be a little tricky to get into place. One end is larger then the other; put the small end on first so that you have the larger end to work with.. The last thing to do once you get the springs in place is to put the O ring around the body of the distributor and put the gasket in place and your done with the distributor rebuild.
Parts needed are: Distributor O Ring (Our Part # 14454380), Gasket Distributor (Our Part # 41514680), Distributor Vacuum Advance Unit (Our Part # 5107), x2 Distributor Bearings (Our Part # 2490505), Seal, Distributor Inner (Our Part # 6866), Electronic Ignition Pickup (Our Part # 6003)
Повторяем попытку...
Доступные форматы для скачивания:
Скачать видео
-
Информация по загрузке: