MagVent MV-90 Magnetic Dryer Vent Installation
Автор: MagVentLLC
Загружено: 2015-08-27
Просмотров: 358475
Описание:
MagVent's MV-90 magnetically aligned dryer vent coupling is an easy way to run a minimum path dryer vent. Minimum path dryer vent have less resistance to air flow which makes your dryer perform better and increases dryer safety. Learn more at https://www.magvent-dryervent.com or ask your local hardware store if they carry MagVent.
Transcript:
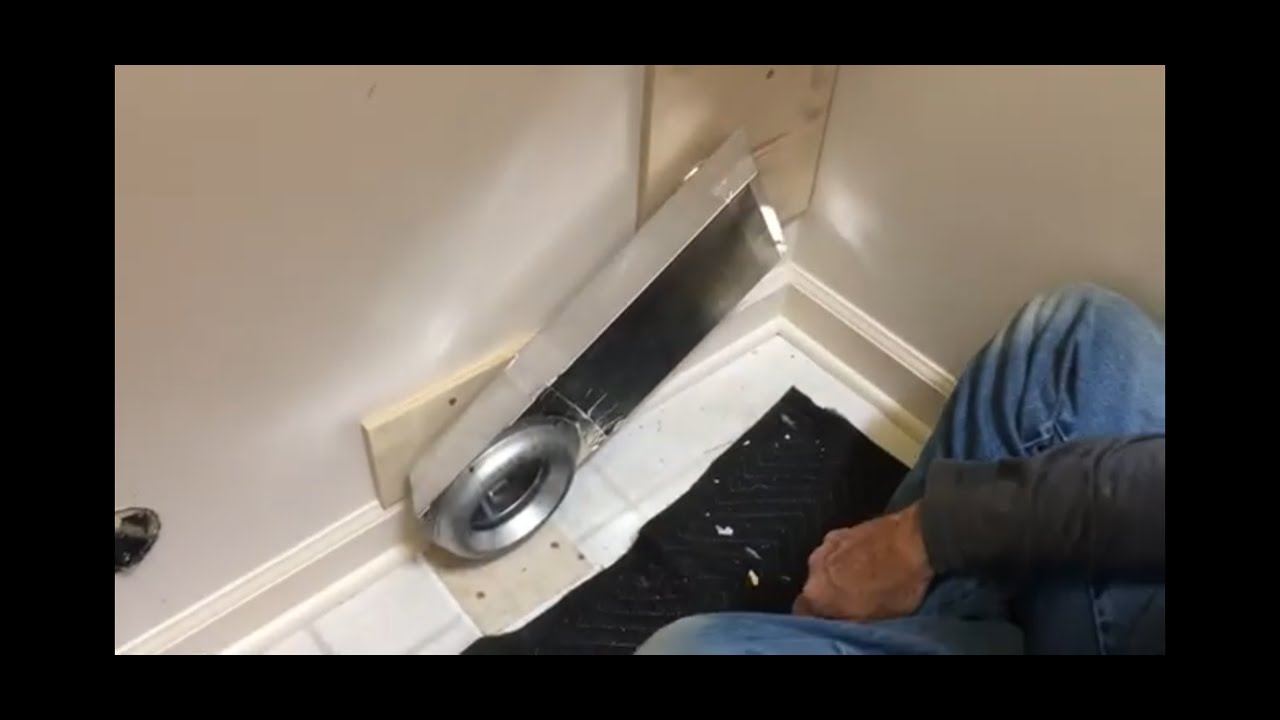
Welcome to the installation video for MagVent’s MV-90. Before proceeding, verify that your current duct path turns 90 degrees behind your dryer. If your current duct path is straight, and aligned with your dryer exhaust port, see the installation video for MagVent’s MV-180.
1-To begin, simply unplug your dryer, and remove any existing transition duct if necessary.
2-Measure the dryer port center from the flush side of the dryer, and up from the floor. Then transfer these measurements onto the wall.
3-Hold the mounting bracket to the wall on the center mark with the open part of the bracket running in the direction of the intended vent path. Then mark the screw hole locations on the wall.
4-Holding the bracket in position, drive the included mounting screws through the bracket hole, and into the wall anchors. If on a wooden surface, simply drive the screws directly into the wood.
5-Squeeze the bracket slightly, and fit the MV-90 onto the bracket until retaining tabs are engaged in the anchor slots located on the sides of the unit.
6-With the MV-90 in place, you can measure for the remainder of your duct system. Remove the MV-90 by squeezing the bracket to disengage the retaining tabs, and reattach if it eases your installation. Note the clean look, and low profile of the MV-90 wall-side installation.
7-Securely attach the Dryer-Side Union to the dryer exhaust port using the supplied hose clamp, and extend hose with a slight tug.
8-Plug the dryer in, and push into position, allowing MagVent’s powerful magnets to self-align and complete the duct connection.
9-A quick visual inspection to verify proper seal, and you’re done!
Congratulations! You've just installed a minimum path vent, and your dryer is safer, and more efficient.
French:
Vous êtes en train de regarder le tutoriel d’installation du dispositif MagVent’s MV-90. Nous vous souhaitons la bienvenue ! Avant de continuer, vérifiez que le tuyau d’évacuation actuellement branché présente un angle à 90 degrés derrière votre sèche-linge. Si votre tuyau d’évacuation actuellement branché est en position horizontale dans l’alignement de votre bouche d’évacuation, veuillez visionner le tutoriel d’installation destiné au dispositif MagVent’s MV-180.
1-Pour commencer, débranchez simplement votre sèche-linge et retirez toute conduite d’évacuation d’air déjà existante, le cas échéant.
2- Prenez la mesure de la distance depuis le centre de la bouche d’évacuation du sèche-linge jusqu’au mur du côté, puis depuis le sol en remontant. Reportez ensuite ces mesures sur le mur.
3-Maintenez le support de fixation au mur, sur la marque centrale, avec la partie ouverte du support orientée dans le sens du passage prévu pour le dispositif d’évacuation. Puis marquez les emplacements des trous de vis sur le mur.
4-En maintenant le support en place, passez les vis de montage fournies dans le trou du support, ainsi que dans les chevilles murales. Si vous avez affaire à une surface en bois, enfoncez simplement les vis directement dans le bois.
5-Appuyez légèrement sur le support et fixez le dispositif MV-90 sur le support jusqu'à ce que les languettes de retenue soient engagées dans les fentes d'ancrage situées sur les côtés du dispositif.
6-Une fois le dispositif MV-90 fixé, vous pourrez mesurer le reste de votre système d’évacuation. Retirez le dispositif MV-90 en appuyant sur le support pour dégager les languettes de retenue, et refixez-le si cela facilite votre installation. Remarquez l'aspect épuré et la position basse de l'adaptation murale du dispositif MV-90.
7-Fixez solidement le raccord côté sèche-linge à la prise d'évacuation de celui-ci, à l'aide du collier de serrage fourni, puis allongez le tuyau en tirant légèrement dessus.
8-Branchez le sèche-linge et poussez-le pour le remettre en place et permettre aux puissants aimants du dispositif MagVent de s’aligner et de terminer le branchement de la conduite d’évacuation.
9-Une petite inspection visuelle rapide pour vérifier que le branchement tient bien, et le tour sera joué !
Toutes nos félicitations ! Vous venez d'installer votre système d’évacuation court, et votre sèche-linge y aura gagné en sécurité, et son efficacité en sera optimisée au mieux.
Повторяем попытку...

Доступные форматы для скачивания:
Скачать видео
-
Информация по загрузке: