How to install LED Tape into LED Tube?
Автор: TXN LED LIGHTING
Загружено: 2026-01-20
Просмотров: 1114
Описание:
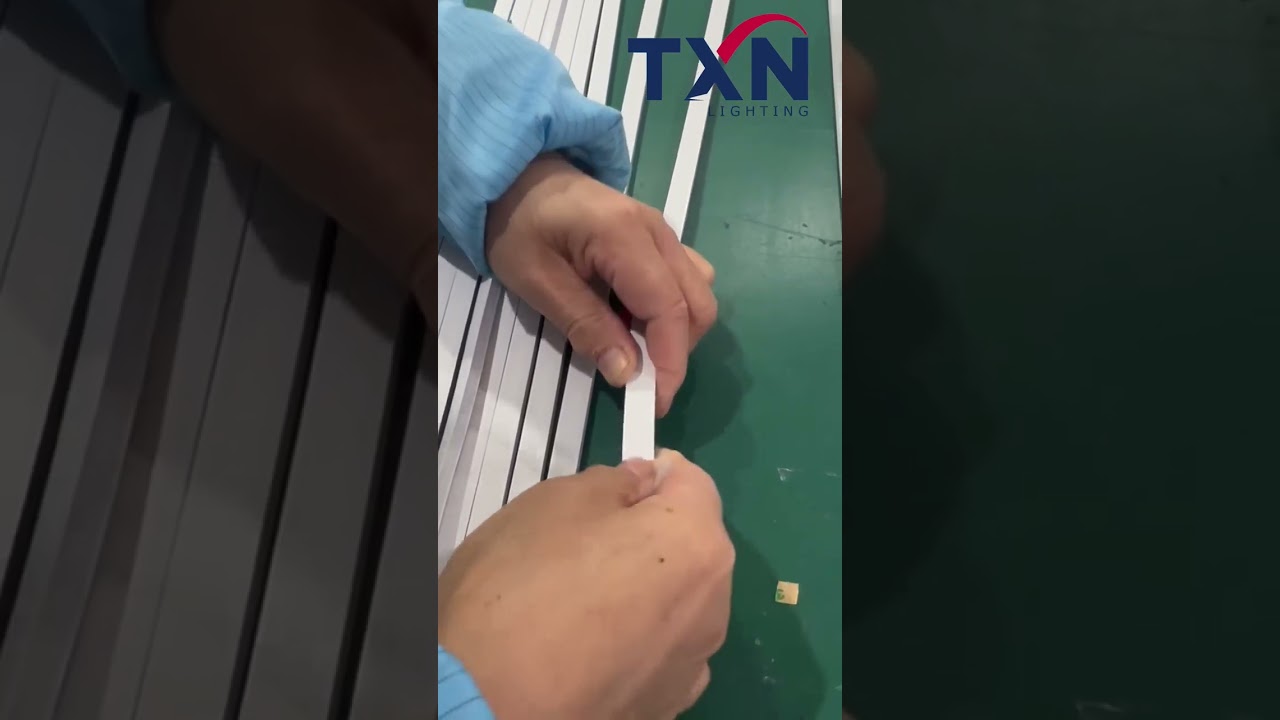
📝 Instruction Manual: Inserting LED Strip Lights into Sheathing Tube
Inserting LED strip lights into a protective tube is a crucial step for safeguarding the strip, enhancing aesthetics, and extending its service life. This process is particularly suitable for outdoor applications or scenarios requiring concealed wiring. Below are the detailed operating instructions:
🧰 Tools and Materials Required
LED Strip Light (cut to the required length)
Silicone Sheathing Tube (diameter should be slightly larger than the strip width to ensure smooth insertion)
Scissors or Utility Knife
Heat Shrink Tubing (optional, for end sealing)
Lighter or Heat Gun (for shrinking the tubing)
Lubricant (e.g., dish soap solution, to assist with insertion if difficult)
🛠️ Step-by-Step Procedure
1. Cutting the Strip
Confirm the required length of the LED strip.
Cut the strip only at the designated cutting points to avoid damaging the circuit.
After cutting, inspect the solder joints at both ends of the strip. If necessary, apply tinning to prevent oxidation.
2. Preparing the Tube
Select a silicone tube with a suitable inner diameter to ensure the strip can pass through smoothly.
If the tube is stiff or the strip is wide, cut the end of the tube at a 45-degree angle using scissors to create a guiding mouth.
Leave approximately 5-10cm of the tube empty (without the strip inserted) at the end. This预留 space is for subsequent power connection or sealing.
3. Inserting the Strip
Gently insert one end of the LED strip into the tube.
If you encounter resistance, apply a small amount of dish soap solution to the front end of the strip as a lubricant. Do not force it, as this may damage the LEDs or solder joints.
Slowly and steadily push the strip through, keeping the strip and tube coaxial to avoid skewing or jamming.
Once inserted to the预定 length, check that the strip runs smoothly without twisting and that the LED orientation is consistent.
4. Sealing Treatment (Optional)
If used outdoors or in damp environments, it is recommended to seal both ends of the tube using heat shrink tubing.
Slide the heat shrink tube over the connection point between the sheathing and the LED strip.
Apply even heat using a heat gun or lighter to shrink the tubing tightly, forming a waterproof layer.
After sealing, check for light leakage or looseness to ensure a secure and reliable connection.
5. Installation and Fixing
Install the sleeved LED strip along the designed path.
Use dedicated clips or cable ties to fix it in place, avoiding suspension or excessive bending.
Before finalizing the fixings, power on the strip to test if it lights up normally. Confirm there are no short circuits or poor connections before proceeding.
⚠️ Precautions
Avoid pulling the strip forcefully during insertion to prevent solder joints from breaking or LEDs from falling off.
The tube length should be slightly longer than the strip to预留 sufficient space for connections and adjustments.
For outdoor use, ensure proper sealing at both ends to prevent water ingress and short circuits.
If the strip needs to be bent, ensure the bending radius is greater than the tube's minimum bending radius to avoid flattening or breaking it.
Повторяем попытку...
Доступные форматы для скачивания:
Скачать видео
-
Информация по загрузке:


