Setting up the B and W Heavy-Duty Trailer Hitch Receiver on your 1986 Chevrolet C/K Series Pickup
Автор: etrailer
Загружено: 2016-02-18
Просмотров: 3891
Описание:
Click for more info and reviews of this B and W Trailer Hitch:
https://www.etrailer.com/Trailer-Hitc...
Check out some similar Trailer Hitch options:
https://www.etrailer.com/fitguide.htm
Search for other popular Chevrolet C/K Series Pickup parts and accessories:
https://www.etrailer.com/vehicle/1986...
https://www.etrailer.com
Don’t forget to subscribe!
/ etrailertv
Full transcript: https://www.etrailer.com/tv-install-b...
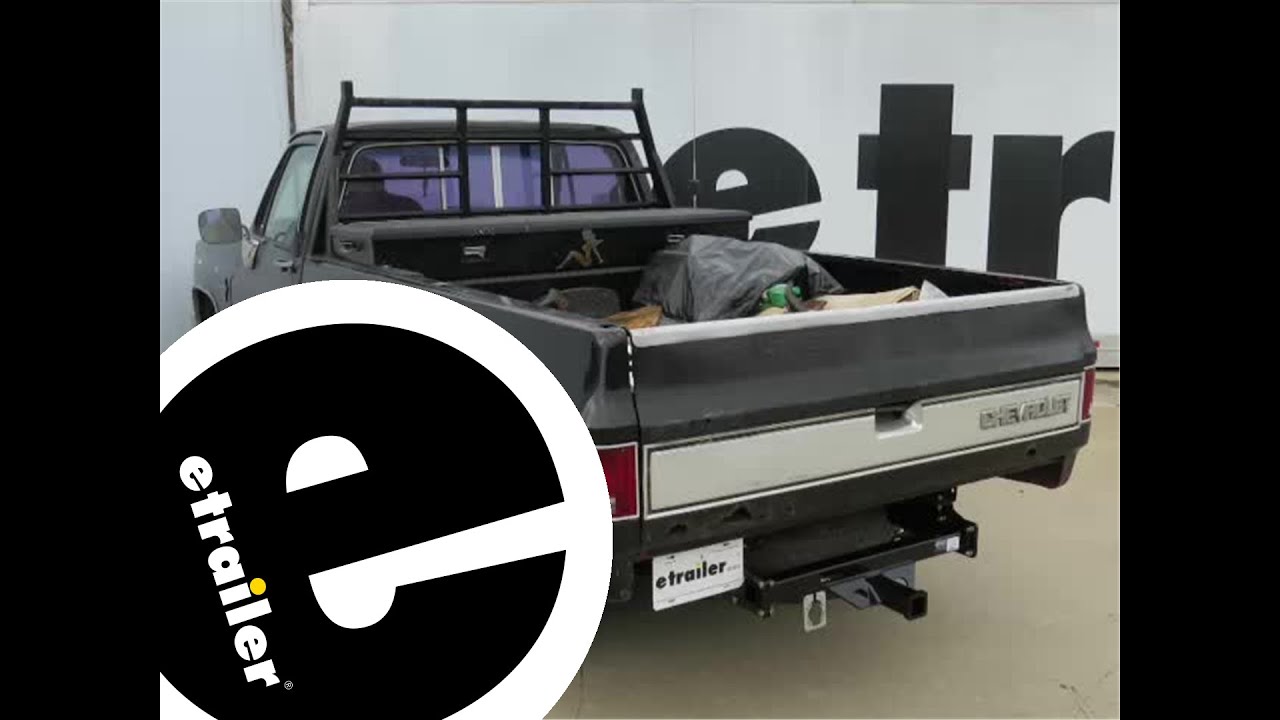
Today on our 1986 Chevrolet Silverado, we'll be taking a look at and installing the B&W Heavy-Duty Class 5 Custom Fit Trailer Hitch Receiver, part number BWHDRH25122. Here's what our hitch is going to look like once it's installed on the back of our vehicle. Now, keep in mind, if your vehicle has a back bumper or a drop bumper or any of those other styles, then it may look a little bit different than if it didn't have a bumper at all like this one doesn't It's going to have a fully-welded construction with an easy bolt on application with minor modifications to this one, but there's going to be multiple different variations to this and the mounting, depending on your vehicle that you're going to be placing it on. With this one we did have to drill out in the middle hole just a little bit to waller out one of our holes a little bit. You're going to have your extremely sturdy, Class 5 hitch here that's going to be fully-welded with those quarter inch, plate steel chain tie-downs on either side and 2 inch by 2 inch receiver too, with that 5/8's inch pin hole going straight through. Another great feature about this is it's going to have that 1600 pound tongue weight capacity and 16,000 pound gross vehicle trailer weight towing capacity. On side over here, you're also going to get your bracket to mount up your wiring harness if you already have one.
Whether that be your 7 way, 4 pull, whatever kind of wiring you're going to be running to this, or running from it, for that matter. You don't have to use a bracket, but it's supplied in case you want it. It is also going to have that welded on bracket here on the frame if you choose to use that one instead. Now, for your older vehicles, this is going to be an essential part. You're going to have that relocation for your spare tire rod and assembly. Now, ours isn't all the way tightened down, but if we tightened that down the rest of the way, it's going to hold up just fine and keep a nice, sturdy grip on that spare tire underneath the back end of our vehicle. Now, we'll go ahead and give you a few measurements to help you in selecting from hitch accessories such as ball mounts, bike racks, or cargo carriers.
From the top of the receiver tube to the ground, it's going to be about 17 and 1/2 inches. From the center of the pinhole to the outer-most edge of the bumper, it's going to be about 2 and 1/2 inches. Now, lets go ahead and see how it's installed. In here we have our outer brackets in place on our receiver tube itself. We're going to go ahead and assemble everything and get it up onto the vehicle. We'll take our half inch by inch-and-a-half bolts and slide them through the outside of the receiver tube.
Get the holes lined up and get them in place. We'll side our other tube bolts through the main receiver tube, once we line up the holes. Then, we'll place our lock washer and hex nut on the back side. Once we have it started, we'll go ahead and tighten them down. We'll use a 3/4 inch socket to do so. Now we're going to go ahead and drop some of the hardware into the frame.
We're going to be placing the 2, the outermost and innermost brackets, through the top side, going through the bigger of the 2 square blocks. Now, notice there is going to be 3 of your spacer blocks, we're going to set these ones off to the side and we're just going to be using these ones. Going through and then this one here as well as the lock washer and nut will be coming up from the bottom side. Go ahead and drop these bigger ones into the frame with our 2 bolts. Now, on earlier model vehicles like this one, it's going to be easier to remove the spare tire from the vehicle before we go ahead and get started. Place the block and then the bolt. It should look like so, dropping it through that big slot at the back. Now, the other one is going to go just in front of the rear leaf support and drop in the 1/2 inch hole. Now, this other one is actually going to be going the reverse direction up through this hole here. Now, we're going to go ahead and put our hitch up into place over those outer bolts. Now, you may need a second set of hands to help you hold it up into place. Once you have your hitch up into place, take your small locking block, place it over, and then your lock washer. We'll go ahead and thread on our hex nut just to where it relieves the pressure and then we can go head and put our b
Повторяем попытку...
Доступные форматы для скачивания:
Скачать видео
-
Информация по загрузке: