DIY Stationery Holder
Автор: PaperOne
Загружено: 2019-02-27
Просмотров: 452
Описание:
Have you guessed what Aline @Aline's cardboard was building with our PaperOne™ carton? Take a look at this instructional video to turn it into something pretty for your desk to hold your stationery!
Materials needed:
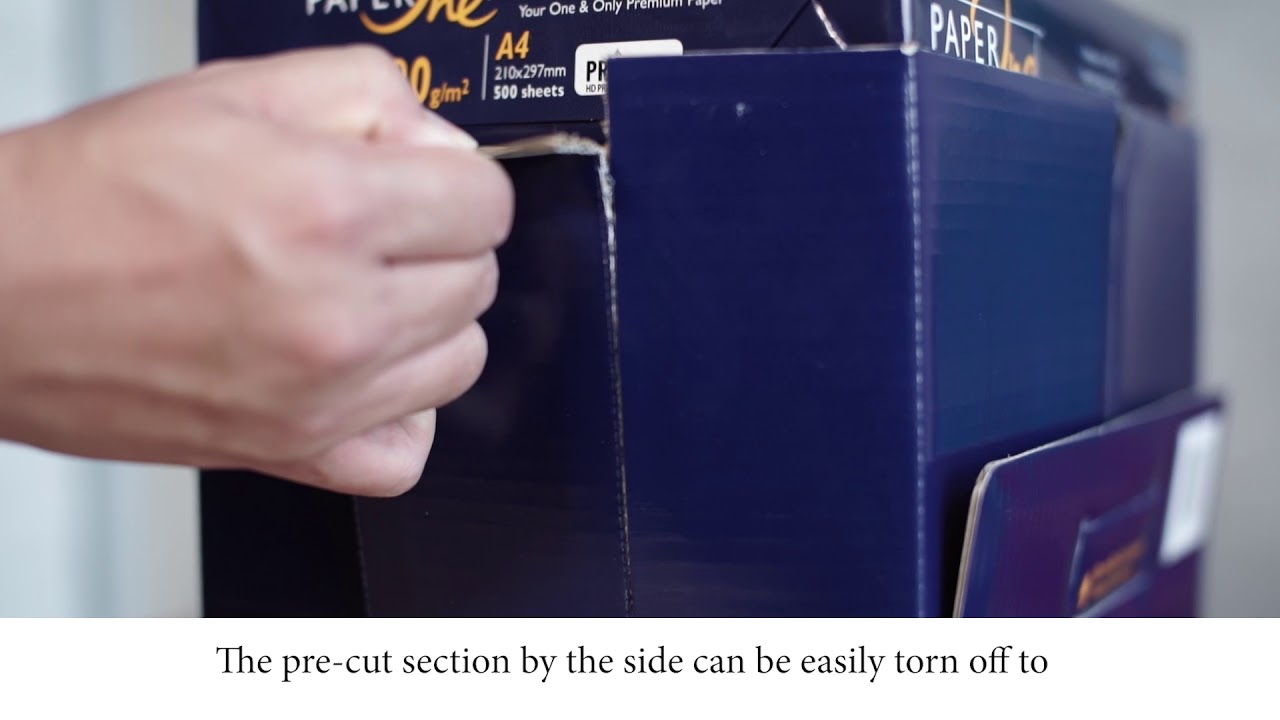
1. PaperOne™ carton
2. A pencil and a permanent marker (to mark where you’re going to cut)
3. A penknife and a pair of scissors
4. Hot glue gun
Instructions:
1. Using the cover of the carton, trace out a 25x13 cm rectangle using a ruler and a pencil
2. Then cut it out using a penknife (adult supervision is advised if a child is attempting this craft project)
3. Next, divide the rectangle into 4 portions; 1 quadrant measuring 2.5 cm in width, with the rest measuring at 7.5cm each
4. Scour these lines to create a deep incision without cutting entirely through with the penknife
5. Fold these quadrants in to form a triangle, sealing the shape with a hot glue gun
6. This forms the holder portion to your craft
7. Next, we’ll form the base, to do this, we’ll return to the cover you initially traced out the rectangle from and cut out a 9x9 cm base
8. Using the hot glue gun, attach the base to the triangle then leave it to dry
9. Cut out the side of a carton, draw out trees along with their branches with a marker (get creative and draw whatever trees that make you smile!)
10. Cut these out with the penknife or a pair of scissors
11. Use the glue gun to attach the branches to the trees
12. Use the glue gun to attach these trees to the base and holder
13. Leave to dry then place your stationery in
14. Snap a picture of your creation and post it in the comments!
#StartsWithOne #PaperOne #OneLife
Повторяем попытку...

Доступные форматы для скачивания:
Скачать видео
-
Информация по загрузке:


![♻️Пасхальный экостиль: из мусора в арт-объект [DIY]](https://imager.clipsaver.ru/2_OshkHwP88/max.jpg)