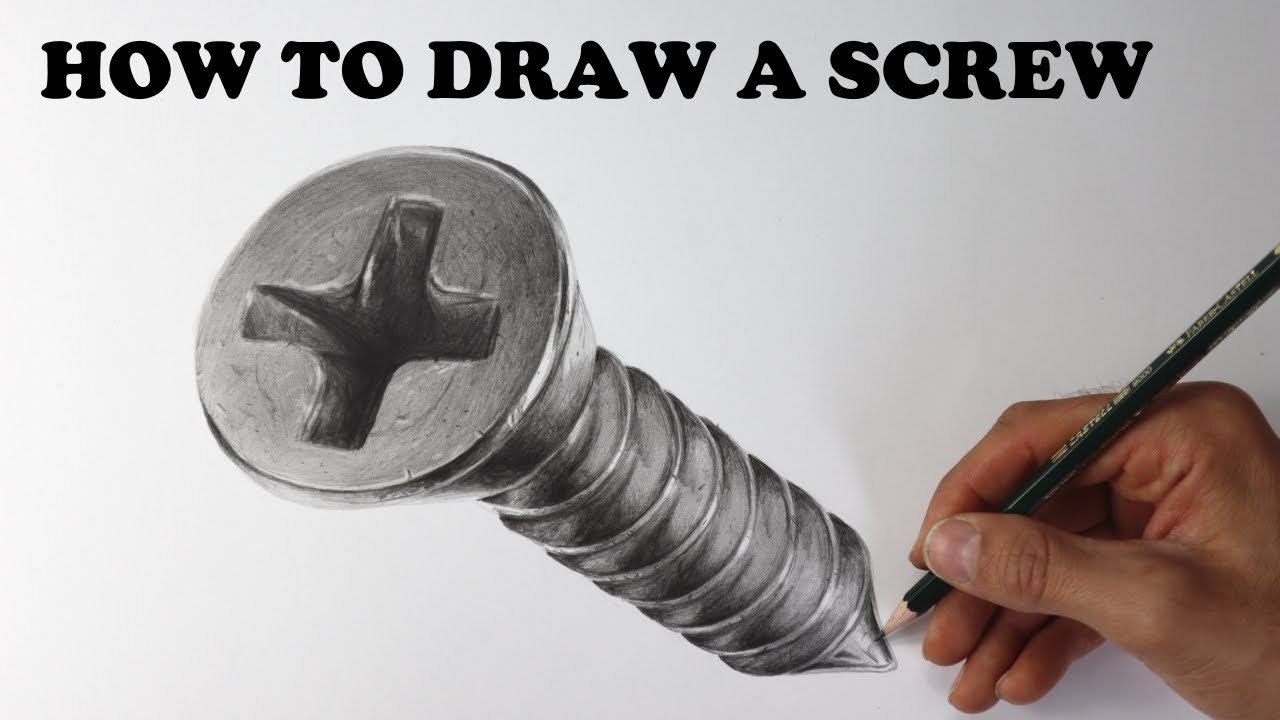
how to draw wood screw step by step - simple drawing
Автор: teachsimple
Загружено: 2018-12-02
Просмотров: 3497
Описание:
Are you curious about the mechanics of a wood screw and a screwdriver? In this step-by-step tutorial, we'll guide you in drawing a wood screw and a screwdriver. This easy drawing lesson is perfect for kids and students who want to learn how to draw these essential tools. So, let's grab our pencils and get ready to create!
Materials:
A pencil
An eraser
Drawing paper
Part 1: Drawing a Wood Screw
Step 1: Draw the Screw Body
Start by drawing a vertical line slightly slanted to the right. This line will serve as the central axis of the wood screw.
Step 2: Add the Threads
On the right side of the vertical line, draw a series of curved lines in a helical pattern. These lines represent the threads of the wood screw. Continue the curved lines until they reach the bottom of the screw body.
Step 3: Shape the Screw Head
At the top of the screw body, draw a larger circular shape to represent the screw head. Ensure it overlaps slightly with the screw body.
Step 4: Add Detail to the Screw Head
Inside the circular shape, draw a smaller circular depression or cross-shaped indentation. This detail is characteristic of a wood screw's head.
Step 5: Enhance the Screw Threads
To give the threads more depth, darken the lines and add shading between them. This will create a three-dimensional appearance.
Part 2: Drawing a Screwdriver
Step 1: Draw the Handle
Start by drawing a long, straight vertical line. This line will serve as the handle of the screwdriver.
Step 2: Add the Grip
On the top end of the handle, draw a slightly curved rectangular shape. This shape represents the grip of the screwdriver. Ensure it is proportionate to the handle.
Step 3: Shape the Screwdriver Tip
At the bottom end of the handle, draw a long, narrow triangular shape. This is the tip of the screwdriver used to tighten or loosen screws.
Step 4: Detail the Tip
On the triangular shape, draw a horizontal line near the top to indicate the flat surface of the screwdriver tip.
Step 5: Enhance the Handle
Add texture to the handle by drawing horizontal or diagonal lines across its length. This will simulate the grip pattern.
Step 6: Erase Unwanted Lines
Review your drawing and erase any unnecessary or overlapping lines. This step will give your wood screw and screwdriver a clean and finished look.
Congratulations! You have successfully learned how to draw a wood screw and a screwdriver step by step. Remember to practice regularly to improve your drawing skills. Now you can easily depict these essential tools in your artwork. Keep exploring and enjoy the process of creating detailed and accurate drawings!
Повторяем попытку...

Доступные форматы для скачивания:
Скачать видео
-
Информация по загрузке: