HDR Tonemapping and Post Processing in Photoshop
Автор: Ákos Szigeti
Загружено: 2011-08-22
Просмотров: 2020
Описание:
1) Align the 3 pictures you took with an auto expo sequence using Photomatix Pro.
2) Check the settings. I personally prefer unchecked noise-reduction and CA reduction boxes because photoshop does a better job.
3) Set the radio-button to "tone mapping" and set the values you like or use a preset. (I already have that image set up for the tutorial video. You need to play with the values every time to find out how the picture looks good. It's pretty simple.)
4) Click on "Process" button.
5) Save the image in .tif format.
6) Open the .tif and the picture of the sequence where the sky is properly exposured. (Most of the time the -2 step image.)
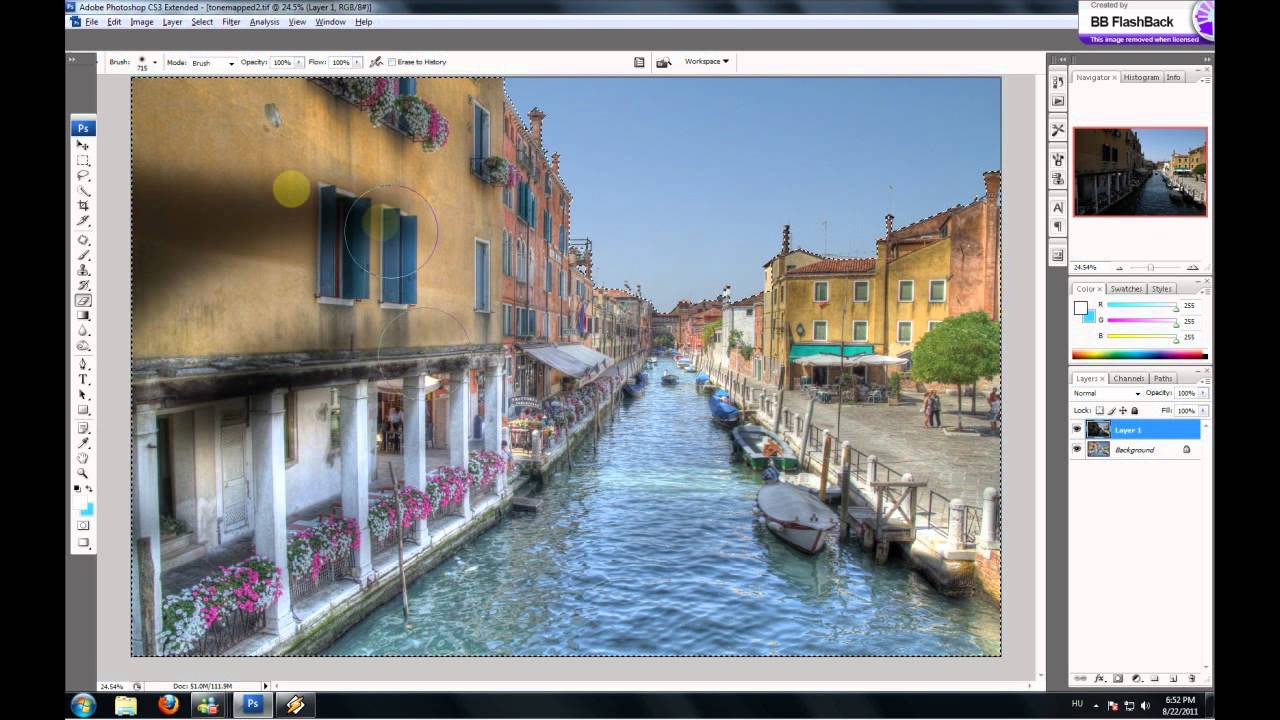
7) Align the images correctly. The upper layer should be the -2 step image from the original sequence.
7) Select magical lasso tool and create marching ants around the sky.
8) Right click + select inverse.
9) Set feather to 1-5 pixels (depends on image size).
10) Erase the selected parts of the upper layer with a soft eraser brush.
11) Select the 2 layers and press CTRL+E. (Merge the 2 layers.)
12) Select "curves" in the bottom right corner and set the colors like I did in the video.
13) Use "selective color" to increase overall contrast and set the tones.
14) Save the picture. =)))
Повторяем попытку...
Доступные форматы для скачивания:
Скачать видео
-
Информация по загрузке: