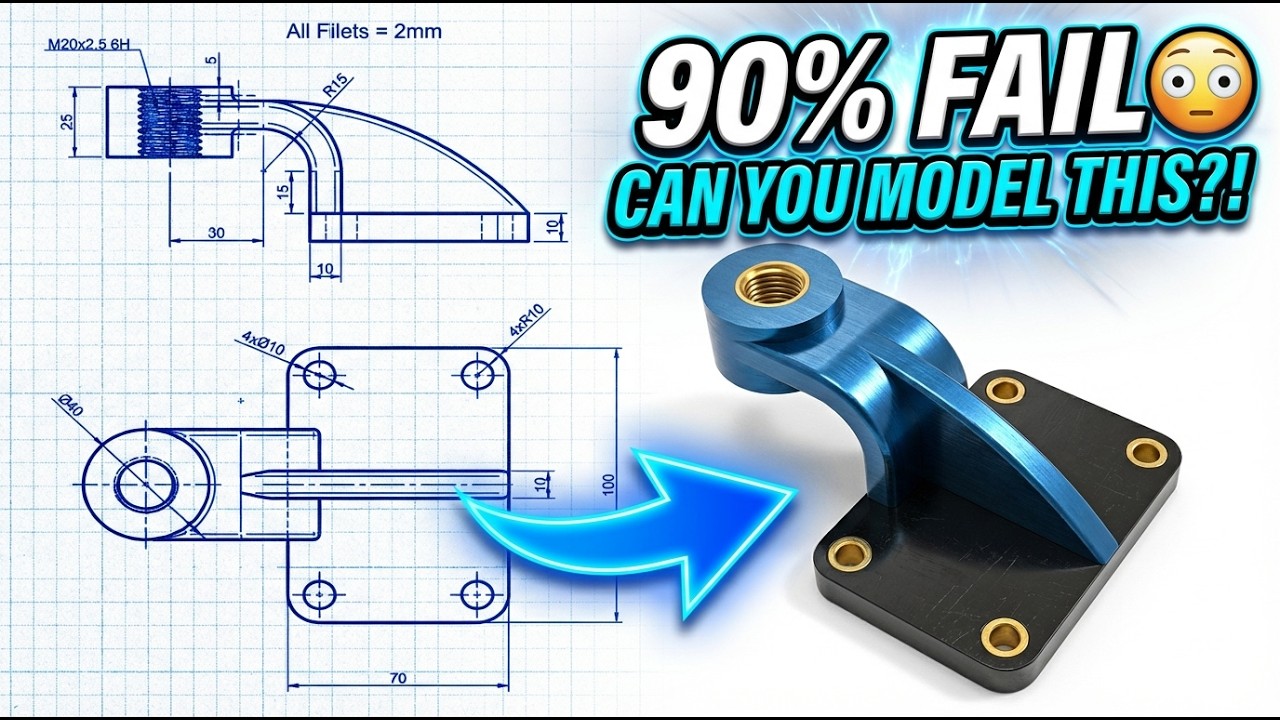
FreeCAD Advanced Tutorial – Step-by-Step Exercise 28 | Real Engineering Modeling
Автор: FreeCAD Hub
Загружено: 2026-02-07
Просмотров: 87
Описание:
3D Sketch : https://www.3dmechanism.com/post/3d-c...
Donate PayPal: https://www.paypal.com/donate/?hosted...
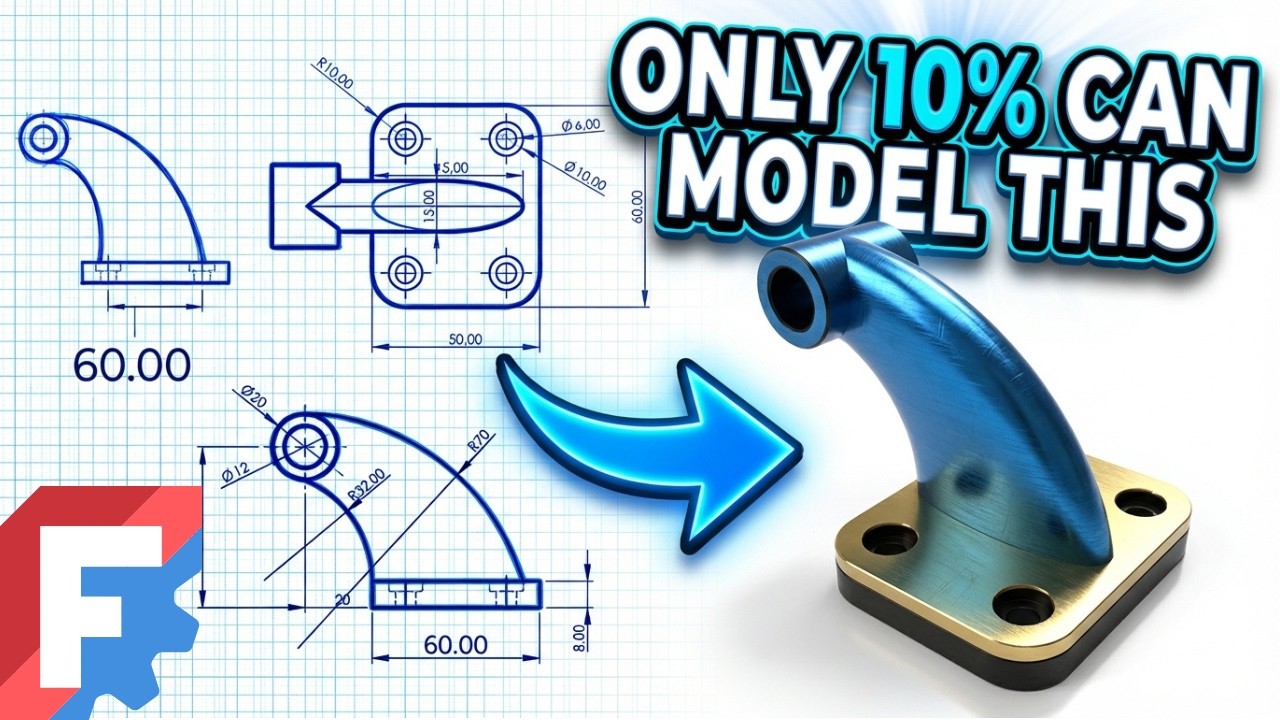
Start your 3D modeling journey with FreeCAD! This tutorial is specially designed for beginners. You'll discover the essential features of the software and create your first project in no time.
1. Surface (Surface Workbench)
The Surface tools are used to create zero-thickness faces.
Action: Creates complex, curved "skins" (like a piece of paper floating in space) from sketches or boundary edges.
Use: Designing complex organic shapes like car hoods, mouse grips, or sleek consumer products where simple extrusion (Pad) isn't enough.
2. Shell
A Shell is a collection of connected surfaces.
Action: It joins multiple surfaces together to form an open shape.
Characteristic: It is not a solid yet; it has zero thickness and no "inside" volume. It is essentially a hollow skin.
3. Shell to Body (Thicken / Offset)
This refers to converting a zero-thickness Shell into a solid 3D Body.
Action: You take a Shell and apply an Offset or Thickness command to give the walls real physical depth (e.g., making the skin 2mm thick).
Result: The "ghost" surface becomes a printable, manufacturable solid part.
4. Pad
The Pad command is the primary tool for creating a solid.
Action: It extrudes (pulls) a 2D sketch into a 3D block.
Use: Creating the main mass of your object.
5. Datum Plane
The Datum Plane is a reference helper.
Action: Creates a custom flat plane in 3D space.
Use: Essential for drawing sketches on angled faces, tangent to cylinders, or offset from the center of your part.
6. Pocket
The Pocket command is for removing material.
Action: Cuts a custom shape (from a sketch) into a solid.
Use: Creating rectangular slots, custom recesses, or simple holes.
7. Hole
The Hole command is for standard engineering holes.
Action: Uses circle centers to drill specific screw profiles.
Use: Automatically creating threaded holes (e.g., M5), counterbores (for bolt heads), or countersinks (for flat screws).
Повторяем попытку...
Доступные форматы для скачивания:
Скачать видео
-
Информация по загрузке: