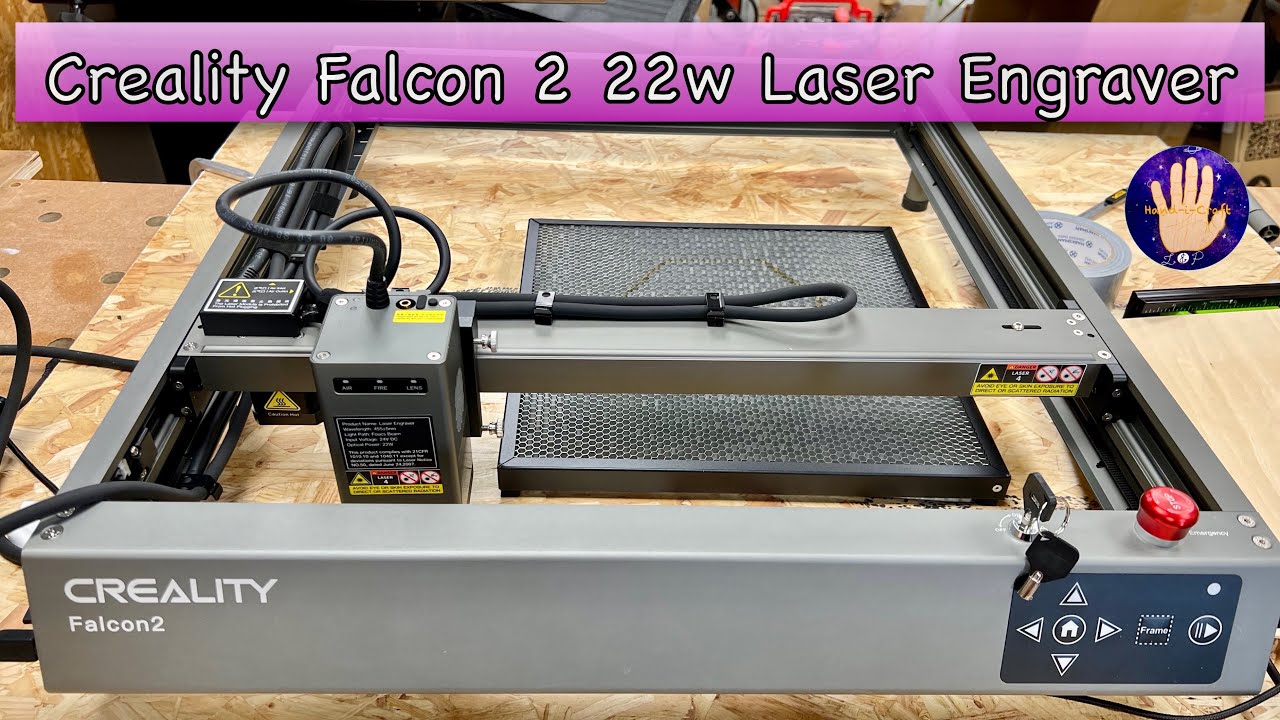
Unboxing, Setup, Test Cuts and First Impressions of the Creality Falcon2 22w Laser Engraver
Автор: Single Handedly Made
Загружено: 2023-03-21
Просмотров: 6494
Описание:
#Creality #crealityfalcon2 #laser #laserengraver #giveaway #22w
Right Folks, very exciting times for the channel as I've finally got my hand on the brand new 22w laser engraver from Creality. As I complete novice in this field I set about unboxing, setting it up with my computer using Lightburn software, run a test cut and a test engraving and offer my initial thoughts on this machine. I made some mistakes along the waym but if you watch this video it will save you the hassle of making the same errors! I will leave links here to the product and their offers, the video from Make With Tech and also my bullet point notes for assembly and setting up.
I hope you enjoy the video and let me know what you think in the comments. If you enjoyed the content then please give it a thumbs up and maybe consider subscribing to the channel.
If you would like to check out my new website and maybe consider making a purchase or even subscribing to the members only section then please visit:
https://www.hand-i-craft.com
If you would like to make a one off donation to support the channel then click on the link here:
https://www.buymeacoffee.com/handicraft
As ever, thank you so much for your continued support in my disability woodworking adventures. Best Wishes, Leo Winstanley
All Social Media, Merchandise and Contact Details can be found at:
https://linktr.ee/hand_i_craft
You can contact us at: [email protected]
Make With Tech 1st Look At Creality Falcon 2 Laser Engraver:
• 1st Look the New Creality Falcon 2 Laser E...
Affiliated Link to the Creality Store. If you click on the link below and purchase any Creality product then the channel will earn a small commission:
https://shareasale.com/r.cfm?b=201599...
“The actual purchased product details are subject to the standard "In the Box" provided on the official website."
Code1: Falcon50(£50 Off)
My Bullet Point Notes:
Unboxing Laser
Unpack everything from box
Fit foot columns
Install laser and use thumb screws to lock it
Rubber plug off air hose and attach rubber pipe
Plug air pump into side of laser frame
Attach silicone hose to laser
Put down metal plate and honeycomb
Connect power adaptor
Installing Laser
Install the SD card software onto Mac
Click on Devices
Import
Folder (laser Demo)
Creality Falcon 2 SD
4 (software)
Lightburn
EN
Creality Falcon 2.ibdev
Click Device Ok
Turn on the laser
Next to devices. (Cu.BLTH)
Click on the port
Click Home and print head wobbles
Click Lightburn Preferences
Select mm/min
Edit Device Settings
Check ‘Enable Laser Fire button is on’ and ‘Laser on when framing’ is on
Turns the laser on low intensity ‘like a soft start on a table saw’
Start from ‘Absolute’ as it allows you to put your material anywhere and then align the laser to match that position
Focus the laser
Move the laser and use the spacer to adjust the height of the laser unit. The thinner the material being engraved, the bigger the space between the laser and the material
Draw a shape
Configure the power, the speed and the number of passes required
Refer to the configuration chart on the SD card
Click on the arrow, select item to be engraved, Input speed on the right side (below white box), then power
Home the laser
Click ‘Frame’
The laser will then dance around where it intends to cut
Before you hit start put your glasses on
Then hit START
Produces the cut
File ‘Import’
Layers of engrave or cut that runs from the top down
Can engrave with ‘lines’ or ‘fill’
Повторяем попытку...
Доступные форматы для скачивания:
Скачать видео
-
Информация по загрузке:


