How to Replace SSD on Chuwi Herobox | Step-by-Step Guide
Автор: PCStuff
Загружено: 2024-07-31
Просмотров: 1519
Описание:
Description:
Welcome to our channel! In this video, we'll guide you through the process of replacing the SSD on your Chuwi Herobox. Whether you're looking to upgrade to a larger drive or replace a faulty one, we've got you covered with this step-by-step tutorial.
🔧 What You'll Need:
A new M.2 sata SSD
A small Phillips head screwdriver
Anti-static wrist strap (recommended)
📌 Steps Covered in This Video:
Preparation:
Power off your Herobox and unplug all cables.
Gather your tools and new SSD.
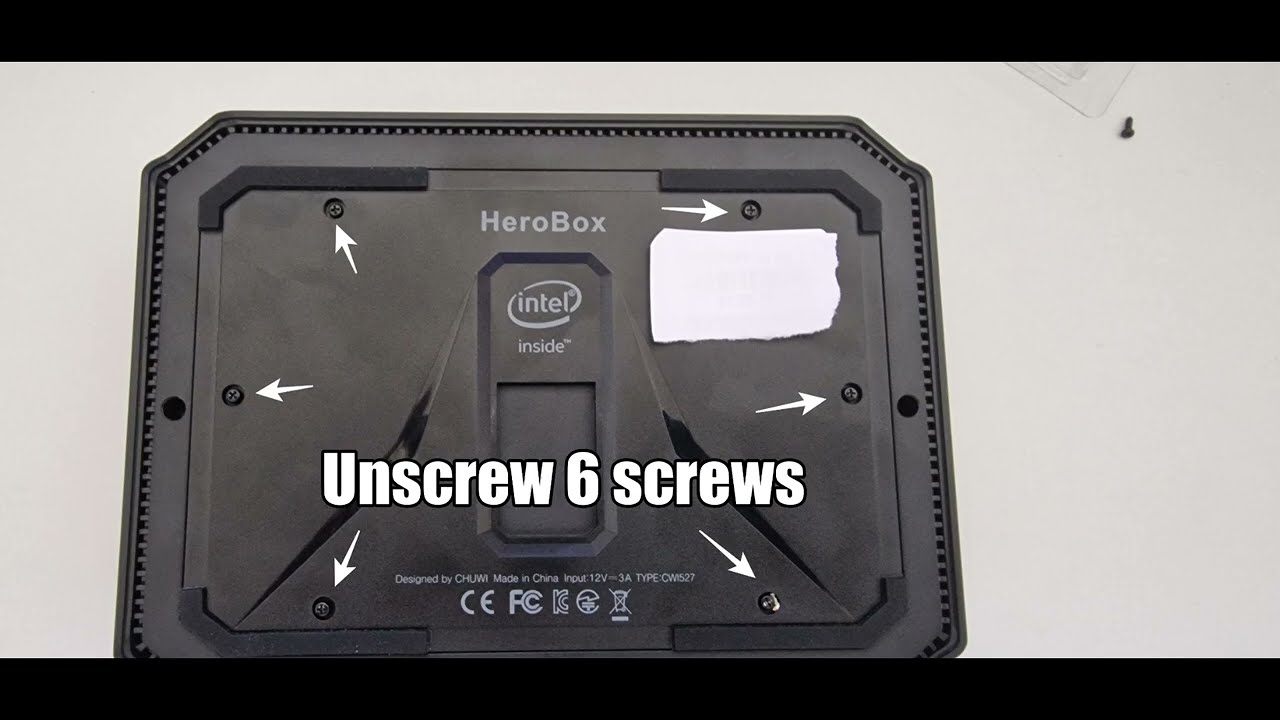
Opening the Herobox
Remove the screws securing the bottom cover.
Carefully lift off the cover to expose the internal components.
Removing the Old SSD
Locate the existing SSD.
Unscrew and gently disconnect it from the motherboard.
Installing the New SSD
Insert the new SSD into the slot.
Secure it with the screws.
Reassembling the Herobox
Replace the bottom cover and secure it with screws.
Reconnect all cables.
Setting Up Your New SSD
Power on the Herobox and enter BIOS to ensure the SSD is recognized.
Install your operating system or clone your existing drive if needed.
📢 Don't Forget to Like, Comment, and Subscribe for More Tech Tutorials!
Disclaimer: This video is for educational purposes only. We are not responsible for any damage caused during the process. Follow the steps carefully and at your own risk.
Thank you for watching! If you have any questions or run into any issues, leave a comment below, and we'll be happy to help. Happy upgrading!
#ChuwiHerobox #SSDReplacement #TechTutorial #DIYUpgrade #techchannel
#ChuwiHerobox #SSDUpgrade #HowToReplaceSSD #TechTutorial #DIYTech #ComputerUpgrade #techchannel
Повторяем попытку...
Доступные форматы для скачивания:
Скачать видео
-
Информация по загрузке:


![Best of Deep House [2026] | Melodic House & Progressive Flow](https://imager.clipsaver.ru/Il-ZpBuC8tA/max.jpg)