DMC5 - Mission 8 Urizen (DMD) - No Damage
Автор: Crumpet
Загружено: 2019-08-27
Просмотров: 2140
Описание:
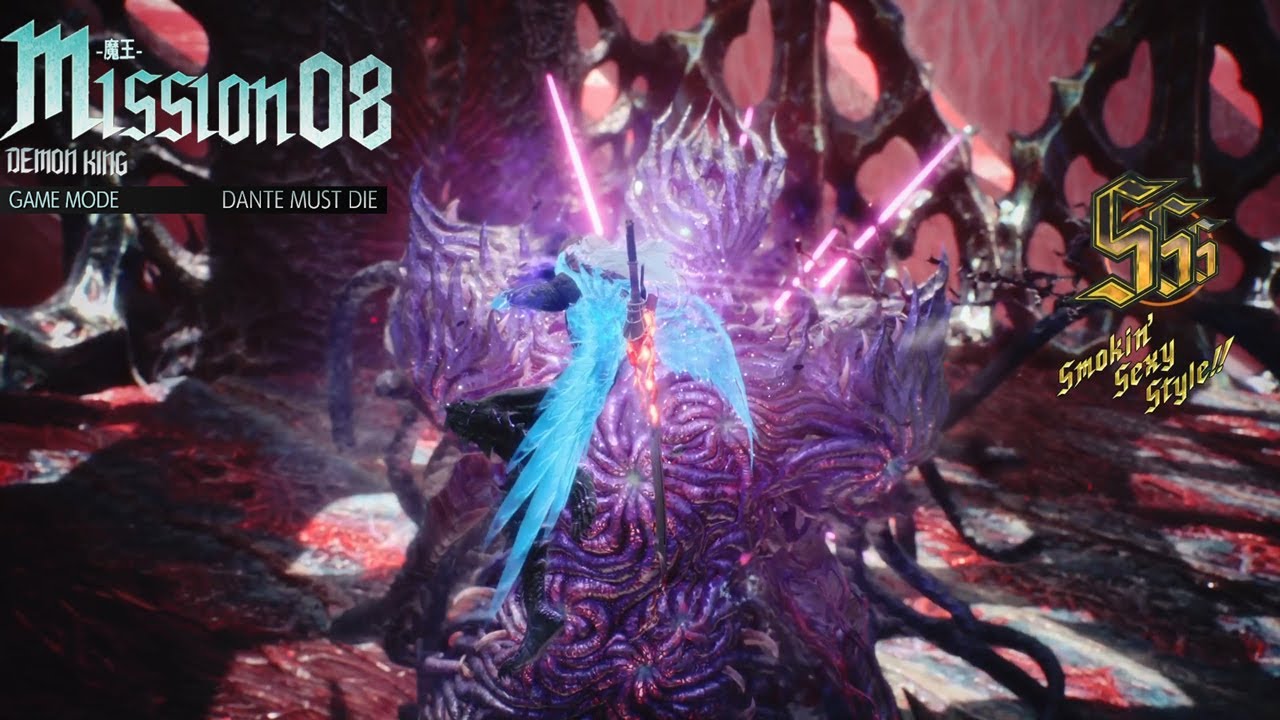
I've no damaged about 3/4 of the game now and this has probably been the most challenging part so far. In addition to his new moves, he has the same attacks as his chair form, but they're much more aggressive and trickier to avoid. It's possible for him to one-shot you, so even if you're not trying to no-damage him he can still end your attempt.
General Tips -
Dropkick into the second fight; this raises your motivation.
After practicing this fight a lot, I found the best loadout for me was to just max out on Helter Skelters (HS). Maximizing your DPS with Ragtimes/Busters is mostly superfluous, since you will always need to break 4 crystals during the fight (about every quarter of his HP). It is better load up on Breakers that will help you for the entire fight. HS with Bringer Kunckle does insane damage to his shield, which will mean you spend less time dodging his tricky laser attacks and more time in his (generally) safer, exposed, crystal-less phase. A lot of people roll Gerbera, and that's fine too as Gerbera can at least parry the fireballs!
The HS Breakage is also incredibly useful here, as it charges super fast and the whole attack has i-frames that you can abuse when you're not confident you can dodge an attack safely.
Don't rush in too much though, especially if you do decide to go with the HS method, since going through the full combo requires a lot of commitment. The safest time to attack is after dodging his seeking tentacle, but you can probably drop some charge shots in between all his laser moves.
When his shield is gone, use enemy step and your extra jumps to stay above him! Most of his tentacle attacks will be easier to dodge if you can get high. And always make sure you have enough meter in reserve to DT, as the i-frames it offers you on cast can save you from a tragic restart.
Urizen's Attacks Tips-
The most infuriating attack he has now is the seeking tentacle, which moves at an eerie pace, but can be a bit tricky to gauge it's distance from you. Moving sideways will give you a better angle as it approaches you. He will always use this after you break his first three crystals, so get prepared before moving in. A simple jump is all you need to dodge it, but 9 times out of out of 10, you will need to to hop it again as it circles around back at you. After dodging it again you should hopefully have some time to get in a full Helter Skelter combo.
When his shield is down, he will use more of his tentacle attacks. His side-sweep is easy enough to dodge, but the one you need to be careful of is his tentacle slam. This one consists of a punch to the ground, followed by the tentacles which can hit you from deceptively far away. The safest way to avoid this one is to simply pop your DT, which has enough i-frames to protect you. If you're too far away, you might still get hit by the tentacles as they land after, so get as close as you can when you seem him preparing this attack.
When he summons his last crystal, he will immediately summon the big slow bubble around him, so remember to gtfo. His sweeping laser will move much faster so don't let it catch you off guard, and he'll probably use his tentacle in addition to another attack.]
Повторяем попытку...

Доступные форматы для скачивания:
Скачать видео
-
Информация по загрузке:
![[DMC5] DMD Prologue Urizen - (No upgrades/No Damage/New Game)](https://imager.clipsaver.ru/BitCku57ejM/max.jpg)