Balsam Separation Anamorphic Lenses FIX Working Method Re Glue Tested
Автор: Waves Sounds
Загружено: 2022-02-11
Просмотров: 11291
Описание:
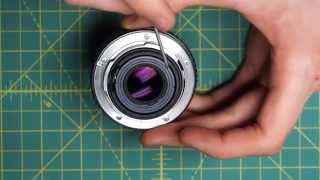
In the video i'm sharing my tested method for fixing the balsam separation in my case for some anamorphic lenses elements. When you get the rainbow you know what it is. Is called balsam separation. The original thing is most probably a natural compound since the smell is like Fir Three. The original compound might be available but my choice is Epoxy UV compound used for mobile screens glue. It is sold like this and usually comes with a little UV LED light.
Here you can stop and consider.
If you consider doing it please follow some tips.
1. When you heat the lens make sure you gradually increase the temperature. I started the steamer and when a bit warm i stopped it for few minutes and then again and again until leaving it to boil for 2-5 minutes. This is important since if you put the glass directly under heat might crack. As well leave it gradually to cool down.
2. Handle the lenses with care. There is not too much care.
3. Mark somehow the original position to know it later.
4. Clean it with Methanol, IPA, or lighter fluid. White spirit will work as well.
5. Make sure you clean it very well then against a light source get rid of dust. You can use micro fiber cloth for glasses but the dust is the most difficult to get rid of.
6. The last touch is the most important. Blow on it and with a sensor cleaning swab is easy and gentle to remove any remaining particles.
7. The blue liquid is windscreen washing liquid.
8. The foam can is Glass Cleaner.
9. Make sure you align the elements and secure them before the UV Light.
10. When you handle the lens make sure your fingers are clean. Excess glue It will come out on sides and might touch your fingers and then touch other parts. Before putting the V light make sure the glass is clean. If happens Acetone will help but i'm not sure if will affect the lens coating.
11. Few seconds exposing to UV light and is done.
12. When you put the UV light make sure you press a bit the elements for the last time without moving them. Gentle.
13. With luck...IF YOU TRAP DUST, BUBBLES, NOT ALIGNED you are screwed! Make sure the glass have room temperature.
I don't think you will be able to remove the elements ever again so is one chance. If you use the original optical compound is ok but might be hard to find.
DO IT ON YOUR RESPONSIBILITY in a clean place. On daylight might be even better. Take your time for every step. Rehearse every step in your mind before and keep the tools, and something to wipe your hands close.
If you have more questions ask. Read and watch before you ask.
Good luck.
2024 sidenote:
I will explain below in all the details i can if you want to give it a go....
The coating are on sides not between.
Maybe just cleaning the lenses for fungus and dirt will make them better.
This a bit complicated process but now that you seen the process put down the steps and get all you need around and make it as a project. Make sure you read as well the description. Binoculars lenses might be smaller and you need a kind of jig to keep the lenses aligned when you put the UV light for good. No turning back easy.
Patience and when you are sure press a bit and put the light for a second first the light on it and check.
Even a second might be too much. The resin will cure very fast. Electrical tape around the lenses elements on top of each other worked for me. If you are scared exercise the steps first. These are few more tips. Maybe somebody else will read them as well. The resin again is used for phone screens. In the video you will see the bottle and search. Is a must to watch all the video if you want to do it like me. I used the method on several lenses already. For maintenance make sure you use the lens wise avoiding temperature extremes. No lens will benefit from that.
Personally wanted to try and got it right. Use your own risk. I cracked a lens and got one a bit misaligned and i had to polish a side of the lens to enter in the body. It ended right. The cracked one i tried to mark a side. My sign marker i know that will be washed when i clean the lens. I used a pair of scissors or a cutter and is when the crack appeared. I did it in my stupidity in a way. No metal on the glass. A wood stick end will enter in the sides groove and displace the old patches of paint while cleaning with acetone and rubbing alcohol. varnish.
Wash with distilled water or screen wash with a soft brush. A makeup brush or a watercolour brush the edges.Dry the brush and attract the dust with it. Use Q-tips and rubbing alcohol and for fungus Peroxide and as upgrade you can blacken the inside and clean with distilled water. I used a sensor swab made in China very well and was used in the final stage of removing stubborn residues and for the final wipe by steaming the lens with your breathe and wipe several times in straight direction several times and when your mouth breathe stay without any patters you leave the lens to dry and lower the lens in the position.
Повторяем попытку...

Доступные форматы для скачивания:
Скачать видео
-
Информация по загрузке: