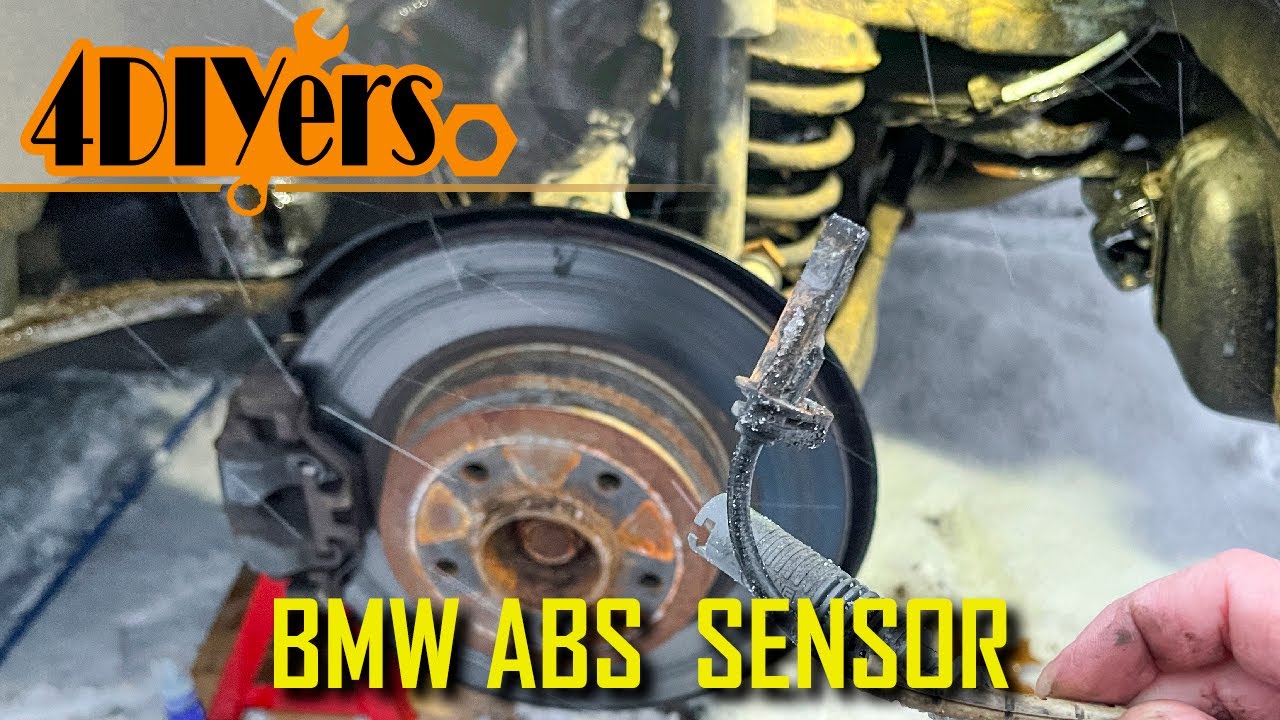
How to Change the Rear ABS Sensor on a BMW E90 E91 E92 E93
Автор: 4DIYers
Загружено: 2024-12-13
Просмотров: 7817
Описание:
How to replace the rear abs sensor on a BMW E90. This is a 2011 335d and this replacement also applies to the E91, E92, and E93 models. A fault rear left abs sensor will cause both an ABS and brake error codes to pop on on the gauge cluster, your cruise control will no longer work, you won’t have ABS brakes, and there will be no stability control. #bmwe90 #foxwell #oemtools
Foxwell NT530 Scanner: https://www.foxwelldiag.com/products/...
OEMTOOLS 24837 3-1/2 Ton Low-Profile Floor Jack: https://www.mobiledistributorsupply.c...
Website: http://4diyers.com
Patreon: / 4diyers
Facebook: / 4diyers
Twitter: / 4diyers
Instagram: / 4diyers
Tumblr: / 4diyers
Pintrest: / 4diyers
Tools/Supplies Needed:
-5mm allen socket with an extension and ratchet
-new rear ABS sensor
-8mm socket
-10mm socket
Procedure:
Raise the rear left side of the car.
Now using a 17mm socket, remove the lug studs.
Finally remove the wheel.
Place a jack stand under the car’s subframe as a safety.
The abs sensor is directly behind the dust shield for the brakes on the wheel carrier.
Use a small standard screwdriver to clean the head of the socket head bolt. This will ensure good contact and reduce the chance of stripping it.
Using a 5mm allen head socket, remove the bolt. If yours is seized, take your time not to break it.
Now using interlocking pliers, grab onto the sensor and rock it up and down. Take your time, again we don’t want to sensor to break off. Slowly work the sensor out until it’s fully removed.
I used a wire brush to clean up the base of the sensor location to remove any debris which may cause installation issues.
Unclip the wire on the suspension arm, simply separate the clip on the top and pull it off.
Unclip the sensors along the back, use a small standard screwdriver to separate the clips and then pop out the wire.
We need to unclip the electrical connector and this is in behind the fender linear.
Remove the 3 8mm bolts by the bumper.
Then remove another 2-3 10mm plastic nuts higher up in the fender liner. The liner doesn’t need to be fully removed but just pulled back to gain access to the connector.
Now pull the liner back.
Remove the connector from the plastic holder.
Unclip the electrical connector by pushing the tab in and then pulling the connector apart.
I did apply some contact cleaner and protectant from Deoxit to provide some protection to the contacts preventing corrosion.
Plug in the new sensor.
Clip the connector back into the case.
Now push the fender liner back into place.
Install the fasteners that were removed.
The plastic wire retaining clip was removed from the old sensor and transferred over to the new sensor.
The wire retaining clip was snapped back into place on the suspension arm.
Clip the wire back into the clips at the base of the fender liner.
Finally install the new sensor. It may take a little force to push it into place, don’t force it though. If you find it’s too hard to install, then use sandpaper to clean up the hole it slides into.
I applied some medium grade threadlocker to the fastener to prevent it some seizing in the future. Then it’s installed and tightened.
Clean the hub mounting surfaces on the car and then the backside of the wheel.
Finally install the wheel.
The torque specifications for the lug studs is 88 ft lbs or 119 NM.
Thank you to all those who watch my videos and support my content. Don't forget to subscribe to my channel for future tutorial videos and like my video if you found it helpful. New videos are always being uploaded every week!
© 4DIYers 2013
All Rights Reserved
No part of this video or any of its contents may be reproduced, copied, modified or adapted, without the prior written consent of the author.
Повторяем попытку...
Доступные форматы для скачивания:
Скачать видео
-
Информация по загрузке:


