Enable DHCP Mode from the Front of a KE2 Controller - Video 128 (FAQ:walk-in freezers & coolers)
Автор: KE2Therm
Загружено: 2019-03-29
Просмотров: 1496
Описание:
For more information please visit our website at http://www.ke2therm.com
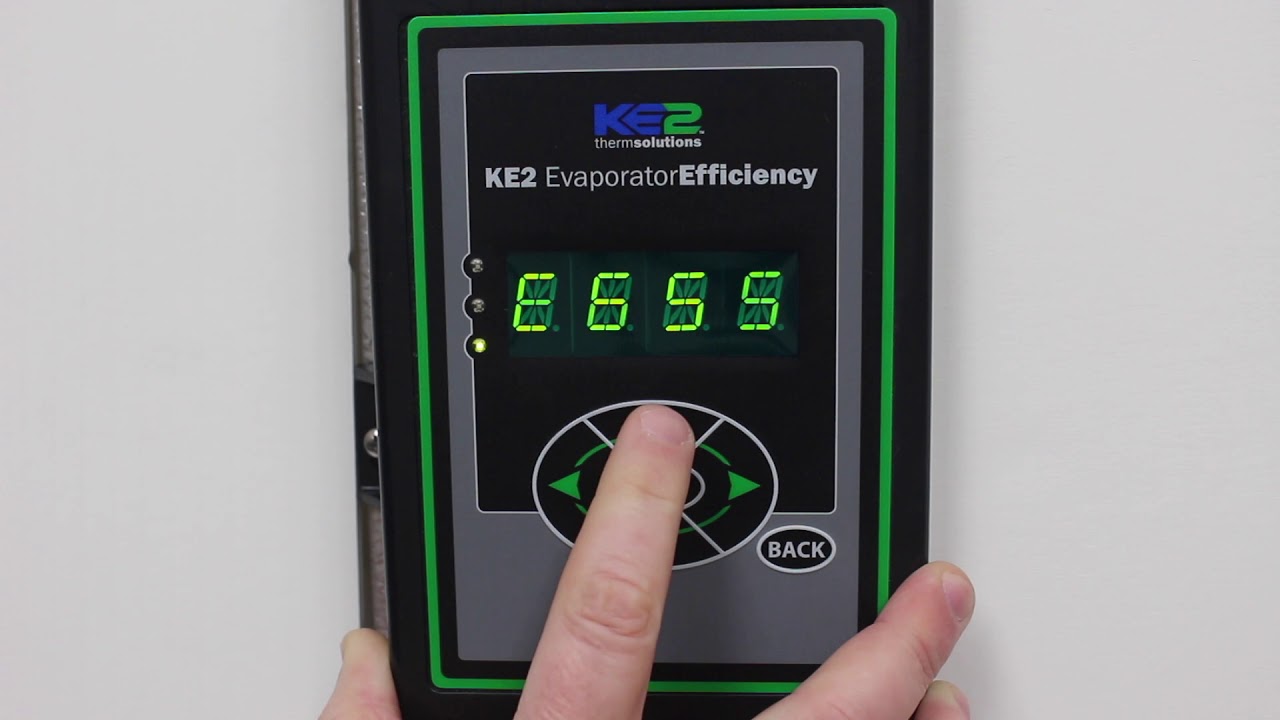
The step by step process to enable DHCP mode from the front panel of a KE2 Evap or one of KE2 Therm's other ethernet enabled controllers - allowing the controller to get an IP address from the customer network.
In this video we're going to show you how to enable DHCP mode from the front panel. This will allow the controller to get an IP address from the customer's network. Using the left or right arrow scroll through the menus until you see MANUAL MENU. Press the down arrow to scroll to the column. ENTER PASSWORD will appear if have not already entered. Press ENTER. Four zeros will appear. Change the zeros to twos using the up arrow, and the left or right arrow, until 2 2 2 2 is across the front of the controller. This is the password. Press and hold the Enter button until the twos disappear. Using the up or down arrow, scroll through the menu until DHCP mode is scrolling across the screen. Press the Enter button. It will either show DISABLED or ENABLED. To change the status, press and hold the Enter button until the display starts blinking. Then, use the up or down arrow to change from DISABLED to ENABLED, and again press and hold the Enter button until the display stops blinking. Now, your controller is ready to be connected to your customer's network. Press the Back button until the room temperature is displayed.
For more information please visit our website ,or contact our tech support, and we would be glad to help.
Повторяем попытку...
Доступные форматы для скачивания:
Скачать видео
-
Информация по загрузке: