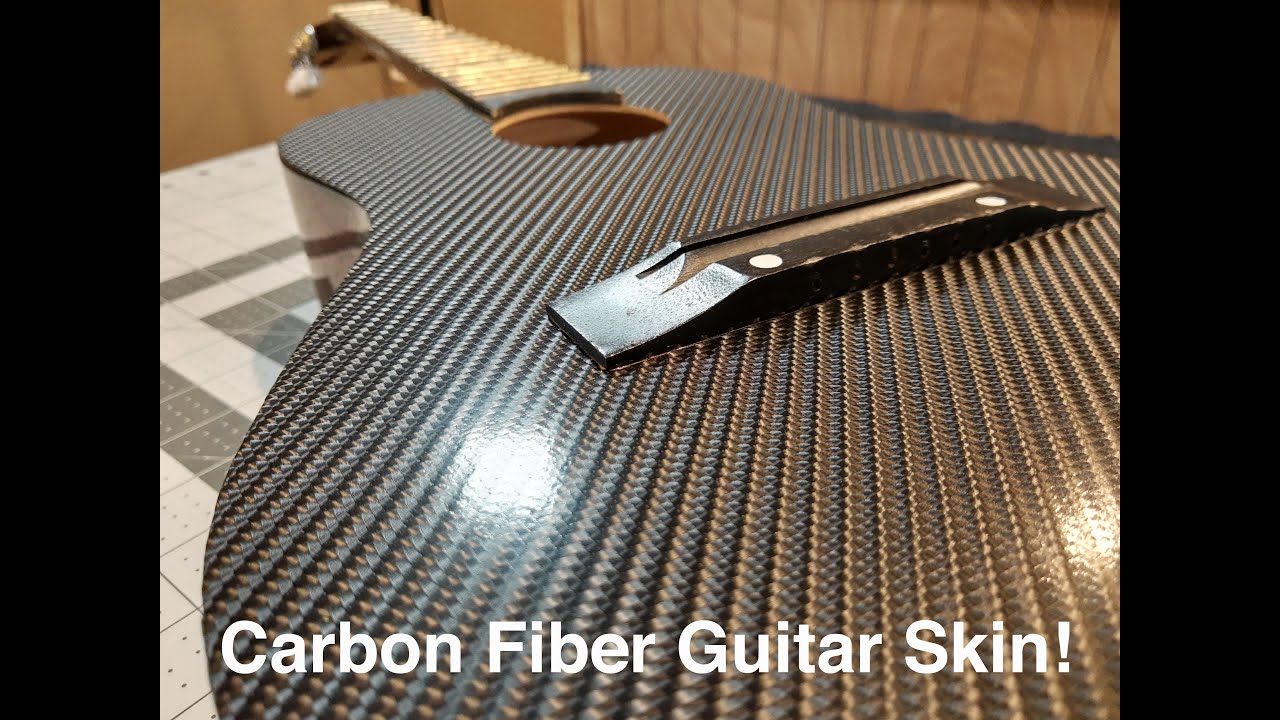
How to install Carbon Fiber Fseries Bass Neck
Автор: KLŌS Guitars
Загружено: 2024-11-20
Просмотров: 2855
Описание:
Upgrade your PRECISION BASS® or JAZZ BASS® with an extremely durable and long lasting, Carbon Fiber Bass Neck! Blending tradition with innovation, these Fseries Bass Necks by KLŌS feature 20 frets, a 9.5" fingerboard radius with beveled edges, a modern C neck profile, and stainless steel medium-jumbo frets.
Follow along with Co-Founder and Head Luthier, Ian Klōsowiak, as he walks through the steps to installing your Fseries Bass Neck at Home! We suggest watching the video in full, and making sure you understand the process before attempting to install your Neck. If you would prefer, you are welcome to send in your Bass Body to KLŌS Guitars, and we can install the Neck for you! Also, most local luthiers should be able to complete this process no problem!
Customize your own Fseries Neck on our website: https://klosguitars.com/products/carb...
List of tools:
Included:
Screws 8-32 size
Tap bit 8-32 size thread
Drill bit 9/64” diameter
Additional:
clamp
scrap blocks
long tape measure or yard stick for checking intonation
two straight edges or rulers for checking side string spacing
masking tape
rag(s)
Chapters:
0:00 - Introducing Ian Klōsowiak
0:08 - 4 String Fseries Neck Intro
0:14 - Tools included with the Neck
0:31 - Jazz Style 4 String // Specific Neck being installed
0:39 - PLEK Details
0:50 - Tools you will need (not included)
1:21 - Check and Confirm Scale Length
2:15 - Prepare for Install, Check Fit of the Neck in the Pocket
2:44 - Centering the Heel of the Neck in the Pocket (using tape)
3:23 - Clamp on the neck
4:40 - Check String Alignment
6:42 - Angle the neck to compensate for string thickness
7:39 - Tighten Clamp, Finalize Positioning
7:50 - Pre-Drilling the 4 holes / Locate Centering Point in Carbon
9:21 - Remove Clamp, move body out of the way
9:43 - Complete the drilling (4 holes in Neck)
10:32 - Drilling Tips / Depth Explained
11:29 - Swap-in Tapping Drill-Bit, Tap the 4 holes in the Neck
12:33 - Torque Settings on the Drill
14:44 - Check with the Screws
16:00 - Double Check with Screwdriver that all 4 screws fit all the way in
16:37 - Check the Depth of the Body
17:00 - Remove any access tape and place on the body
17:13 - Place Neck Plate on the back of the Body and thread screws
17:56 - Double Check all screws are tight
18:24 - Completed attaching the Neck!
18:28 - Strings and Saddle Height
18:43 - Quick Note for Adjusting Saddles, Intonation and string height
19:53 - Final Remarks with Ian
Gear - Sony A7C Camera with 18-35mm f2.8 Gmaster Lens
Tascam Clip On Mic
Повторяем попытку...

Доступные форматы для скачивания:
Скачать видео
-
Информация по загрузке: