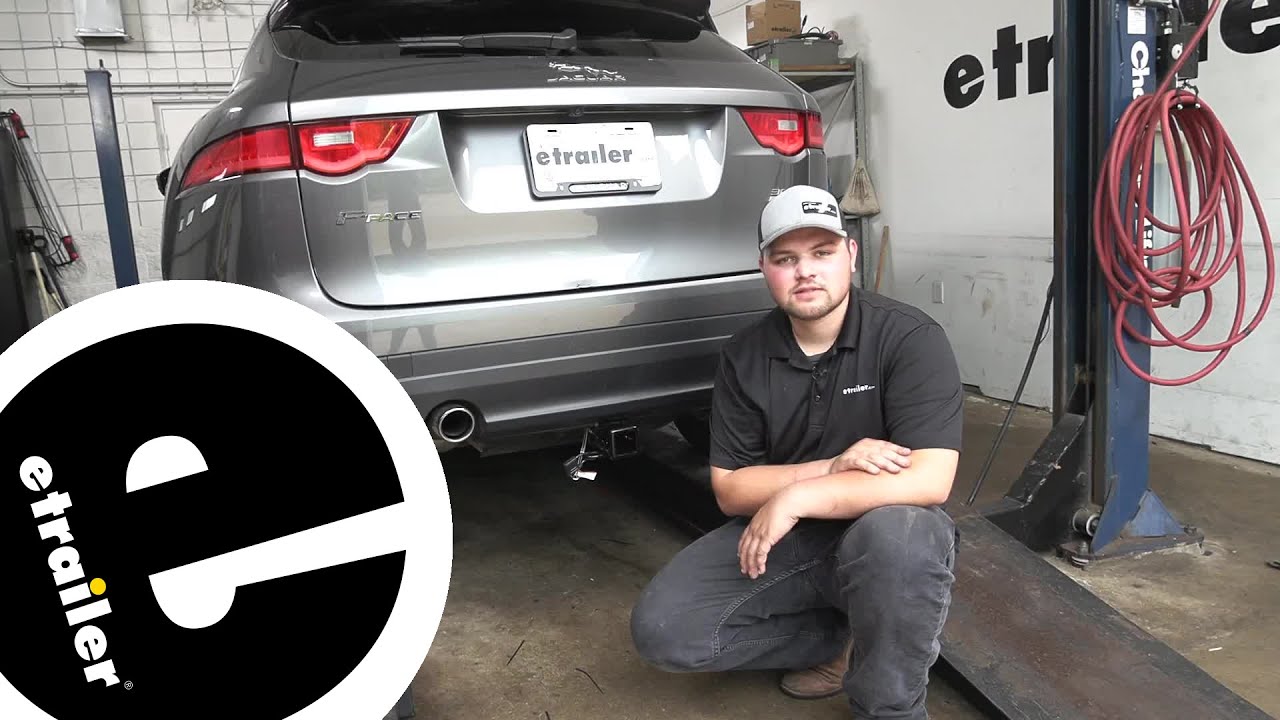
Step-By-Step Installation Tutorial for the Curt Trailer Hitch Receiver on a 2018 Jaguar F-Pace
Автор: etrailer
Загружено: 2018-12-22
Просмотров: 13416
Описание:
Click for more info and reviews of this CURT Trailer Hitch:
https://www.etrailer.com/Trailer-Hitc...
Check out some similar Trailer Hitch options:
https://www.etrailer.com/fitguide.htm
Search for other popular Jaguar F-Pace parts and accessories:
https://www.etrailer.com/vehicle/2018...
https://www.etrailer.com
Don’t forget to subscribe!
/ etrailertv
Full transcript: https://www.etrailer.com/tv-install-t...
Speaker 1: Today on our 2018 Jaguar F-Pace, we're going to be taking a look at and showing you how to install the Curt Class III Trailer Hitch Receiver, part number C13291. This is what our hitch looks like when it's installed. As you can see, the cross tube is completely hidden behind the bumper. This hitch sits nice and flush with the back of the bumper so you're not going to worry about hitting your legs on it or your shins on it when you're getting anything in and out of the vehicle.It's going to be a Class III. It's going to be 2 inch by 2 inch. Pitch pin hole's going to be 5/8" in diameter.
It's going to have ring style safety chain loops, give you plenty of room for different size safety chain hooks. Has a nice black powder coat finish to resist rust and corrosion. This is going to have a 900 pound max tongue weight which is a downward pressure on the inside of the receiver tube. It's going to have a 6,000 pound max trailer weight, which is the trailer plus the load included. Now, I do recommend checking your owner's manual to make sure your vehicle can withstand that amount of weight, and you're going to want to pick the lowest number between the hitch and the vehicle.Curt also requires the use of stabilization straps for any non-trailer loads.
One thing I like about this hitch on this vehicle is that most of it is hidden behind the bumper. It's got a nice sleek look to it. Reinforced collar gives it extra stability on the tongue, safety chain rings here give it a nice sleek look. As opposed to some hitches that are big and bulky, when they designed this hitch they had the vehicle in mind, they gave it a nice clean look.To begin our installation, we're going to remove this panel down here on the bottom of the vehicle where you have four Phillips head across the back, and you're going to have three 10-millimeter bolts along the underside. Remove the Phillips heads first.
Then we'll remove our three 10-millimeter bolts. We'll just set this panel aside.Under each wheel well, we're going to have two Phillips head screws right down before the bottom that are holding our wheel well in place. Next, we're going to peel back our wheel well liner. This wheel accent piece or fender accent piece, you'll notice five screws up here. You're going to have three Phillips head screws, and two torque's bit head screws.
We're going to have to remove those. We'll set this aside for re-installation. We're going to do the same process on the other side of the vehicle.Now, what I have determined there's actually a sixth screw that needs to be removed under each wheel well, and it's going to be right down here under this black panel. It's going to connect to this brace that goes down underneath the trunk pan. Again, it's just a Phillips head screw.Next we're going to remove this plastic panel here on the inside of the tail light. We're going to do this on each side of the vehicle. We're just going to gently pry out like that. We'll set it aside to get re-installed later. You're going to have a 10-millimeter screw. We use a 10-millimeter socket. We're going to do that same thing on the other side of the vehicle.Next we'll take a Phillips screwdriver and we'll remove the center of this. Then we're going to take a plastic trim panel tool and we're going to take this plastic piece out.Now, with an extra set of hands, we're going to remove our bumper fascia. I want you to keep in mind you have sensors that run across your bumper. On the inside you're going to have wires connected. Once you pull your bumper fascia off, you need to disconnect those wires so you don't do any damage to them. We're going to start on the outside by the fender, you're just going to gently pry out and move your way to the center of the vehicle. Here on the driver's side we're going to take a trim panel tool and we're going to pop these two connectors off to give us a little extra room to get them unplugged. You're going to pull up on this orange piece. This tab right here you want to pull up. Just pull up. This one has a little tab here on the top, just going to push down and pull apart. We'll set our fascia aside.Next thing we're going to do is we're going to remove our bumper beam. You're going to have four bolts on each side. You're going to be a 13/16 socket. We're going to take these four bolts out on both sides of the vehicle. One thing I do want to mention. You want to make sure you use a socket wrench first to lo
Повторяем попытку...

Доступные форматы для скачивания:
Скачать видео
-
Информация по загрузке: