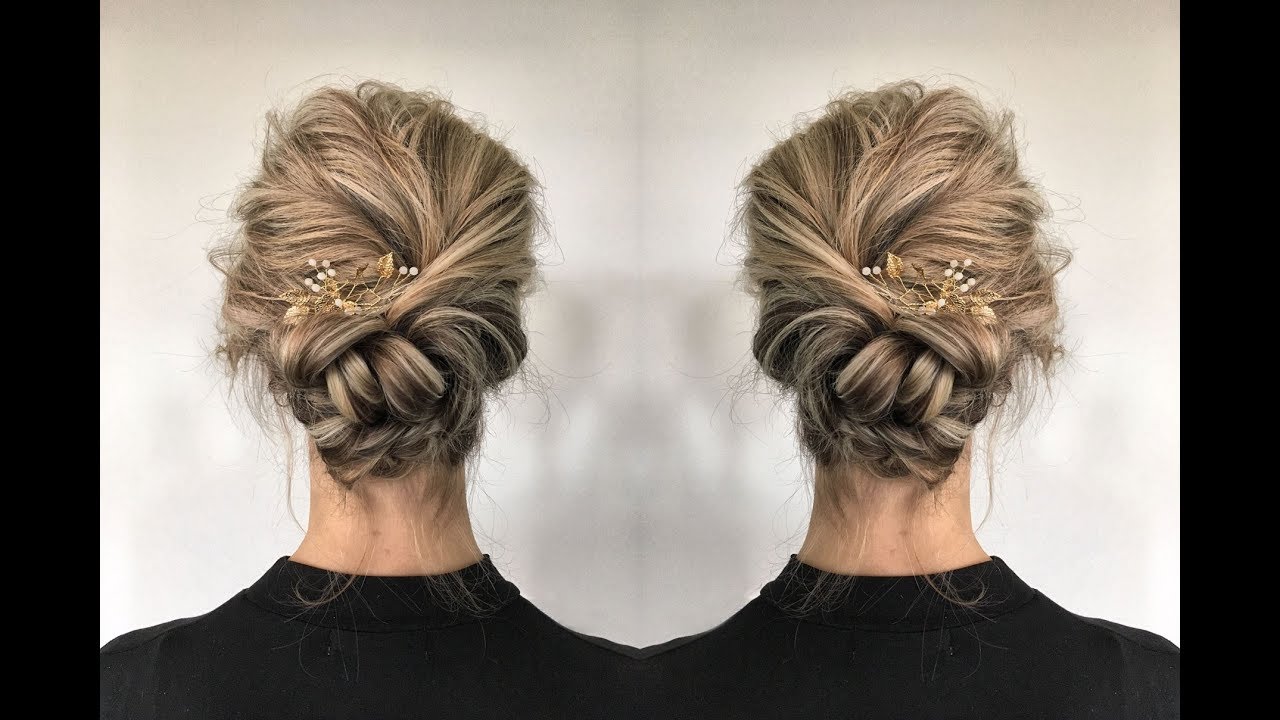
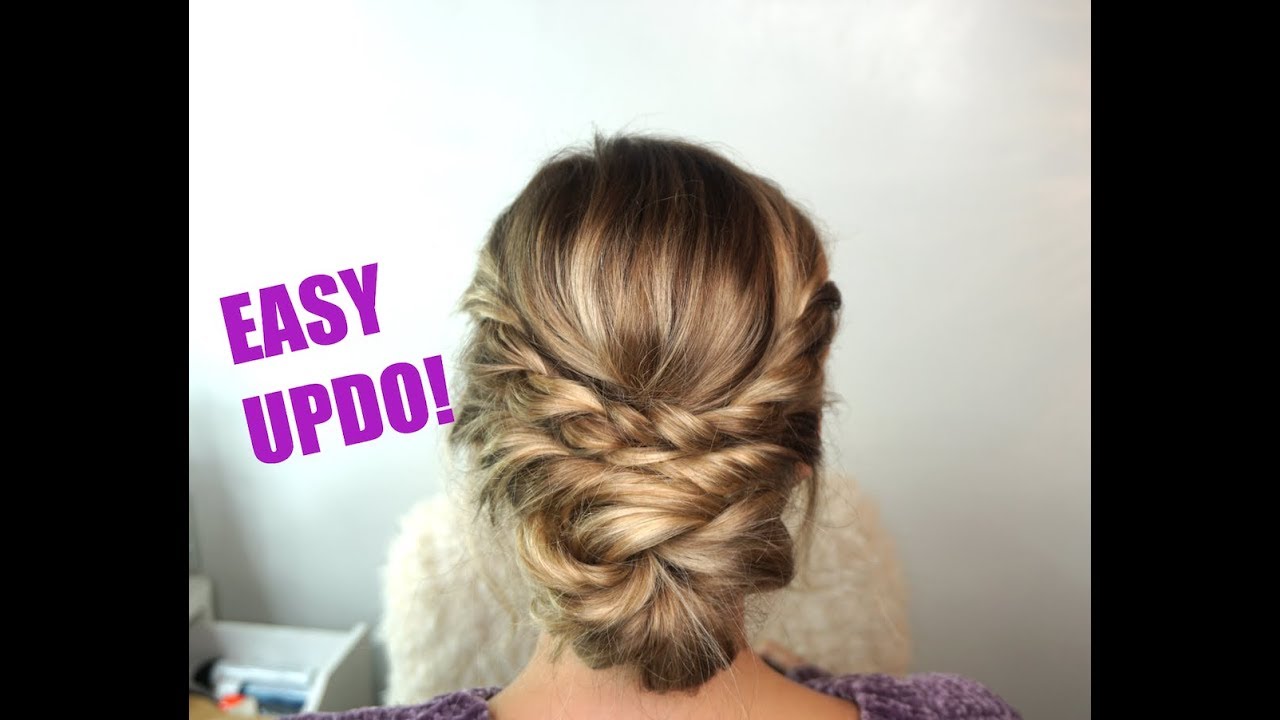
EASY BRAIDED UPDO FOR PROM!
Автор: Pretty Hair is Fun - Girls Hairstyle Tutorials
Загружено: 2016-03-21
Просмотров: 58334
Описание:
Be sure to SUBSCRIBE { https://goo.gl/CnpGtS }to our channel for all the latest videos!!
#phifeasybraidupdo Easy braid updo that looks pretty, is great for beginners, perfect for weddings, prom, homecoming, any formal occasion, or an evening out!
This gorgeous updo is SUPER easy! The word 'updo' used to give me a little stress, when girls would ask me to do their hair for their prom, homecoming, or for a wedding, etc. I would think slick, sleek hair, with big barrel curls that had to flawless, no hair out of place. The new updos though, are so simple, bohemian, romantic, and easy. The hair is forgiving, it looks right to have flyaways, and a little messy. I love it!
Try this hairstyle out for your prom, homecoming, wedding, or just whenever you want to look like you spent an hour doing your hair! You will get compliments!
TIMESTAMPS: "Intro: 0:04"; "Parting: 0:27"; "Back ponytail/bun: 0:45"; "Side curling: 2:31"; "Pinning sides: 4:44; "Finished look: 7:57"
Hairstyle Instructions:
Time: 5-15 minutes depending on pinning, curling, etc.
Difficulty level: Easy to medium
Items needed: brush/comb; I used a sea salt hairspray to add texture; lots of bobby pins matching hair color; a few elastics; curling iron (I used a 1 inch); thermal spray; hairspray; any hair decorations/accessories if desired.
~1. Part hair from forehead to crown in side or middle part. Part from crown to ears, and clip off front sections. (Spray with sea salt or texture spray if you wish).
~2. Put back section in low ponytail. Tease crown to add volume before putting in pony if desired.
~3. Split ponytail into three sections, and do a loose three strand braid. Before putting in elastic, pull braid very wide.
~4. When braid is finished, wrap it up and around base of ponytail, forming a bun. Pin in place.
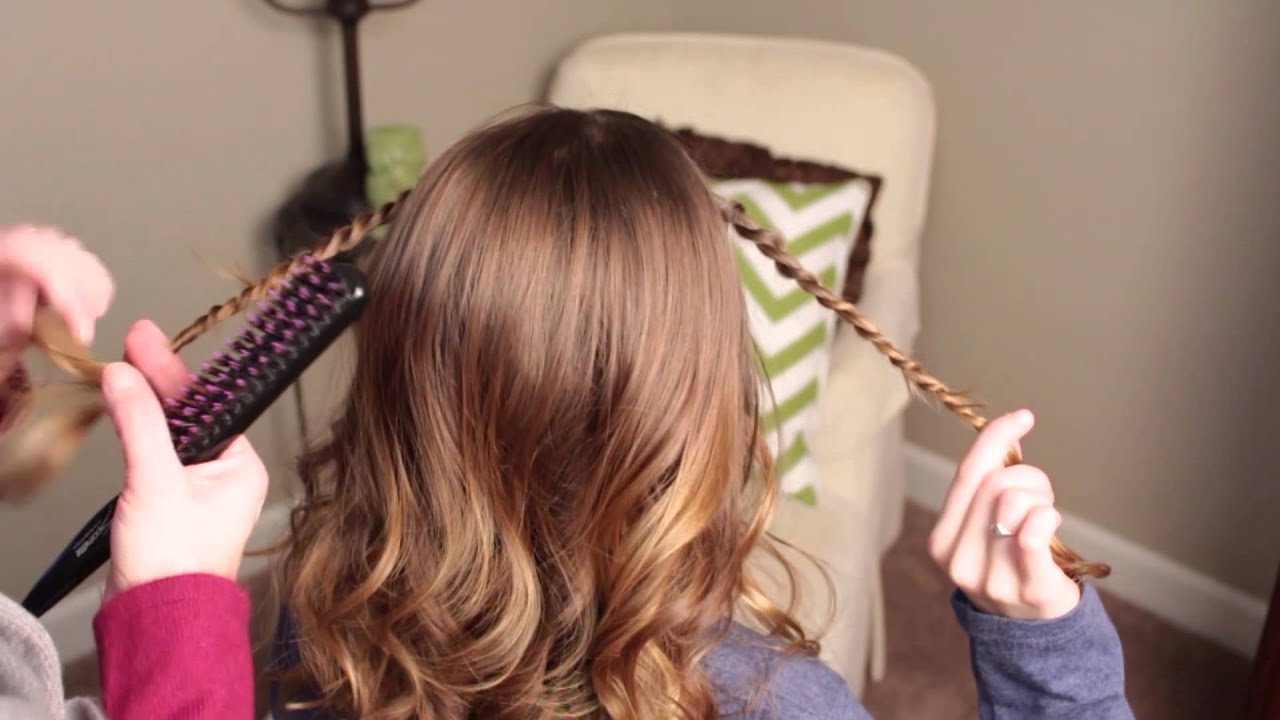
~5. Spray front sides with thermal spray. Curl these sections with curling iron, going in vertical sections from ear to forehead.
~6. When curls are cooled, begin by picking up one curled section, bringing it to the back, twisting in direction of curl, and pulling it wider, like you pull a braid wide. Drape it over the top of the braided bun, and pin on opposite side. Let curled ends hang down for now.
~7. Continue layering sides, until all sides are pinned back. You can wrap the hanging ends under the bun and pin in place, or twist them up and pin to hide holes, etc.
~8. Adjust hair/pins where necessary, add in hair accessories, and you are done!
The video listed at the end of our video can be viewed here: • DIY: Easter Egg Decoration Ideas | Pretty ...
Check us out at www.prettyhairisfun.com;
Join our Email List: http://www.prettyhairisfun.com/join-o... Facebook at http://www.prettyhairisfun.com/facebook
Pinterest: / shaunellshair
Twitter / shaunellshair
Instagram: http://www.prettyhairisfun.com/instagram
And be sure to SUBSCRIBE (https://www.youtube.com/feed/subscrip...) to our channel for all the latest videos!!
Royalty Free Music by http://www.audiomicro.com/royalty-fre...
Category
Howto & Style
License
Creative Commons Attribution license (reuse allowed)
Remix this video
Повторяем попытку...

Доступные форматы для скачивания:
Скачать видео
-
Информация по загрузке: