Crisp &fluffy Cream cheese butter cookie|芝士黄油曲奇,蓬松酥脆不油腻,没有裱花嘴轻松做/奶油奶酪饼干/牛油起司曲奇【阿栗食譜48】
Автор: Ali's kitchen 阿栗的厨房
Загружено: 2021-09-11
Просмотров: 1999
Описание:
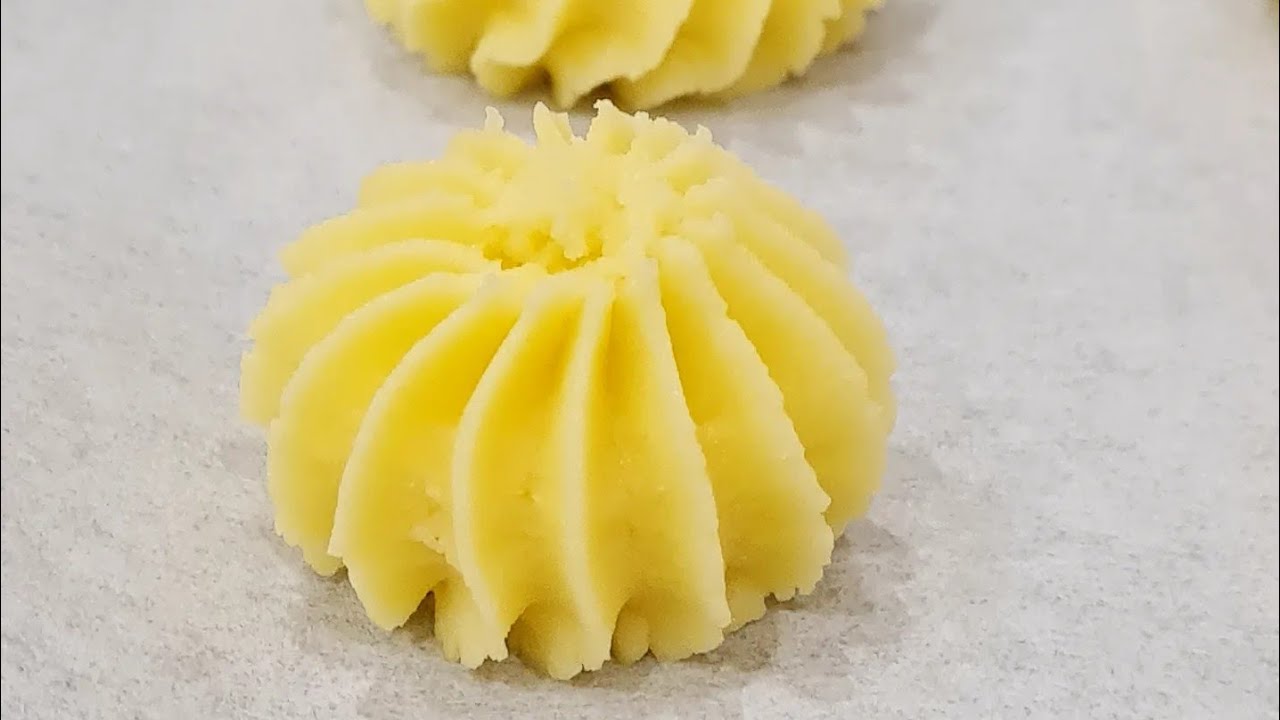
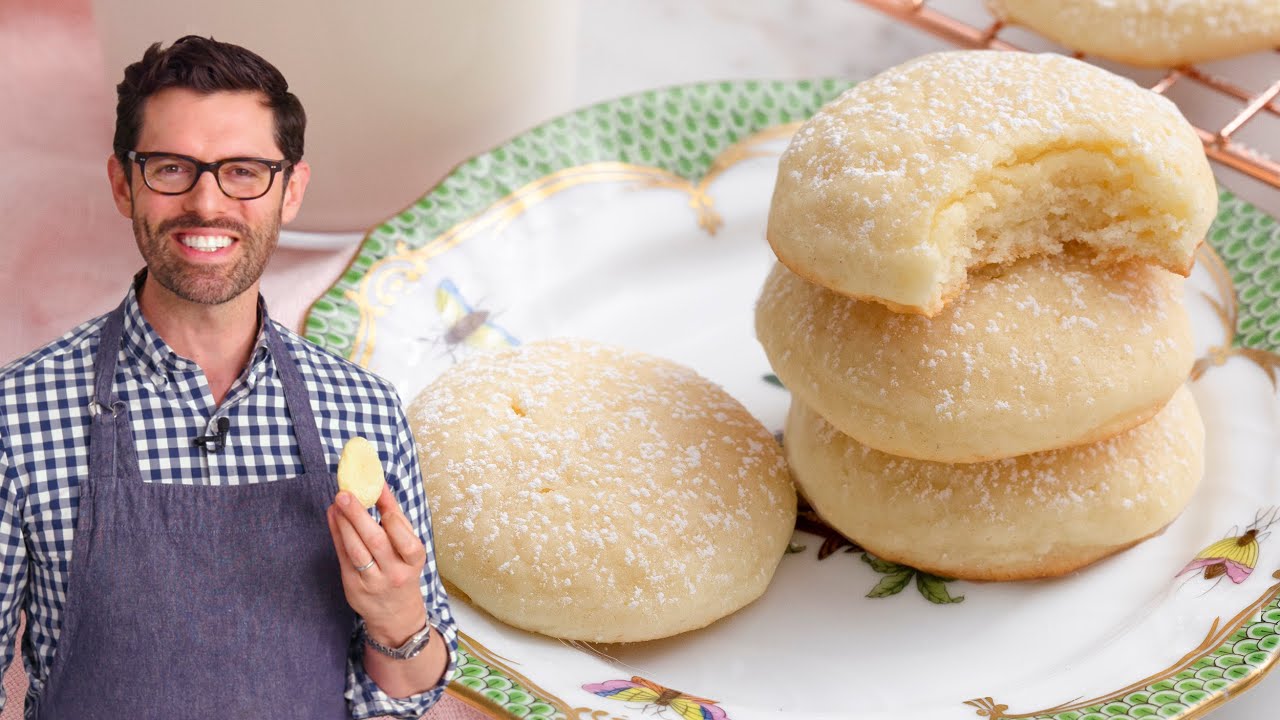
Cream Cheese Cookie
This cream cheese cookie is very fluffy and crispy, full of the aroma of cheese, and this cookie is fast to make.
In my recipe, I mixed some vegetable oil into the butter ad cream cheese, so it will taste less oily than the cookies made by butter only.
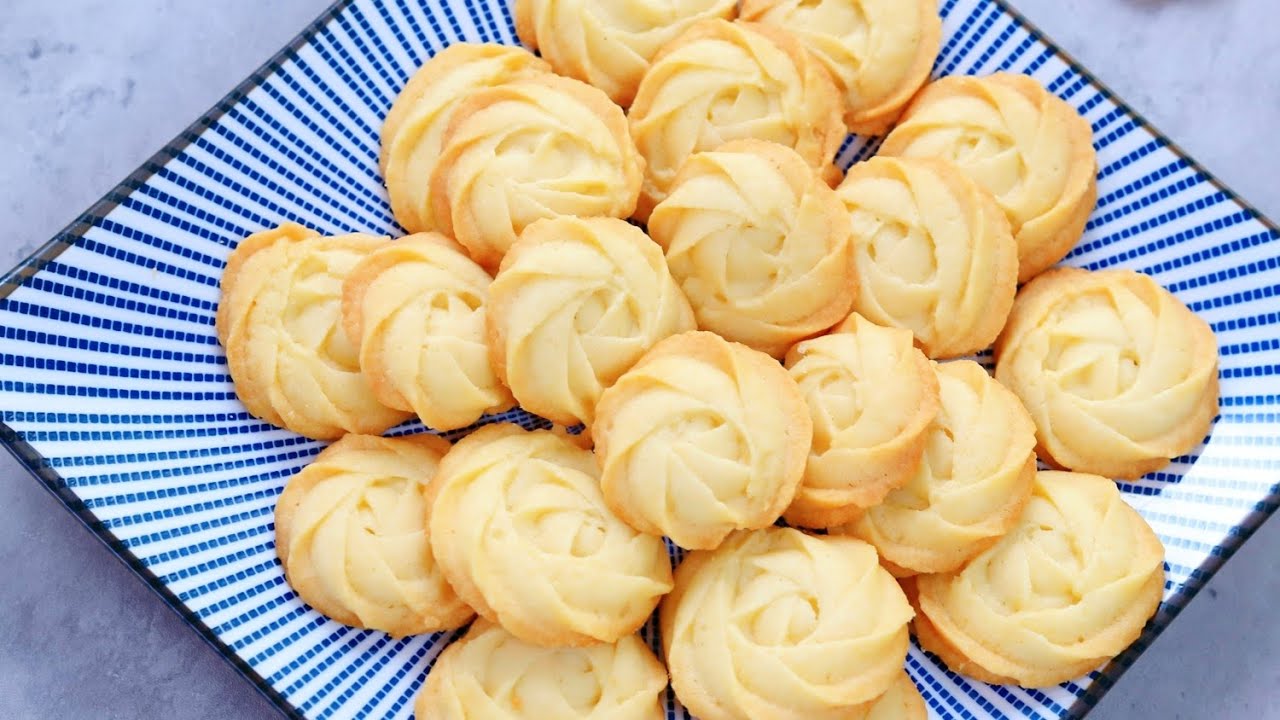
You can make beautiful cookies without piping tips in this recipe.
Seal them after you are done with baking, you can send them out as a gift for friends, , dessert for family life and party, and it’s a healthy snack for children.
Thanks for watching Ali’s Kitchen!
If you like my channel,please like and share
And SUBSCRIBE
Don’t forget to turn on the little bell for reminding so you won’t miss my updates every week
Recipe:
Unsalted Butter (Softened ) 80g
Corn oil 30g (or Light-tasting cooking oil)
Cheese cream(softened) 80g
Caster sugar 80g
Salt 1g
Egg*1(55~65克with the shell)
Cake flour 180g
Corn starch 20g
*The baking temperature varies according to the different shapes and sizes of the cookies.
Middle or Lower-middle rack of oven.
Reference temperature:
1. Heart-shaped cookies
Bake at 160°C for 5 minutes to set shape, turn to 150°C and bake for 15-17 minutes
2. Thick strip cookies, flakes (0.5~0.8 cm thick)
Bake at 160°C for 5 minutes, then turn to 150° and bake for 20-25 minutes.
3. Flaky (0.5~0.8 cm thick)
Bake at 160°C for 5 minutes, then turn to 150° and bake for 25 to 35 minutes.
Tips:
1、Soften the butter and cream cheese to the condition that you can easily break its shape with silicon spatula.
2、The container for mixing the butter should be clean, which mean NO WATER in this case. If there is water, it will effect the mixing result, and sometimes you can’t even get a mixing result in this condition.
3、After you add in the egg liquid per time, you must mix until the cream and the egg liquid are fully mixed, the you can add the egg for another time.
4、After you add in the flour, don’t mix it in circular motion, gently flip them and mix it in horizontal or vertical way only.
5、The cookie mixture will not used instantly after you are done with mixing, or the cookies that squeezed out don’t have to put for baking instantly. You can put it in the refrigerator first , don’t put them outside of the room because the high temperature may melt the oil inside the cookie.
6、After your cookie is done and cooled, seal them immediately for preservation, so it will keep crispy.
奶油奶酪曲奇
这款芝士黄油曲奇,蓬松香酥,有浓浓的芝士味,制作起来非常快手的曲奇。
我的食谱里,用到了一部份植物油加入到黄油,奶油奶酪中,口感更加清爽,不会有纯黄油曲奇的油腻感。
这个食谱中,没有用裱花嘴,也能做出很漂亮的曲奇。
烤好后密封保存,既可以作为送朋友的礼物,也可以家庭甜点,聚会甜点,还是很健康营养的儿童零食。
谢谢收看Ali’s Kitchen 阿栗的厨房!
喜欢请记得点赞,分享
订阅我的频道
并打开小铃铛提醒
您就不会错过我的每周更新
食谱:
无盐黄油(软化) 80克
玉米油30克
奶油奶酪(软化)80克
细砂糖80克
盐1克
鸡蛋1个(带壳55~65克)
低筋面粉180克
玉米淀粉20克
*烘焙温度根据曲奇不同的形状,大小,有所不同。
家用烤箱中下层,或者中层
参考温度:
1、心形曲奇
160°C 先烤5分钟定型,转150°C 烤15~17分钟
2、粗条形曲奇,片状(0.5~0.8厘米厚)
160°C 先烤5分钟定型,转150°烤20~25分钟。
3、片状(0.5~0.8厘米厚)
160°C 先烤5分钟定型,转150°烤25~35分钟。
Tips:
1、黄油,奶油奶酪,一定请先软化到可以用橡皮刮刀轻松拨开的程度。
2、搅打黄油的盆,一定是需要无水的盆。如果有水会影响黄油打发,甚至不能打发。
3、每次添加蛋液后,都搅打到蛋液和奶油糊完全融合,再加入下一次。
4、加入面粉后,请不要划圈搅拌面糊,轻柔翻拌和切拌匀就好。
5、拌好的面糊还不用,或者挤好花的曲奇暂时不烤,可以先放冰箱冷藏,不要放室外防止温度过高油脂融化。
6、曲奇烤好后放凉,立即密封保存,以防受潮。
Повторяем попытку...

Доступные форматы для скачивания:
Скачать видео
-
Информация по загрузке:


![【腰果曲奇🍪】大熱手信!腰果其實係咩黎?Cashew Nut Cookies [Eng Sub]](https://imager.clipsaver.ru/vFDhWDaLxAc/max.jpg)


