How to Embroider: the Raised Cup Stitch - Embroidery Video Tutorial
Автор: Melissa at MCreativeJ
Загружено: 2024-10-15
Просмотров: 1284
Описание:
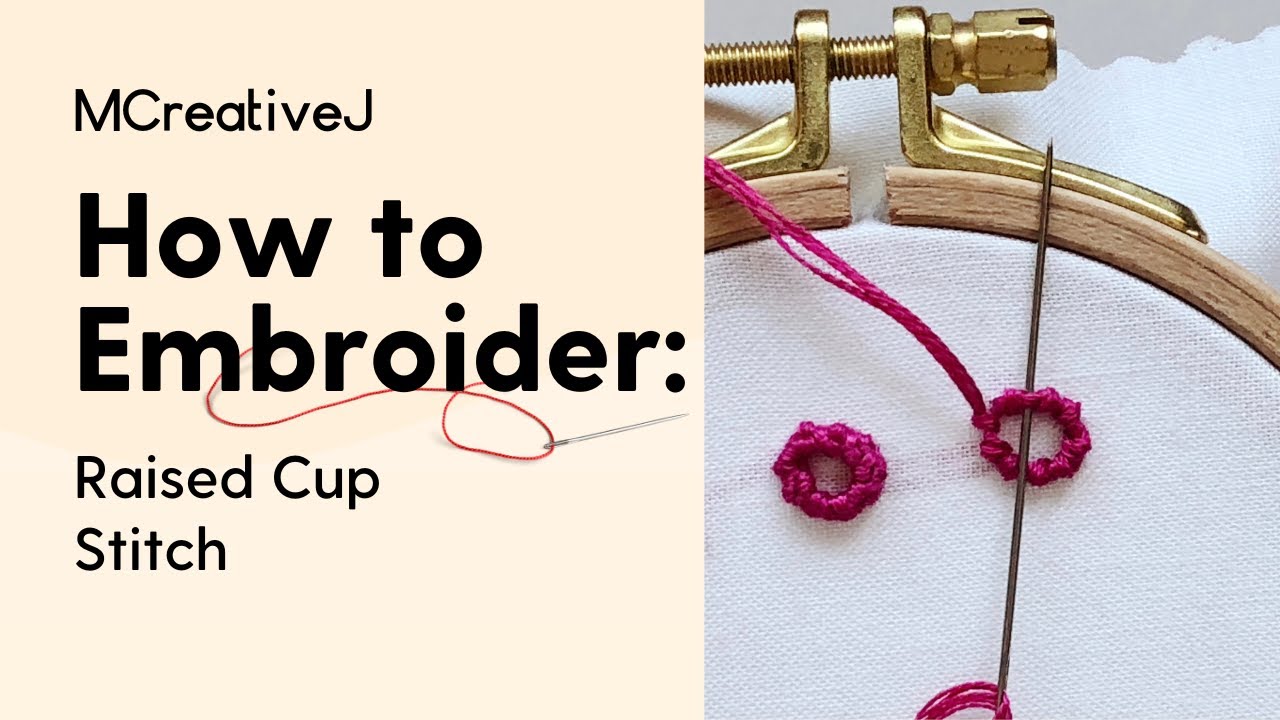
The raised cup stitch is a 3D embroidery stitch that is worked on the front of the fabric. It is considered pop up or Brazilian embroidery.
To start the raised cup stitch, outline the circle with the back stitch. These stitches should be short because they're the base and anchor of the raised cup stitch. Next, bring the needle up on the the outside of the circle, parallel to the last back stitch created. Working from the inside of the circle, slide the needle underneath the back stitch and wrap the working thread around the needle, going over and under it. Then pull the needle through and tug the wrap flush with the fabric. Move on to the next back stitch, and work all the way around the circle. To add the next row of the raised cup, slide the needle underneath the bar of thread between the two knot wraps, then wrap the thread around the needle as before. Continue working around the circle adding as many rows as you'd like. To finish the raised cup stitch, create the last stitch in the circle, then bring the needle back down through the fabric on the inside of the circle, next to the last stitch.
For more hand embroidery tips, projects, kits and patterns, visit mcreativej.com
Повторяем попытку...
Доступные форматы для скачивания:
Скачать видео
-
Информация по загрузке:


![[프랑스자수 ] 7가지 입체꽃자수 7 3D Flower Embroidery](https://imager.clipsaver.ru/HoRBnmM0690/max.jpg)


