Cloud Based Canadian Payroll Overview with eNETEmployer
Автор: CanPay Payroll Services
Загружено: 2016-07-29
Просмотров: 2101
Описание:
This lesson provides a complete overview of the eNETEmployer payroll process from start to finish. It begins with the company and payroll setup, and continues through to earnings, deductions, benefits, and much more. The lesson concludes with a payroll calculation and shows you how to create a Payroll Register report along with an EFT file that is used to pay employees via Direct deposit.
For detailed On-line Help about this feature, visit:
• http://enetemployer.com/help/menu/how...
This lesson provides a complete overview of the eNETEmployer payroll process from start to finish. It begins with the company and payroll setup, and continues through to earnings, deductions, benefits, and much more. The lesson concludes with a payroll calculation and shows you how to create a Payroll Register report along with an EFT file that is used to pay employees via Direct deposit.
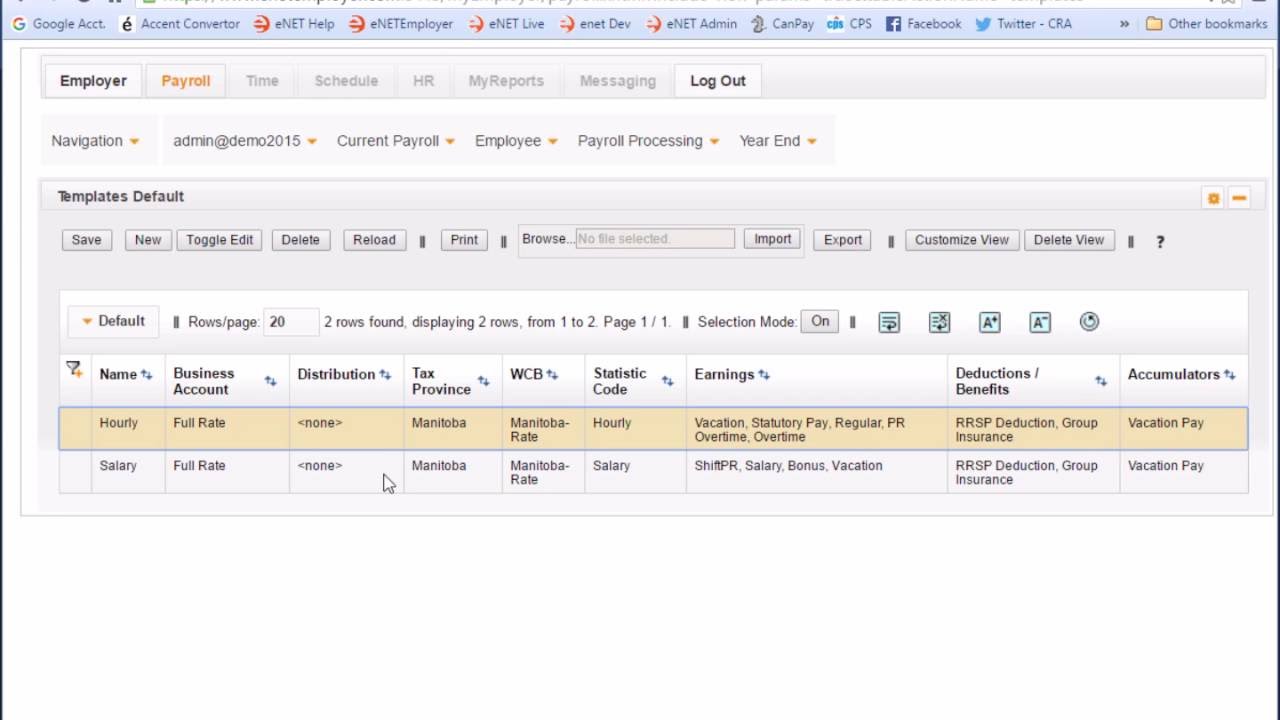
User Interface - All eNETEmployer program screens contain a series of tabs, menus and buttons. The top most row of each screen is entitled "the Tab Bar", with each tab providing access to a different module in the program. Active tabs are designated by the Orange color. The row just below each tab show is called the Menu Bar. Each of these menu options are contextual and will be different, depending on the tab that you currently viewing.
The Employer tab contains menu commands that allow you to work with employer-related tasks at a global (company) level. Some of the options defined here will be applied to all company payrolls, while other options are of an administrative nature.
The Payroll tab is the main section of the program that provides options for working with actual payroll and its corresponding employees. As part of the task of defining our payroll, we must move logically through this menu from top to bottom, and enter the data for each screen in the order shown in each menu.
The Payroll Tab's Employee menu provides options for working with employee-specific tasks such as entering their work hours, and managing their individual earnings, deductions, accumulators and more.
The Setup Employee screen is where it all begins. The screen is used to define the detailed payroll, tax, payment and all other settings required for each individual employee in the payroll. Each row represents a distinct employee and can be edited as needed.
Now that we've reviewed our company, payroll and employee details, it's time to process the payroll.
We begin by choosing the Payroll Processing - Speedy Update menu command. This screen provides a quick method of entering the hours that your employees have worked for the pay period. Once the data entry is complete, we can calculate the payroll and then verify our pay hours and rates.
To do so, choose the Payroll Processing - Calculations menu command to open the Calculations screen where we can define the required settings for performing our calculations for the current payroll.
Before calculating any pay run, it's important to review the Start Date, End Date and Pay Date - which is often referred to as the "Cheque Date".
Once these are confirmed, choose the Calculate button to process the payroll. Notice that the Status column now indicates that the payroll has been calculated.
Use the Generate Report button to create an Interim Payroll Register is generated so that you can review the payroll.
Now as is the case before closing any payroll, we must first create a Backup file by choosing the Backup button.
Once the backup is complete, finalize the payroll by choosing the Close button.
This completes the payroll processing step! We can now run our reports as needed to complete the pay cycle. Choose the Payroll Processing - Reports menu command and when the screen appears, click on the drop down list that appears beside the New button.
Choose the Pay statements with Cheques option and then select the New button to insert a report row into the table. Modify the settings as needed, then select the Generate Report button.
When the report is ready, review the Pay Statement data for each of the employees.
To close off the lesson, create the EFT file that will be used by the company's bank in order to process the individual employee payments. To do so, choose the Generate EFT's option from the drop down list, and then select the New button to insert the report row Once the row appears, choose the Generate Report button to create EFT file. The resulting EFT file can now be transmitted to the company's bank for final processing.
Повторяем попытку...
Доступные форматы для скачивания:
Скачать видео
-
Информация по загрузке: