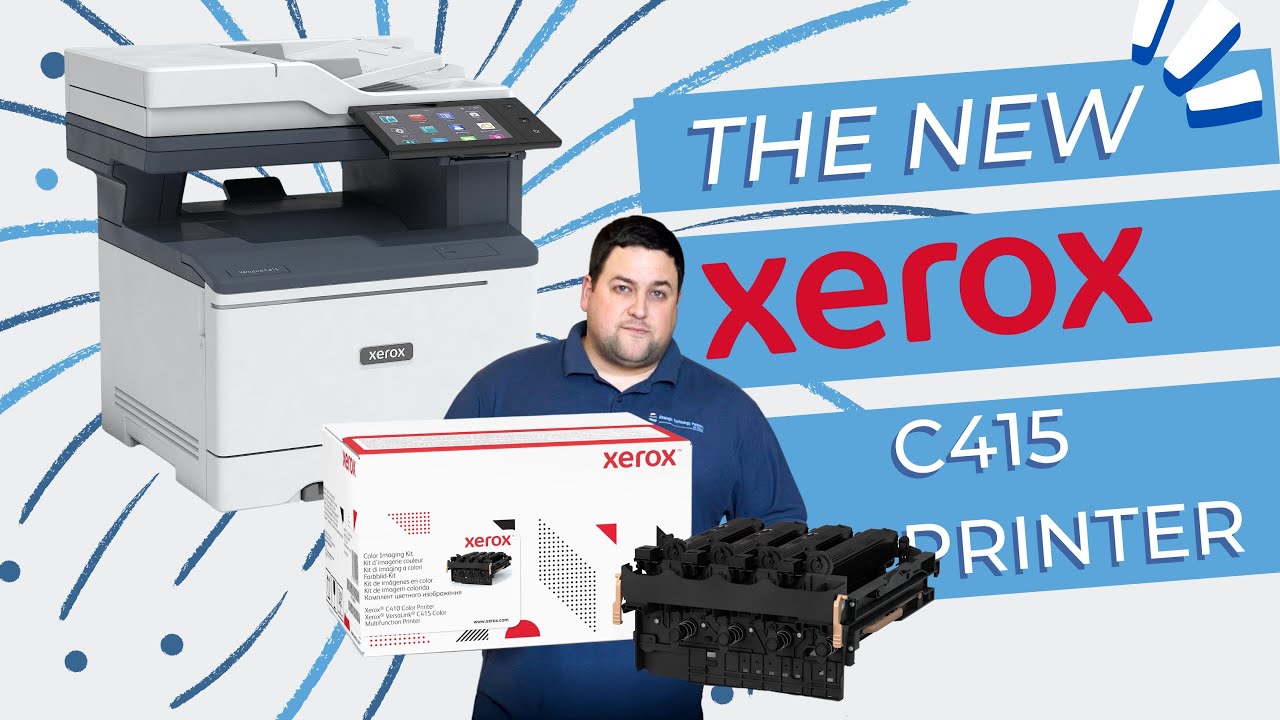
How to replace the (black only) imaging units on your Xerox machine: New C410, C415
Автор: The Printing Workshop
Загружено: 2024-02-09
Просмотров: 838
Описание:
Matthew here with another "How to: Quick printer fixes". Most people think replacing the imaging unit is a hassle, but it only takes a few minutes. In this video, I show you how to quickly change the imaging unit on several different Xerox printer modules so you can be back in business. Have a Problem With Your Printer/Copier that is not a quick fix? Reach out here and we can help!
https://info.stptexas.com/request-a-s...
0:00 Intro imaging unit replacement
0:16 Step 1: Open front cover
0:20 Step 2: Open B cover
0:28 Step 3: Push both orange buttons to remove white cover
0:47 Step 4: Push both orange buttons above the waste toner bottle
0:57 Step 5: Push up on orange handle to remove toners
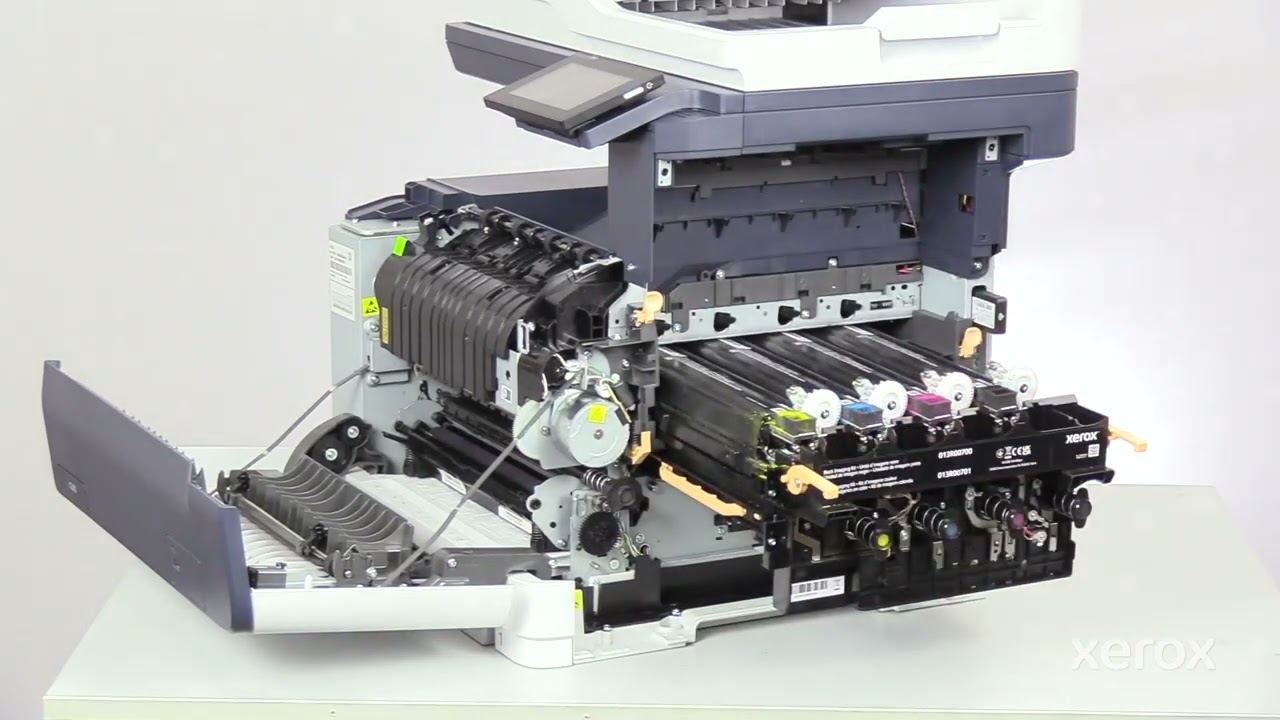
1:14 Step 6: Lift up both orange handles and pull imaging units till it stops
1:35 Step 7: Push orange button on right handle to completely remove imaging units
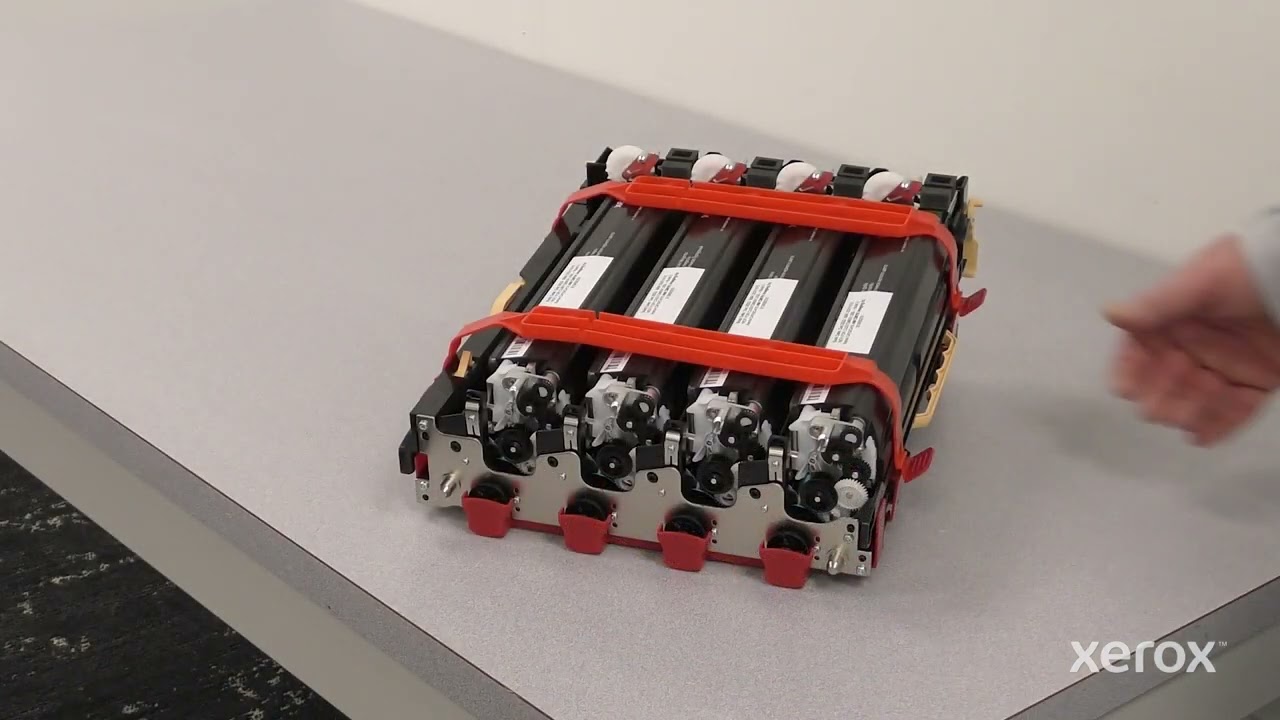
2:00 Step 8: Remove color developer units
2:28 Step 9: Re-insert old color developer units into new black imaging unit kit
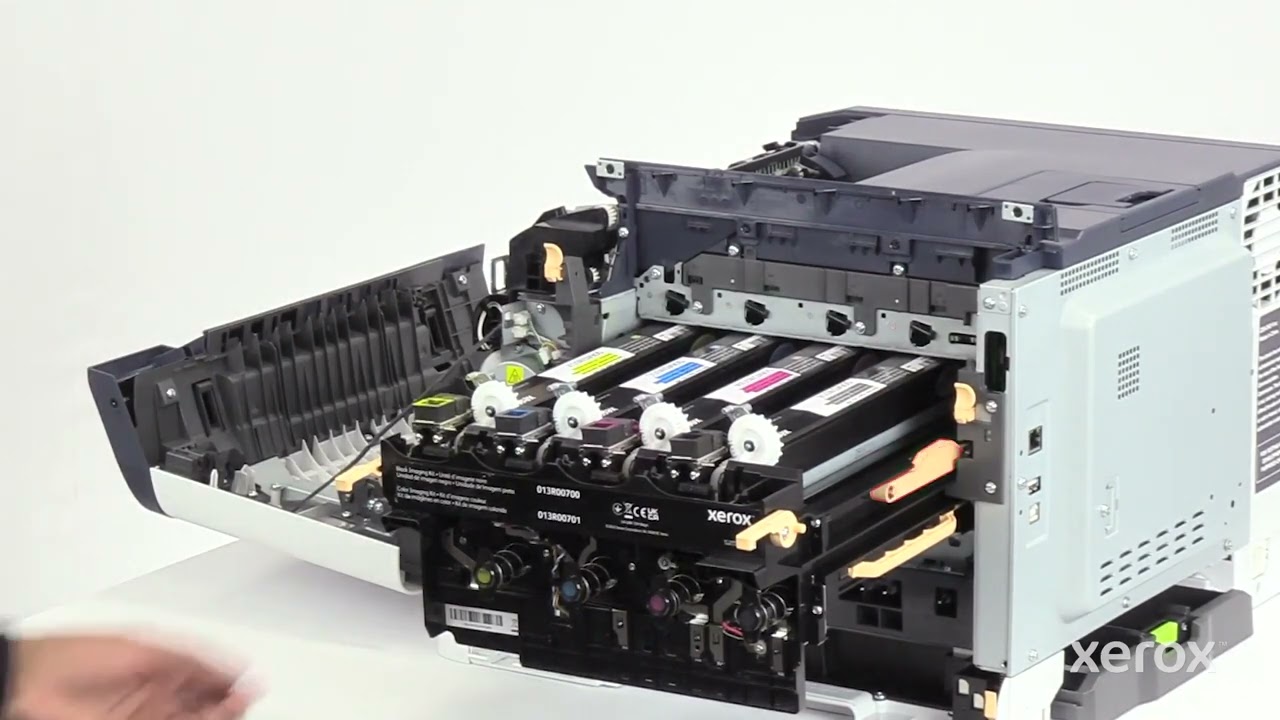
2:50 Step 10: Insert new imaging unit till right side clicks
2:58 Step 11: Use orange handles to push imaging unit in place and then lock
3:18 Step 12: Re-insert toners
3:22 Step 13: Re-insert waste toner bottle
3:49 Step 14: Re-install white cover
4:01 Step 15: Close B cover
4:04 Step 16: Close front cover
Повторяем попытку...

Доступные форматы для скачивания:
Скачать видео
-
Информация по загрузке: