Converting the Nikon D3200 Digital Camera to Full Spectrum for Vanessa Narrated. Disassembly Guide
Автор: FullSpectrumuk
Загружено: 2025-03-04
Просмотров: 1457
Описание:
Free image processing tool for creating pink foliage from 590 nm infrared images:
https://fullspectrumuk.com/apps/590pink/
Get cameras like this one here https://www.fullspectrumuk.com/shop1/...
If you are in the EU or UK, we can convert your camera.
Digital Camera Conversions to IR, Full Spectrum, or Astro:
https://www.fullspectrumuk.com/shop1/...
Converted Infrared Cameras for Sale:
https://www.fullspectrumuk.com/shop1/...
Converted Astro Cameras for Sale:
https://www.fullspectrumuk.com/shop1/...
Full Spectrum Converted Cameras:
https://www.fullspectrumuk.com/shop1/...
If you live in the USA, KolariVision is your local camera conversion service:
https://kolarivision.com/product-cate...
KolariVision Converted Cameras:
https://kolarivision.com/product-cate...
Infrared Photography Tools
CLiR Infrared Photography Mastery – Complete IR Course and Software:
https://kolarivision.com/product/clir...
KolariVision IR Chrome Lens Filter:
https://kolarivision.com/product/kola...
Download the free Infrared Photography eBook here:
https://www.fullspectrumuk.com/infrar...
Getting Started with Your Converted Infrared or Full-Spectrum Camera by Rob Shea:
https://www.fullspectrumuk.com/gettin...
Our Blog:
https://www.fullspectrumuk.com
Our Shop:
https://www.fullspectrumuk.com/shop1
Our Instagram:
/ fullspectrumuk.com_
Our Facebook:
/ fullspectrumuk
Converting the Nikon D3200 Digital Camera to Full Spectrum for Vanessa
This time, we will convert this Nikon to a full-spectrum camera. Remove the battery and memory card.
Unscrew all exterior screws. The screws are not the same, so it's better to create a screw map on the table. This will make reassembly much easier.
One hidden screw is underneath the rubber on the back panel.
Unscrew the screws in the battery compartment.
Separate the grip rubber and unscrew the hidden screws.
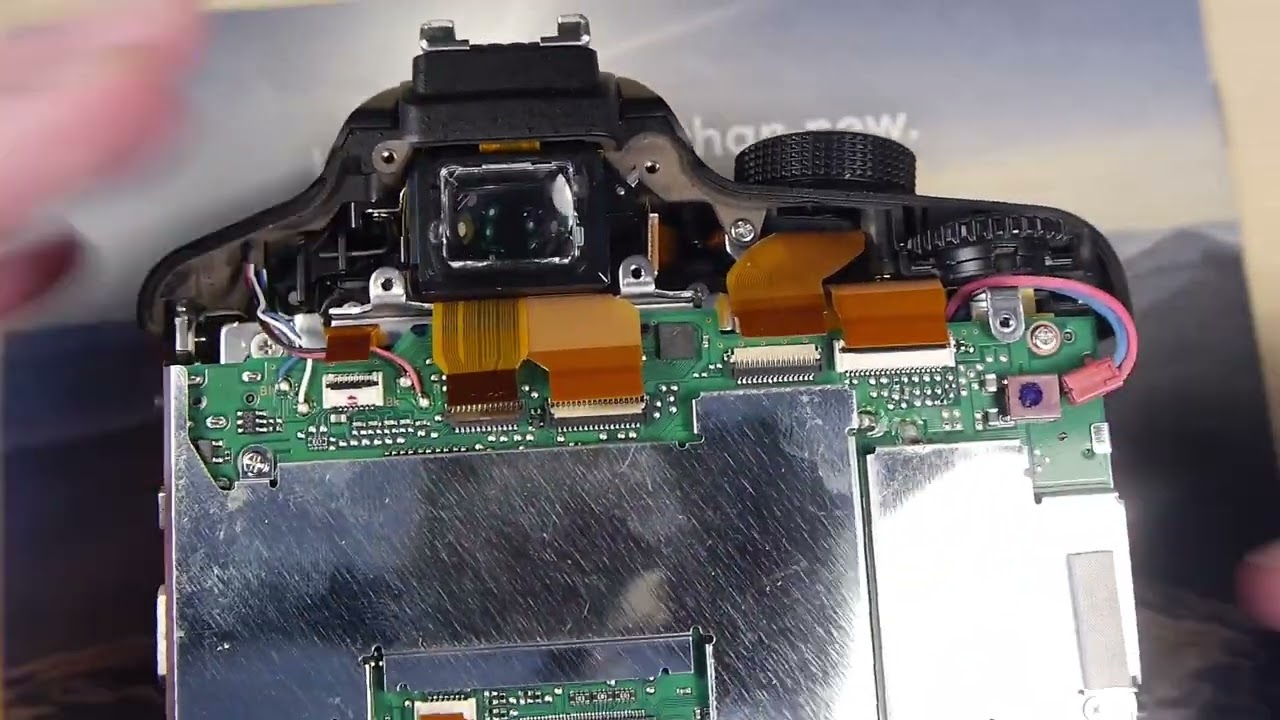
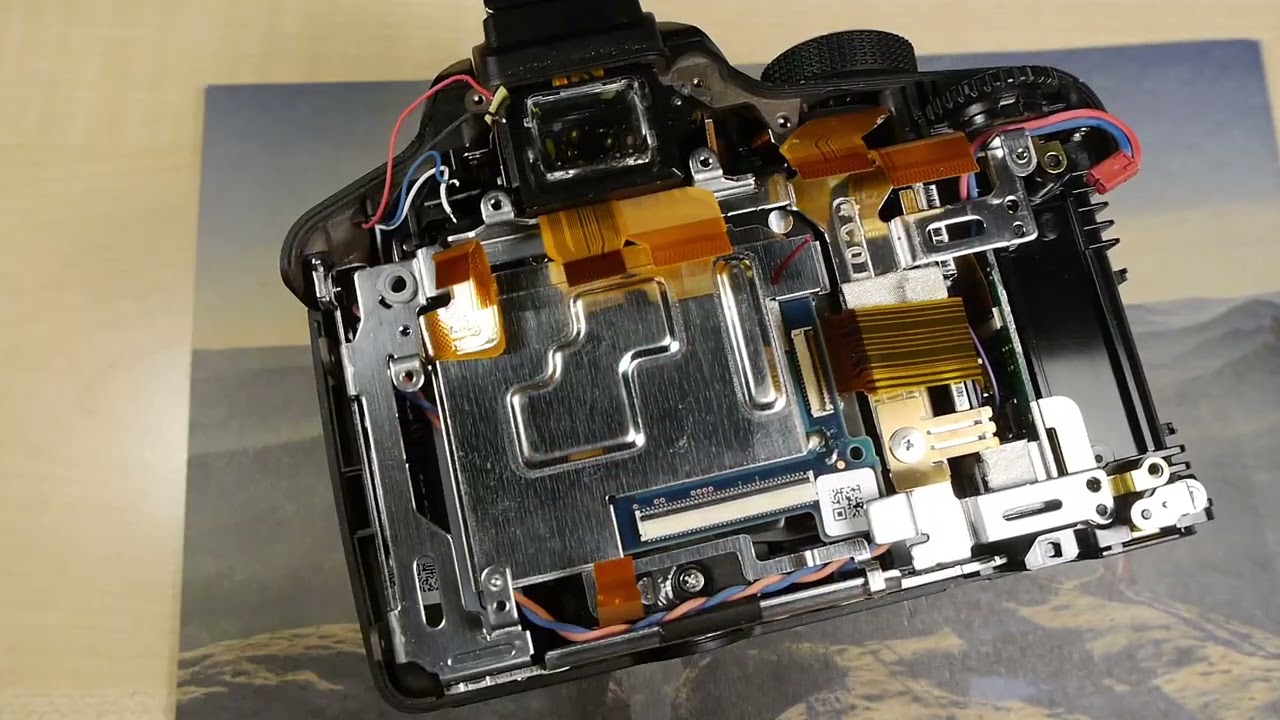
Now, carefully separate the back panel, disconnect one ribbon cable, and remove the back panel.
Disconnect all the ribbon cables.
Desolder the four wires. If you don’t remember where each wire goes, there are markings on the mainboard.
Unscrew the mainboard screws.
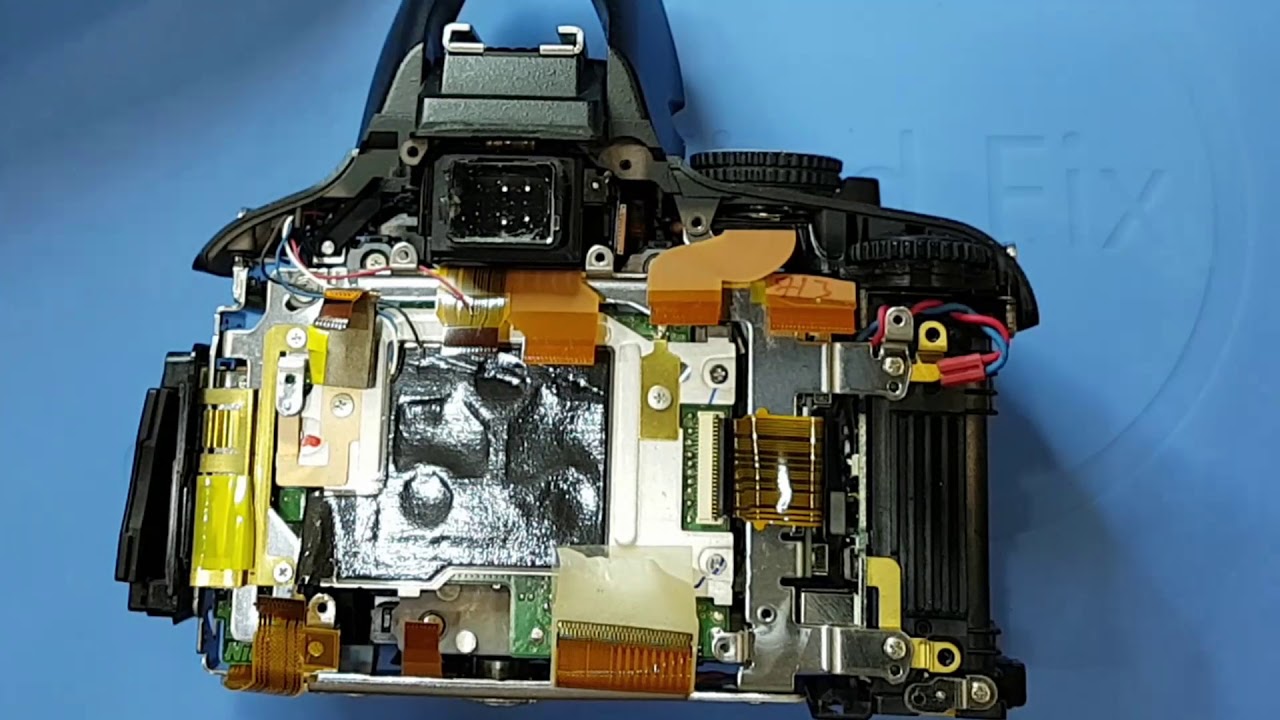
Detach the sensor’s grounding tape.
Disconnect the ribbon cable and unscrew the silver plate screws.
Pop out the silver frame and move it slightly. You need to access and unscrew two screws.
Now, you can remove the silver frame.
Unscrew the sensor screws.
There will be a few shims. Do not lose them.
Desolder the ultrasonic resonator from the sensor.
Unscrew the four screws.
Remove the filter and quickly place the sensor back into the camera.
Measure the thickness of the three shims. If they are not the same thickness, you will need to use an additional shim or adjust the existing ones for compensation.
In this case, all shims were the same thickness. I discarded them because we need to shift the sensor forward anyway.
Now, reassemble the camera.
The conversion is complete.
Повторяем попытку...
Доступные форматы для скачивания:
Скачать видео
-
Информация по загрузке:


![Эффект Джанибекова [Veritasium]](https://imager.clipsaver.ru/N9HlQ-XVnFk/max.jpg)