etrailer | How to Install the Draw-Tite Max-Frame Trailer Hitch Receiver on a 2018 Land Rover Velar
Автор: etrailer
Загружено: 2021-09-01
Просмотров: 3311
Описание:
Click for more info and reviews of this Draw-Tite Trailer Hitch:
https://www.etrailer.com/Trailer-Hitc...
Check out some similar Trailer Hitch options:
https://www.etrailer.com/fitguide.htm
Search for other popular Land Rover Velar parts and accessories:
https://www.etrailer.com/vehicle/2018...
https://www.etrailer.com
Don’t forget to subscribe!
/ etrailertv
Full transcript: https://www.etrailer.com/tv-install-t...
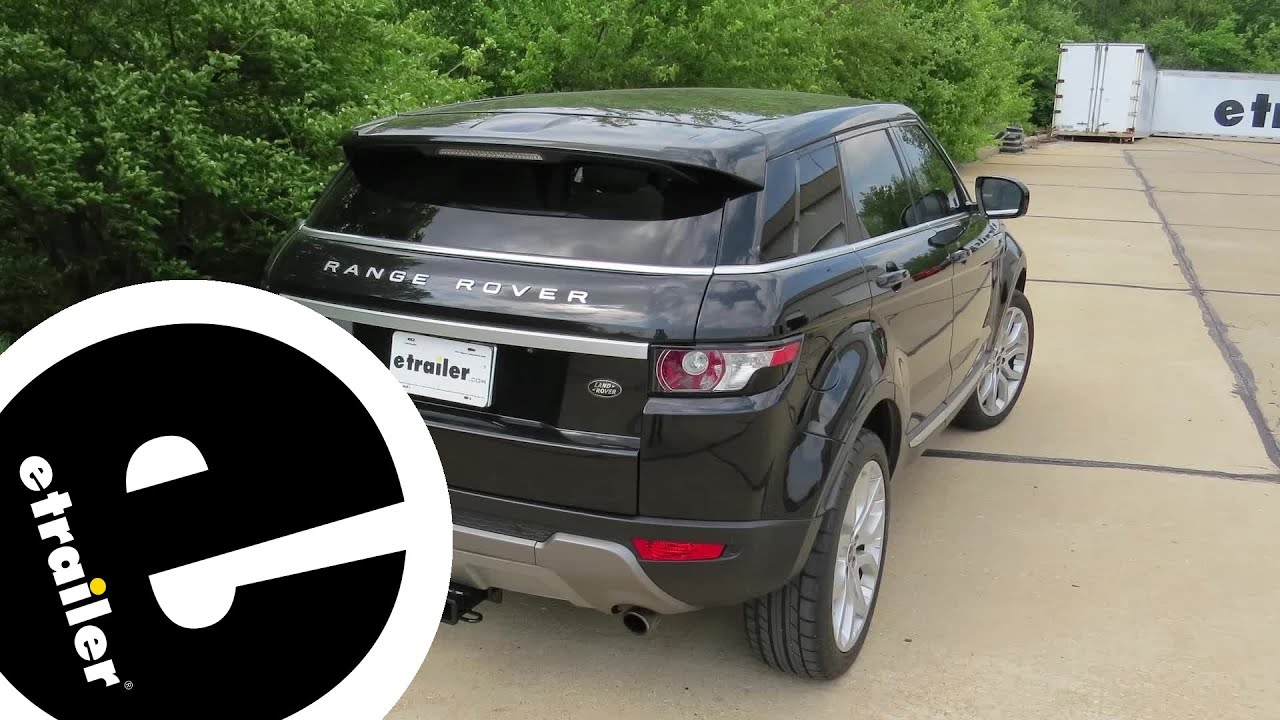
Today on our 2018 Land Rover Range Rover Velar, we're gonna be taking a look at and showing you how to install the Draw-Tite's Class 3 2-inch trailer hitch receiver. And this is what our hitch looks like when it's installed. That's right, it's completely hidden behind the fascia so you're not gonna be able to see it whatsoever when you're not using it. So you can maintain that complete factory look. When you already to use it, the panel here at the back is removable. We can simply loosen up the fasteners on bottom and that'll drop out of the way, revealing our hitch behind it.
This hitch is a class 3 2-inch by 2-inch receiver, so it's gonna be great for all of your towing needs, whether you're wanting to get some work done with it, like use a small utility trailer and maybe move some stuff around like a lawn mower from place to place, or maybe you're wanting to use it to bring some things with you for the weekend, like a camper, maybe a boat, jet ski, or maybe you need to get some gear out of your vehicle. You could put a cargo carrier or a bike rack on the back as well to bring along some items. Your accessories will secure to the hitch using any 5/8 inch hitch pin and clip. Now, one doesn't come included with the hitch, but we've got plenty available here at etrailer, and you can get locking ones as well so you can protect your investments when they're installed. On bottom, we've got hoop style safety chain loops.
With a very large opening that should accommodate just about every shape, size, and style of safety chain. The little one has no problem and neither does our big guy on here. And this hitch offers a 900 pound tongue weight, which is the force going down on top of our receiver. And that's gonna be more than enough for a cargo carrier, fully loaded up to the max, the largest ones that we even have here, at etrailer, you could max out on this hitch, as well as a four bike rack. You could have it fully loaded up as well with all that tongue weight at your disposal.
It also offers a 6,000 pound gross towing capacity, which is how much it can pull behind it. So if you have a camper, a smaller camper, you should be able to bring it with you. Some smaller boats and stuff should be no problem as well. And you could get some work done, 6,000 pounds is quite a bit of weight. So you can even potentially pull another vehicle with this as long as it's a smaller vehicle.
And now as always, I recommend that you verify in your vehicle's owner's manual and ensure you don't exceed any of its towing capacities. Now I've got some measurements for you to help you when deciding on your accessories. From the center of our hitch pin hole to the edge of our rear bumper here, it looks like we're right at about six inches. And that's important when determining if your accessories will contact the bumper when inserted, and if they can be placed in the upright storage position without contacting the bumper. And from the ground to the top inside edge of our receiver tube, we're measuring right at about 17-3/4 inches. And that's important when determining, if you need a drop or rise or raise shank on any of your accessories. Now that we've covered some of the features of our hitch, why don't you follow along with me in the shop and we'll get it installed together. I will tell you this one here is a bit bigger of an install to other vehicles that are out there. So you do wanna give yourself some time. This might be a Saturday project for you to tackle. We'll begin our installation here at the back of the vehicle with the lift gate open. We'll be removing the covers next to the tail light assembly on each side. To do this, we'll use a plastic trim panel tool. We're just gonna get behind the plastic cover here with our trim panel tool. We're kinda just prying it away. And we can just kinda rock it out of there like that. We'll also be removing the one on the other side. We can remove the single bolt that holds our tail light assembly in after removing that cover out of the way. We're gonna use a T30 Torx to do it. Once we removed the bolt, the whole tail light assembly will come straight rearward. We'll gently lift it aside, and then we can disconnect the electrical connector located underneath. We'll press on the release tab there, and then just pull it off. Released tabs had little button there in the center. We'll get the other side removed the same way, but while we're back here, we als
Повторяем попытку...

Доступные форматы для скачивания:
Скачать видео
-
Информация по загрузке: