How to Assemble the 1500w Dual Motor, Dual Battery EBike Rickshaw (Step-by-Step Guide)
Автор: sixthreezero ETrikes, EBikes & Bicycles
Загружено: 2026-02-16
Просмотров: 135
Описание:
Check out the EBike Rickshaw 1500w here https://www.sixthreezero.com/products...
🔧 How to Assemble the Double Motor, Double Battery EVRYjourney Rickshaw
4
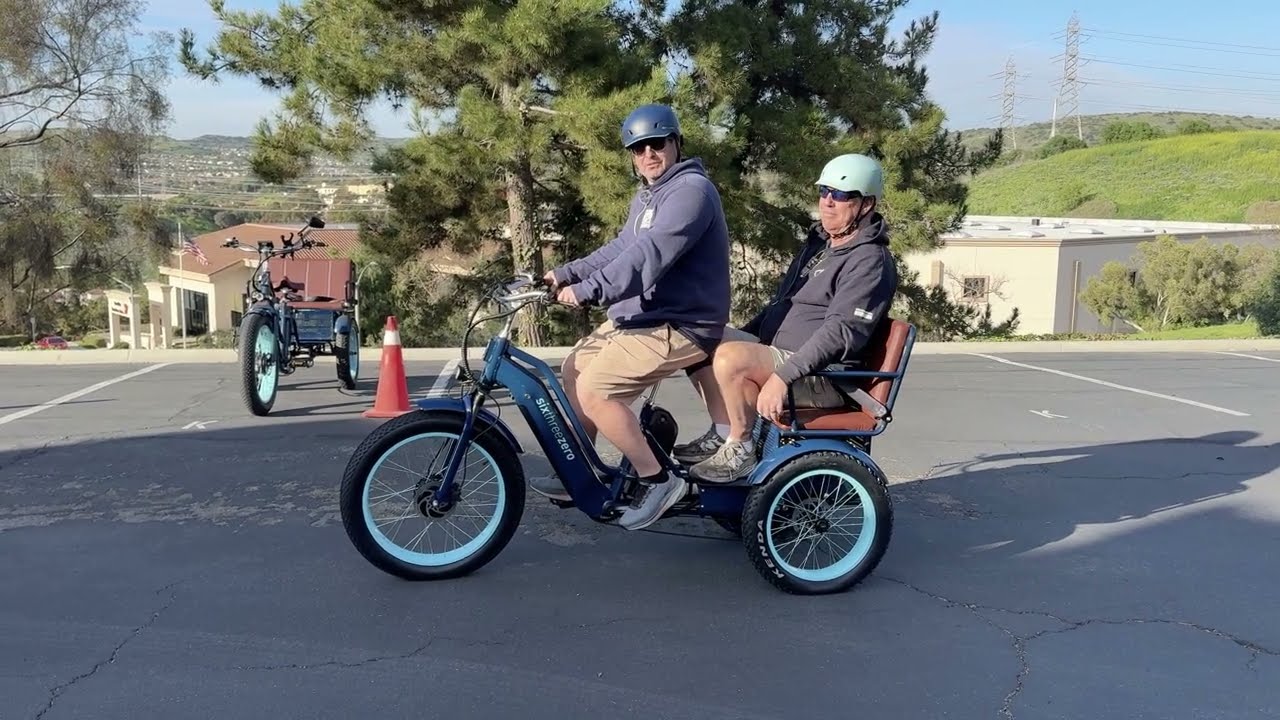
If you’ve just received your Sixthreezero EVRYjourney Rickshaw, you’re about to assemble one of the most powerful and longest-range electric rickshaws in the lineup. With dual motors and dual batteries, this model is built for serious torque, extended mileage, and reliable passenger transport.
Let’s walk step-by-step through exactly what to expect and how to assemble it correctly.
📦 Unboxing & What to Expect
Your rickshaw arrives in a large palletized box measuring:
71.5” long
35” wide
32.5” tall (34” including pallet feet)
160 lbs gross weight
128 lbs without packaging
Because of the weight, it’s ideal to be home during delivery so the carrier can place it where you want it.
Inside the box you’ll find:
Rear passenger bench seat
Front wheel (with motor)
Front fender
Pedals (marked R and L)
Mirrors
Seat post (suspension style)
Two battery chargers (one per battery)
Decorative headset cap
Hardware & instruction manual
Nearly all electrical components, including both motors and both batteries, arrive pre-installed. Assembly mainly involves attaching the front wheel, rear bench, pedals, fender, and rider seat.
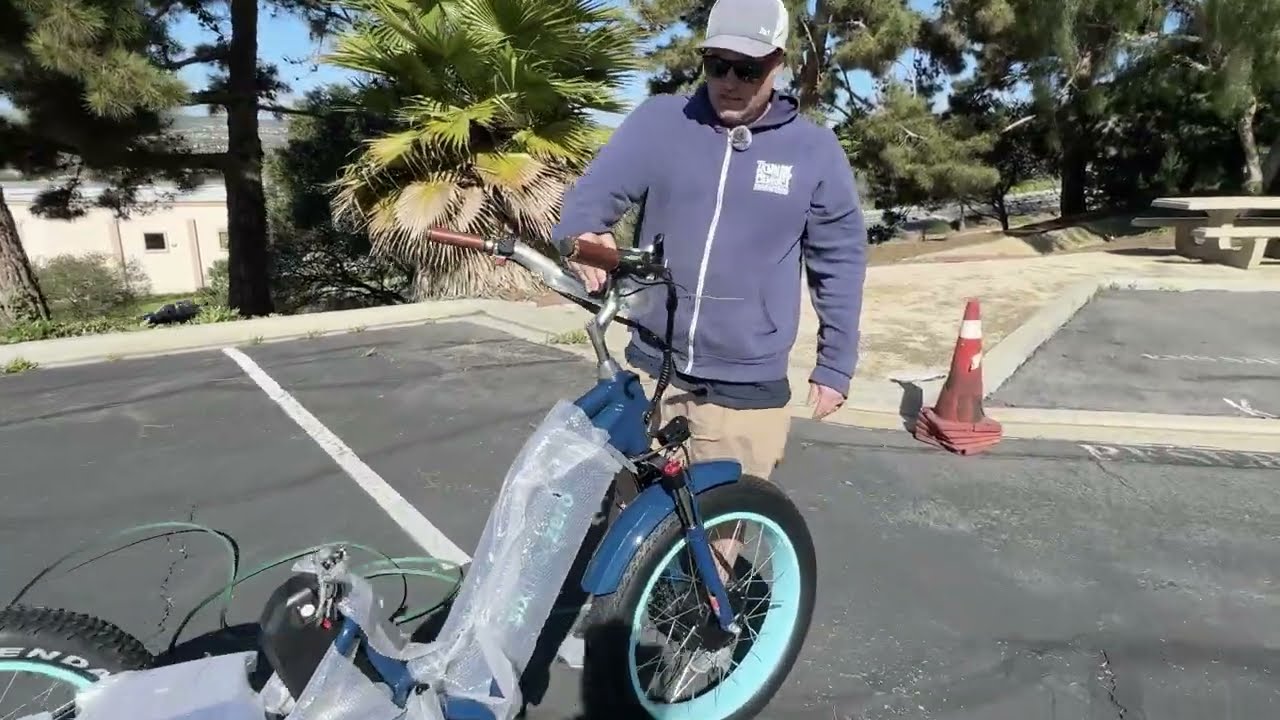
🛞 Step 1: Install the Front Wheel
Remove all zip ties and packaging.
Cut down the front of the box to create a “garage door” opening — this allows you to install the wheel before removing the bike completely.
Remove the protective fork spacer (metal pseudo axle).
Remove brake caliper packaging inside the front disc brake.
Position the wheel so the rotor slides cleanly into the brake caliper.
Ensure the washer tab locks into the fork dropout.
Install thin washer → thick washer → axle nut.
Tighten both sides using a 19mm wrench.
Connect the front motor cable by aligning the arrows on both connectors and tightening the threaded collar.
Once installed, you can roll the rickshaw out easily.
🚲 Step 2: Handlebars & Front Fender
Insert handlebars into stem.
Align straight with front wheel.
Tighten top bolt using a 6mm Allen key.
Adjust tilt using the two 5mm bolts if needed.
For the fender:
Slide the fender tab behind the fork.
Insert screw and tighten (Phillips or 10mm).
Slide fender upward to prevent tire rubbing.
Adjust and tighten front light using a 3mm Allen key if necessary.
🪑 Step 3: Install Rear Bench Seat (Most Time-Consuming)
Install rear fenders first.
Slide fully inward.
Position approx. 1¼ inches from the seat frame.
Tighten with 8mm wrench.
Remove four mounting bolts from seat platform (leave center two in place).
Position bench seat.
Insert bolts through basket and black support brackets.
Hand tighten all four bolts first.
Fully tighten with 10mm wrench once aligned.
Important: Do not fully tighten any bolt until all four are threaded correctly.
⚙️ Step 4: Install Pedals
Pedals are marked R and L.
Both tighten by turning forward.
Tighten using a 15mm wrench.
🪑 Step 5: Install Rider Seat
Attach saddle to suspension seat post.
Adjust tilt slightly backward if desired.
Tighten using 6mm Allen key.
Insert into frame.
Adjust quick release tension with 5mm Allen if needed.
Note: If suspension seat post sits too high, you can swap for a shorter standard post.
🔋 Dual Battery Setup
This model features two independent batteries:
Each has its own key.
Each has its own charging port.
Two different chargers are included (single-prong and three-prong).
To power on:
Turn on battery switch.
Press and hold power button on display.
Both battery levels appear on screen.
🧭 Controls Overview
You’ll find:
Thumb throttle (right side)
Horn
Headlight control
Turn signals (display indicator included)
Reverse switch
Gears
Parking brakes
The dual motor system provides strong torque and confident hill performance, especially useful when carrying rear passengers.
🛡 Warranty & Test Ride Policy
30-Day Test Ride Policy – If you don’t love it, return it within 30 days.
1-Year Warranty – Covers parts and labor.
You can also test ride in San Clemente, California before purchasing.
Join the 630 Pedalers Facebook community to connect with thousands of riders before and after you buy.
Final Thoughts
The double motor, double battery EVRYjourney Rickshaw combines extended range, serious torque, and passenger comfort in one platform. Assembly is straightforward, and most major components arrive pre-installed.
Once assembled, you’re ready to ride with confidence.
It’s your journey. Your experience. Enjoy the ride.
Come Visit Us in Person for a Test Ride at:
1046 Calle Recodo Unit K,
San Clemente, CA 92673
(310) 982-2877
[email protected]
To get an extra 5% off electric bikes use code YT5
To get $10 off standard bikes use code YT10
Повторяем попытку...
Доступные форматы для скачивания:
Скачать видео
-
Информация по загрузке: