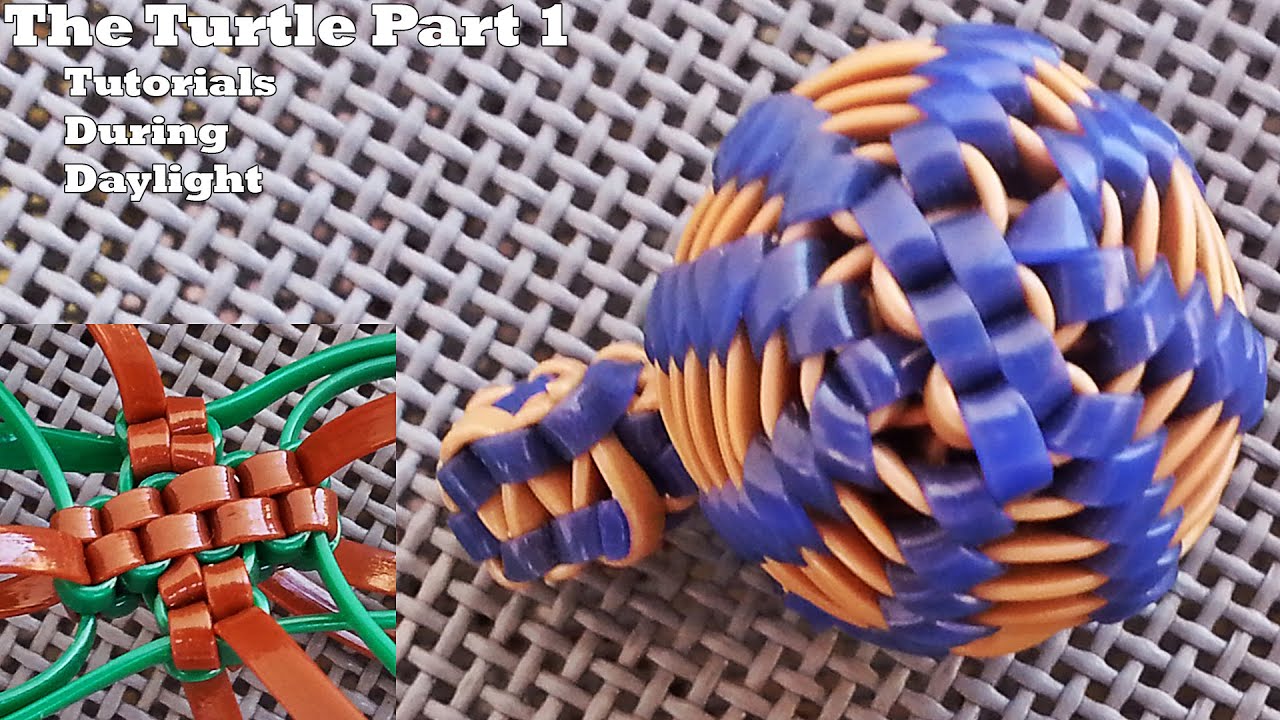
The Turtle Lanyard/Scoubidou Part 1 (making the X) -TDD
Автор: LanYarD
Загружено: 2016-04-20
Просмотров: 38768
Описание:
1st part of the turtle step-by-step tutorial
lanyard (boondoggle/scoubidou/craftlace/gimp).
TDD refers to Tutorial During Daylight , where I film when my family is awake. Sorry in advance if you hear some minor noises in the back round.
The turtle in my opinion is one of the best examples how a simple idea that uses almost only box stitches (except for the legs) , and can turn into such a sphere.
I think the first one who post an instruction for it is (in french):
http://vanoul.free.fr/tuto/tuto-scoub...
You can also find it on scoubidous.eu , they actually copied it from the guy above.
Violet LQ made a tutorial here in YouTube you can check hers here:
• Part 1: Sphere Tutorial for the Turtle Lan...
Another link I talked at the intro is the double sided box stitch ,also from Violet :
• Tutorial: Starting The Double Sided Lanyard
Remember, you'll need some paicent in order to make this turtle. Especially in part 2. If you get stuck in one of the steps , try to rewind the video or check the recommended links . Or you can ask me in the comments .
Good luck~
-------
00:00 - intro. Spent 4 hours on this intro, please give it a try :O .
01:06 - explaining some basic ideas. How to get to a X shape .Basically in order to start it we need 2 double sided box stitches. You'll need to cut 8 strings 1 yard long (1 meter) , in my case 4 greens and 4 browns.
You need also to remember that at the end, all 4 box stitches of the X need to be the same position ,all of them left hand or all of them right hand. It's very important.
06:03 - making the 1st double side box stitch. You'll need to take 4 strings ,2 from each color. The idea is that you're going to create 4 loops with those 4 strings , the 2nd will "eat" the 1st , the 3rd will "eat" the 2nd , the 4th will "eat" the 3rd and at the same time it'll be "under" the 1st (kinda like over and under thingy).
12:24 - make another 2 box stitch for it, and then remove the one at the bottom. That will create a nice double sided box stitch.
17:05 - making 2nd double sided box stitch.
21:31 - making another 2 stitches for the 2nd double sided. So for now we have a lanyard with 2 box stitches ,and one with 3 box stitches.
25:10 - explaining what we'll do next.
27:00 - make sure that you have your 2 lanyards in the same position , both of them left hand or both right hand . My case both of them ,the string that towards you is on the left (left hand position).
I suggest to watch closely what I do these 4 sections.
26:23 -align both of the box stitch in the same order of colors. Make 1 box stitch for the one you have 2 stitches, and insert
the closest string of the 2nd box stitch.
30:52 - make another box stitch for the 1st, and insert the next closest string of the 2nd box stitch.
33:22 - 3rd box stitch with the 1st one, and insert the 3rd string of the 2nd box stitch.
34:26 - 4th box stitch with the 1st one , and insert the last string of the 2nd box stitch.
35:28 - explaining what we did with the yellow-white example.
36:29 - making another 3 box stitches with the 1st. without inserting anything.
37:19 - pulling the 4 strings of the 2nd lanyard.
38:11 - what I did as for now.
38:30 - making 1st box stitch in the last side of the X.
40:08 - another 2 box stitches.
40:58 - somehow I done one mistake of having 4 stitches in one of the sides, just remove a stitch and you'll have 3 stitches.
42:16 - make sure you have all 4 direction the same position. Left hand position in my case.
42:56 - conclusion.
43:30 - annotation.
Thanks for watching
Повторяем попытку...
Доступные форматы для скачивания:
Скачать видео
-
Информация по загрузке:


