How to Patch a Full Break | DIY Nail Repair Tutorial
Автор: My Simple Little Pleasures
Загружено: 2014-03-01
Просмотров: 458241
Описание:
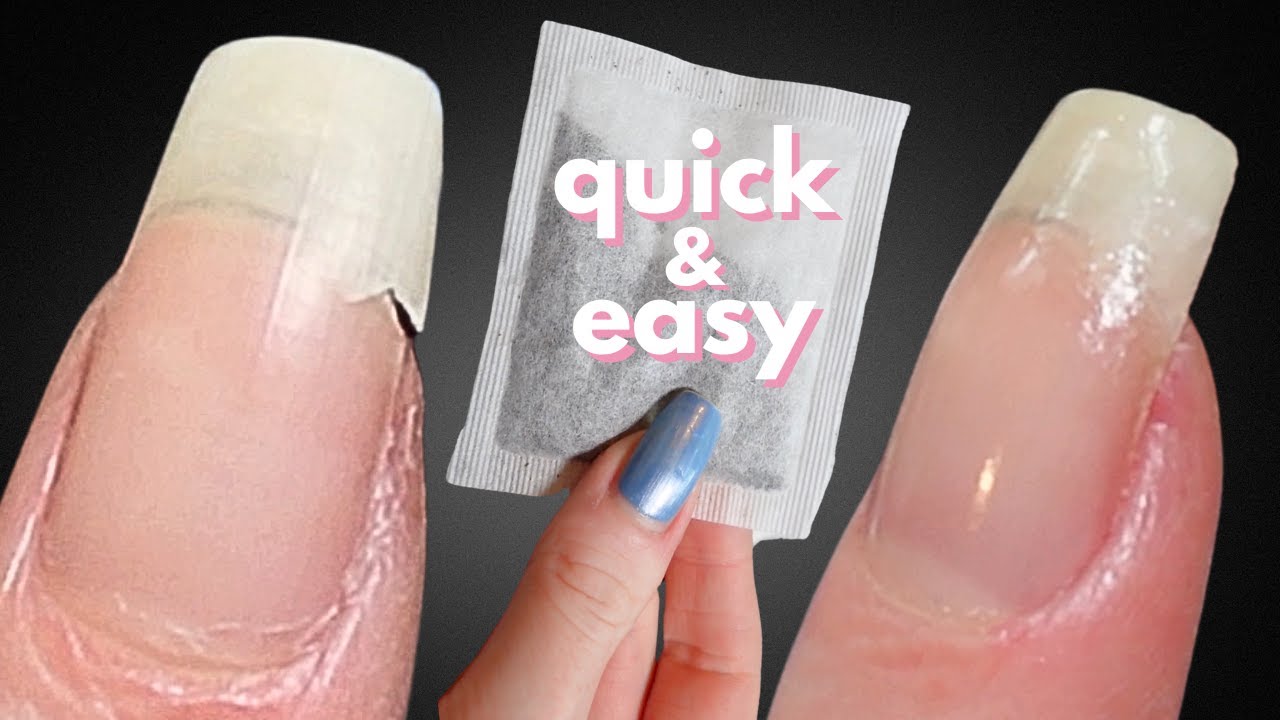
Today I'll be showing you how to repair a completely broken nail at home with a silk patch. Products used are listed below.
See more nail art how to's & FAQs here: http://goo.gl/X6P7Gr
Subscribe for new videos every week: http://goo.gl/JJaoHC
See my 1st patching tutorial here: • How To Apply A Silk Patch | DIY Nail Repai...
See my 2nd patching vid here: • How I Patch My Nails - Product Update
See how to repair a broken corner here: • How to Fix a Broken Corner | DIY Nail Repa...
This same technique can be used to repair a ripped nail that's still attached too.
I ended up mostly showing the patching on the fully broken nail - since the low break was already glued, and that glue held, I would have applied more glue to hold it if necssary. Glue helps the nail hold under the patch. I have had nails rebreak even with patches, or the glue fail while the patch holds. Other than that, ther'es not really a huge difference other than the severity of the break. Same steps for the actual patching for both nails ... I keep the brush I use to spread the gel in an old polish bottle full of acetone to clean it.
There are a few downsides to patches, reasons I don't wear them on all my nails all the time:
-Normal polish remover, or even exposure to too much water - can cause lifting around the edges & make them need to be replaced more often
-They can make your nails hard almost to the point of being brittle ... sometimes I've had patched nails-re-break because they cannot bend or give at all.
Products used for repair:
-Glue - ibd Brush-On Nail Glue: http://amzn.to/1iiMZiq (or any kind of nail glue is fine)
-Swiss Silk Self-Adhesive tabs: http://amzn.to/1XhHiS1 (or you can even use a piece of tea bag if you don't have this)
-ASP - Light-less Gel: http://amzn.to/1iiNbOL
-ASP - Gel Cure: http://amzn.to/1hURPCR
-Buffer or Nail file: http://amzn.to/1hUSoMR
Step-By-Step
-Steart with absolutely clean and dry nails
-Glue the tear or break if necessary
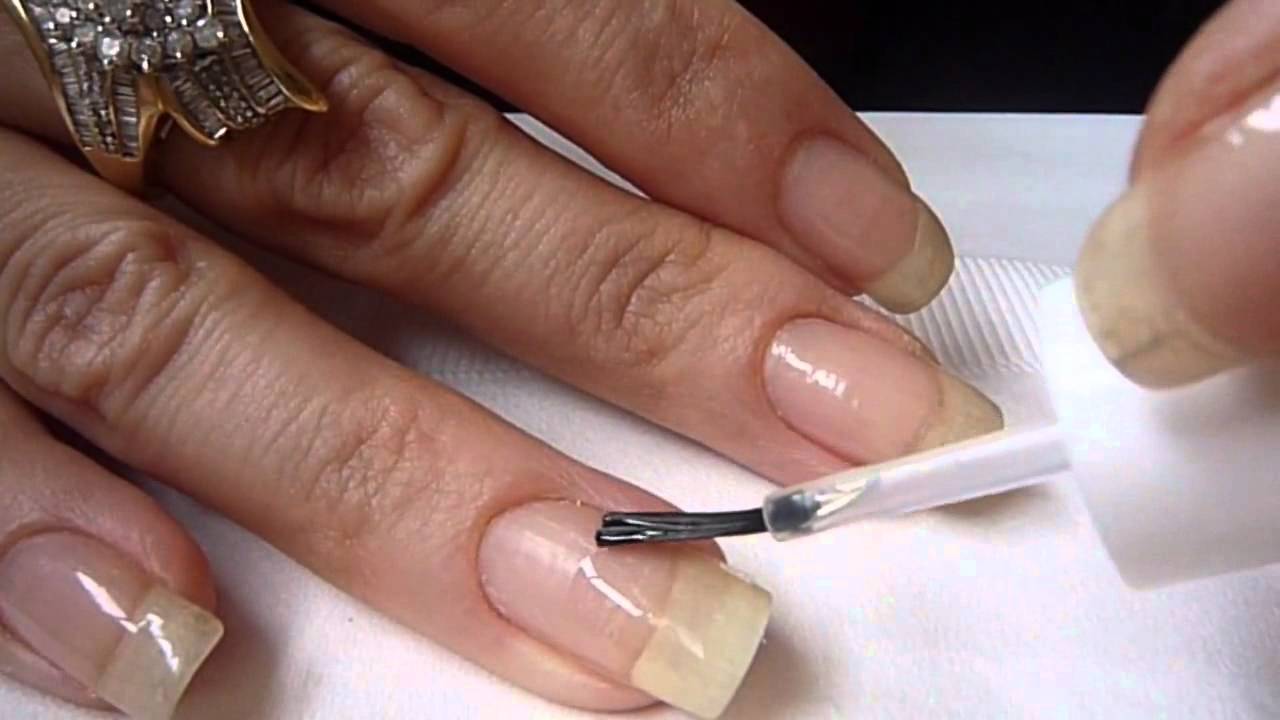
-Apply the wrap over the area of the break & overlapping each side
-Apply the gel, being careful to avoid contact with your skin
-Smooth the gel as well as you can with a brush, keeping the layer on the thin side, before spraying the gel cure
-Gel cure takes about a minute to set
-File off the excess wrap once the gel is dry
-Apply a second coat of gel (I do wrap the tip on the 2nd layer, just like when painting, as it seems to help prevent lifting at the tip)
-Spray with cure
-Buff if necessary
-Done!
Music is: Griphop by Kevin MacLeod (incompetech.com)
Check me out on these sites too!
Like the Simple Little Pleasures Facebook page & share your nail art! / 119041034826219
Follow me on Instagram: / mysimplelittlepleasures
Follow me on Twitter: / colettemslp
Follow me on Pinterest: / colettemslp
Read more on my Blog: http://mysimplelittlepleasures.blogsp...
Main YouTube Links:
My Channel: / simplelittlepleasues
Tips & Tricks Playlist: • Tips & Tricks - How To's & FAQ's
Water Marble Tutorials Playlist: • How To Water Marble | DIY Nail Art Tutorials
Nail Art Tutorials Playlist: • How To Do Your Own Nail Art | DIY Tutorials
My Vlog Channel: / throughoutme
*Disclaimer: Some links above are affiliate links
Повторяем попытку...

Доступные форматы для скачивания:
Скачать видео
-
Информация по загрузке:

![How to fix a cracked natural nail. [Pro Nail Technician explains]](https://imager.clipsaver.ru/RCoc2QRQcMY/max.jpg)