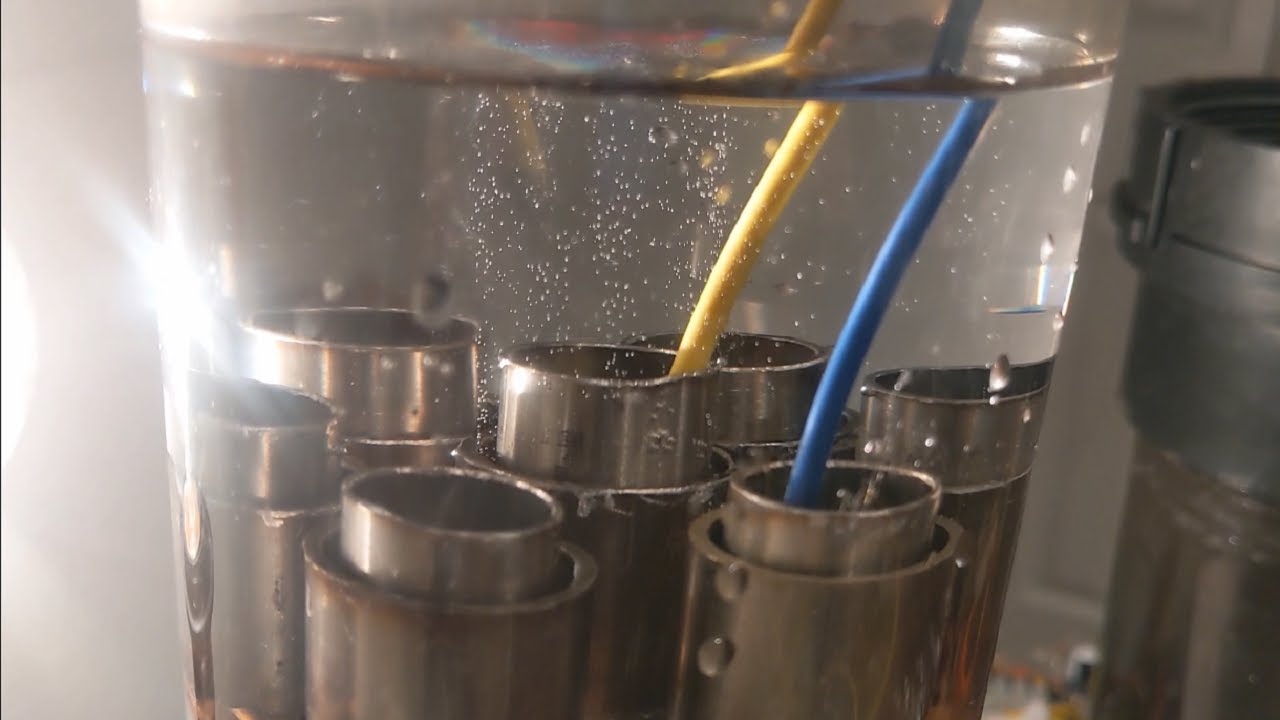
Stanley Meyer VIC Circuit - Part 1: Arduino Pulse Generator Build
Автор: The Off-Grid Alchemist
Загружено: 2025-08-26
Просмотров: 827
Описание:
Building Stanley Meyer's Voltage Intensifier Circuit from scratch using Arduino, optocoupler, and MOSFET switching. Part 1 covers the pulse generator that drives the entire water fuel cell system—watch me troubleshoot loose headers, soldering fails, and get the first pulse working. Full parts list and code below.
👉 Subscribe for Parts 2-4: Coil winding, frequency tuning, and water splitting tests
Stanley Meyer claimed this circuit powered his water-fueled dune buggy. Part 1: building the Arduino pulse generator that drives the entire system. Join 47+ builders following this series!
🔍 What You'll Build & Learn:
Arduino Nano pulse generator for the VIC circuit
4N35 optocoupler isolation system
IRLZ44N MOSFET switching circuit
Real troubleshooting: loose headers, soldering fails, and how to fix them
Why this pulse circuit is the heartbeat of hydrogen fuel cell experiments
🛠️ Build Checklist (Part 1)
Arduino Nano – Pulse generation
Breadboard/wires – Rapid prototyping
4N35 optocoupler – Signal isolation
IRLZ44N MOSFET – Power switching
Resistors – Signal conditioning
LED test load – Visual confirmation
*🛒 Parts & Tools Used (Amazon Links – I earn commissions from these links, which support more experiments!)* Links also included in comments.
Arduino Nano (3-pack): https://amzn.to/4mGefrY
4N35 Optocoupler (5-pack): https://amzn.to/463E7ai
IRLZ44N MOSFET: https://amzn.to/3VmOgK1
Breadboard: https://amzn.to/4lKTVUZ
Jumper Wires Kit: https://amzn.to/47NgdSI
Resistor Assortment (220Ω + 330Ω +10kΩ): https://amzn.to/4mXqhgm
LEDs: https://amzn.to/4mDJ0On
Soldering Kit: https://amzn.to/4mDJ0On
Disclosure: As an Amazon Associate, I earn from qualifying purchases. Using these links helps fund more off-grid experiments at no extra cost to you!
💻 Arduino Code (also in comments)
// VIC Part 1 — First Pulse Test
// Arduino Nano on D3 (digital pin 3)
// Blinks LED (or drives 4N35 optocoupler) at 1 Hz (500 ms ON / 500 ms OFF)
const int pulsePin = 3; // Nano D3
void setup() {
pinMode(pulsePin, OUTPUT);
}
void loop() {
digitalWrite(pulsePin, HIGH);
delay(500); // ON for 500 ms
digitalWrite(pulsePin, LOW);
delay(500); // OFF for 500 ms
}
🚦 Next Steps in the Series:
Part 2: Coil winding & frequency tuning
Part 3: Water splitting tests & voltage measurements
Part 4: Full WFC (Water Fuel Cell) assembly and results
Stanley Meyer Water Fuel Cell Builds - Full Series Playlist:
• Stanley Meyer Water Fuel Cell Builds
Stan Meyer HHO Rocket Experiments:
• Stan Meyer HHO Rocket Experiments
Every legend starts with a pulse. This is where forgotten inventions meet modern experimentation—no hype, just honest builds and real results.
👉 Building along? Comment "FIRST PULSE" and share your progress below—I respond to every builder!
#stanleymeyer #arduino #waterfuelcell #hho #diyelectronics #pulsegenerator #alternativeenergy #vic #offgridtech
Повторяем попытку...

Доступные форматы для скачивания:
Скачать видео
-
Информация по загрузке: