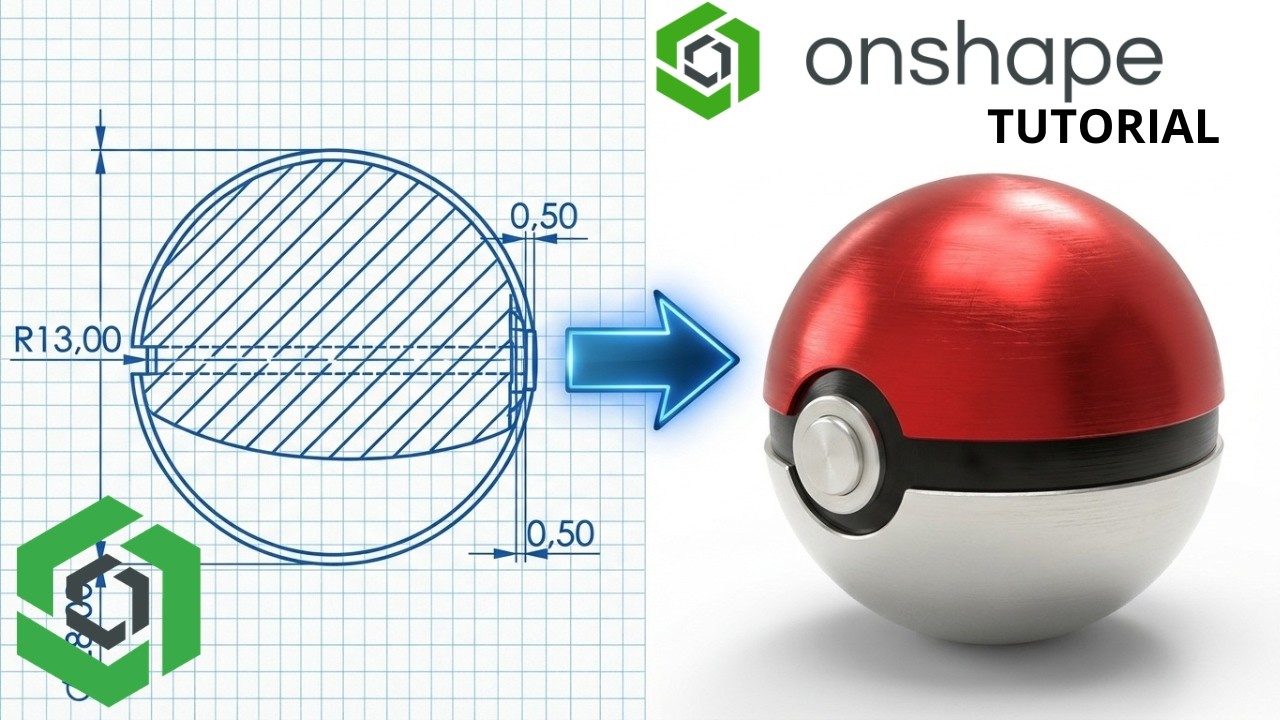
Onshape 360 From Zero | How to Make a Pokeball Tutorial #5
Загружено: 2026-03-05
Просмотров: 40
Описание:
Start your 3D modeling journey with Onshape! This tutorial is specially designed for beginners. You'll discover the essential features of the software and create your first project in no time.
1. Revolve
As a quick recap, Revolve takes a 2D sketch profile and spins it around a central axis to create a solid cylindrical or ring-like shape.
When to use it: When creating a main body that is perfectly round or symmetrical around a center line (like a bottle, a wheel rim, or a dome).
2. Offset Plane
By default, you start designing on the three standard intersecting planes (Top, Front, Right). The Plane tool (specifically the Offset type) allows you to create a brand new, invisible flat surface parallel to an existing plane or flat face, but situated at a specific distance away from it.
When to use it: When you need to draw a new 2D sketch floating in space, above or away from your existing model. For example, if you modeled a bottle using Revolve, you might create an Offset Plane floating above the bottle cap to sketch a logo or a handle.
3. Extrude
Extrude takes a flat 2D sketch and pushes it linearly into 3D space to give it thickness.
When to use it: In conjunction with your Offset Plane, you would use Extrude to push your newly drawn sketch back down into your Revolved body (either adding material to it or removing material from it).
4. Mirror
The Mirror command acts like a digital reflection. It takes existing geometry and flips a perfect, symmetrical copy of it across a designated flat surface or plane (the "Mirror plane").
When to use it: Whenever a design is symmetrical. Instead of modeling both sides of a part, you model one half, or model a feature on one side (like an extruded mounting bracket on the left side of a cylinder), and then Mirror it to the right side. This guarantees perfect symmetry and cuts your design time in half.
Key Options in Onshape: You can mirror an entire Part, a specific Feature (like mirroring just the Extrude you just made), or a Face.
5. Shell
The Shell command hollows out a solid 3D part, leaving a consistent, thin wall of material on the outside.
When to use it: When designing plastic enclosures, bottles, cases, or cast metal parts that need to be lightweight and hollow.
How it works: You type in your desired wall thickness (e.g., 2 mm). If you select a specific face on your model (like the top flat face of a cylinder), Onshape will remove that face entirely to create the "opening" of the shell. If you do not select any faces, Onshape will hollow out the inside but leave the part completely closed off from the outside.
Повторяем попытку...
Доступные форматы для скачивания:
Скачать видео
-
Информация по загрузке: