Stenciling Your Floor with a Burmese Ikat Stencil Design | Oak Lane Studio
Автор: oaklanestudio
Загружено: 2019-11-21
Просмотров: 1002
Описание:
#DIY, #DIY decor, #DIY decorating project, #Burmese Ikat
☝️ Stencil your plain Jane concrete floor with a Burmese Ikat floor stencil from Oak Lane Studio. Before stenciling your floor take the time to check out this concrete floor stenciling tutorial so you know the ins and outs of painting your patio or basement. This vintage floor stencil will add style and charm to any room or can be used as a wall stencil.
Supplies used in this tutorial may be found listed below ⬇️:
➡️ Burmese Ikat Stencil - https://bit.ly/35dqeVQ
➡️ Frog Tape Painter's Tape - https://bit.ly/2QAvxKL
➡️ 4" Foam Roller - https://bit.ly/35nNmki
➡️ Long Handle Stencil Brush - https://bit.ly/2D872wt
➡️ Frog Tape Painter's Tape - https://bit.ly/3476kf4
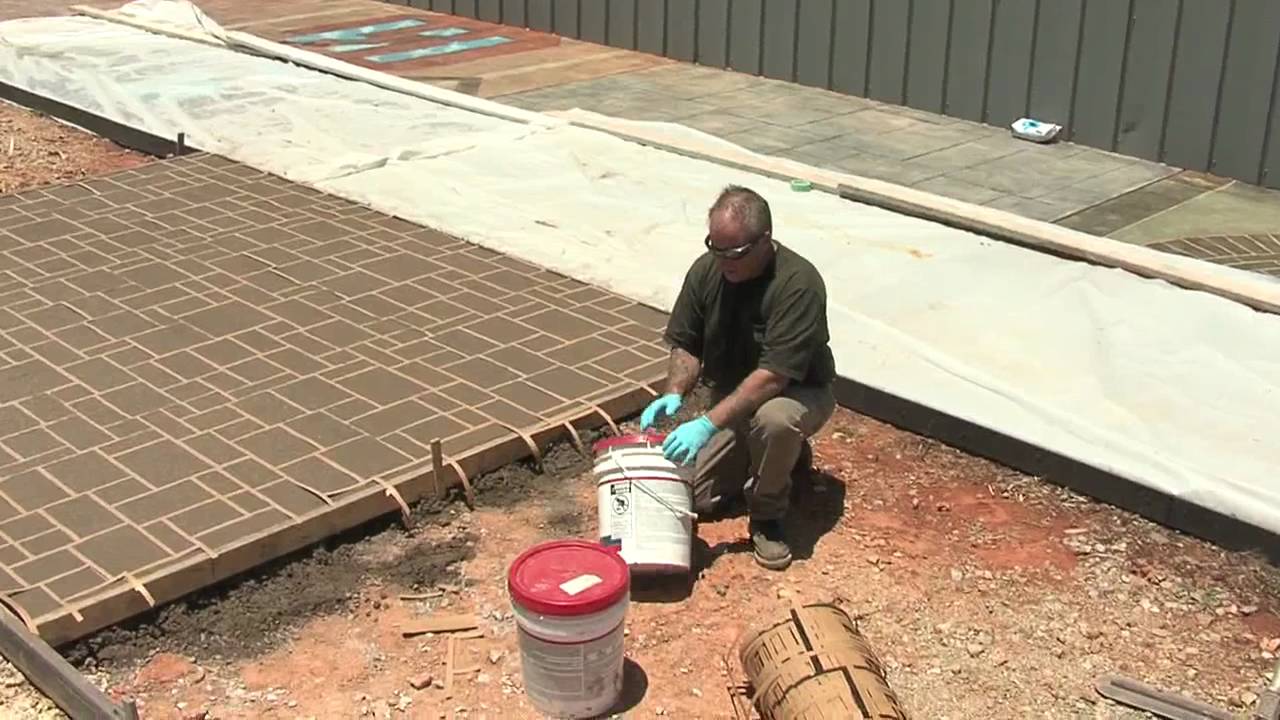
☝️ In this tutorial, we demonstrate the medium format Burmese Ikat stencil to cover more space in less time. Use the small format Burmese Ikat stencil to stencil into the corner where the floor meets the wall.
1️⃣ Start by preparing the back of the stencil by spraying the back of it with Repositionable Spray Adhesive. Let the spray adhesive become tacky for about 30-60 seconds. While you wait for the spray to become tacky use Frog Tape Painter's Tape to mask off the bottom of the wall from the floor.
2️⃣ Get started by placing the tacky side of the stencil on the floor so that it fits neatly into the corner. In each corner of the stencil, there is a small triangular hole called a "registration mark". Put a small piece of Frog Tape beneath each registration mark. Stencil through the registration mark onto the Frog Tape below. The registration marks make lining the stencil up for each repeat a simple process.
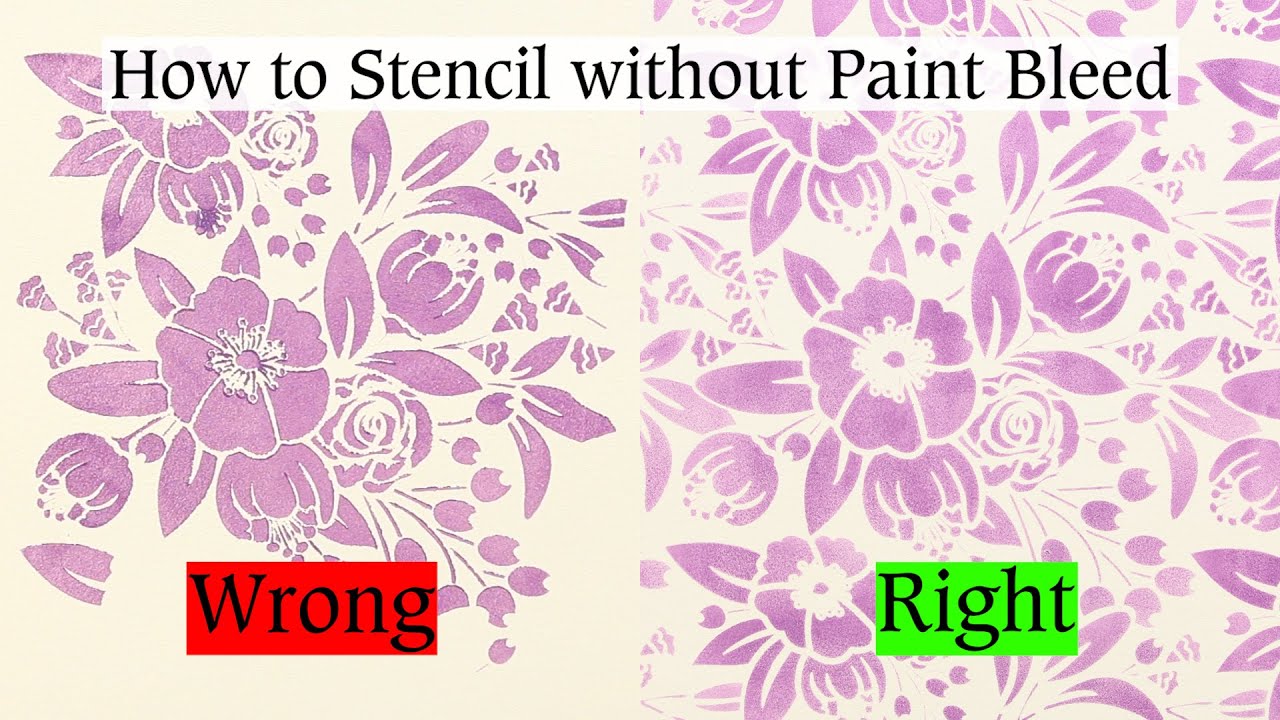
3️⃣ Prepare your roller by rolling it in paint, then rolling the excess off onto a piece of paper towel until the roller feels just about dry to the touch. Using a dry roller will prevent the buildup of paint design edges
beneath the stencil design edges. As you roll paint through the stencil design onto your floor you will notice that the build is slow and gradual. The process of stenciling takes a little time and patience but the end results are worth it. After 3-4 light coats of paint, you will have full coverage and be ready to stencil the next repeat.
4️⃣ To stencil the next repeat, line up the triangular registration marks in the space beside your first repeat. Apply more paint to the roller, roll off the excess until it is dry to the touch, and continue stenciling. Be sure to put Frog Tape Painter's Tape beneath each registration mark.
5️⃣ When you have done all of your repeats you are ready to stencil into the corner where the floor meets the wall. The medium format stencil would work, but to make things simpler we are going to use the small format Burmese Ikat stencil. Use Repositionable Spray Adhesive on the back of the stencil, then line it up with the design closest to the wall. Gently bend the stencil into the corner so that it goes right up to the wall. Lightly roll paint as close to the wall as possible, switching to a dry stencil brush to get the closest part of the wall.
6️⃣ Do this along the wall until complete! When done, be sure to remove the painter's tape that masks off the wall. Everything for this project can be found on our website in the links above!
👉 Visit OakLaneStudio.com today and check out our amazing collection of wall stencils, border stencils, victorian stencils, vintage floor stencils, wall border stencils, farmhouse stencils, supplies, and how-to-videos!
#BurmeseIkat #Ikat #StenciledFloor
Повторяем попытку...

Доступные форматы для скачивания:
Скачать видео
-
Информация по загрузке:


![САМЫЕ ДИКИЕ ОШИБКИ В РЕМОНТЕ! #300 [ ЗЕМСТАНДАРТ ]](https://imager.clipsaver.ru/I0PUIxd9MQ8/max.jpg)