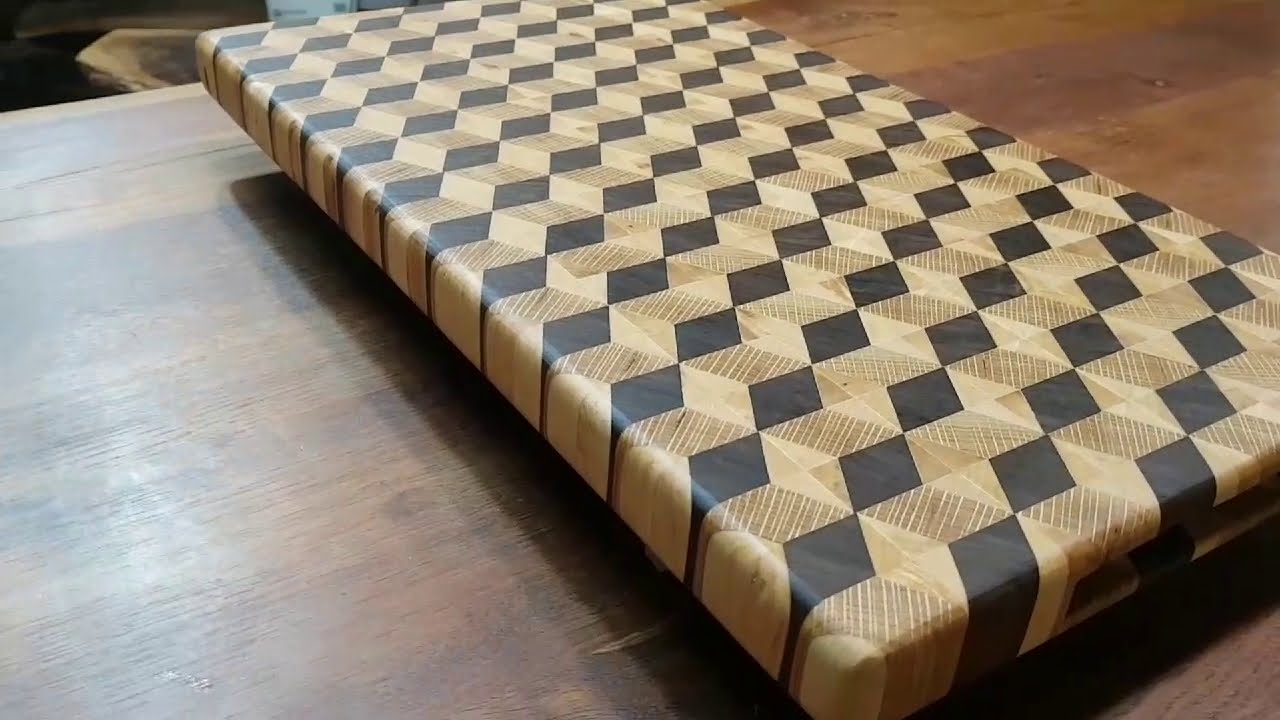
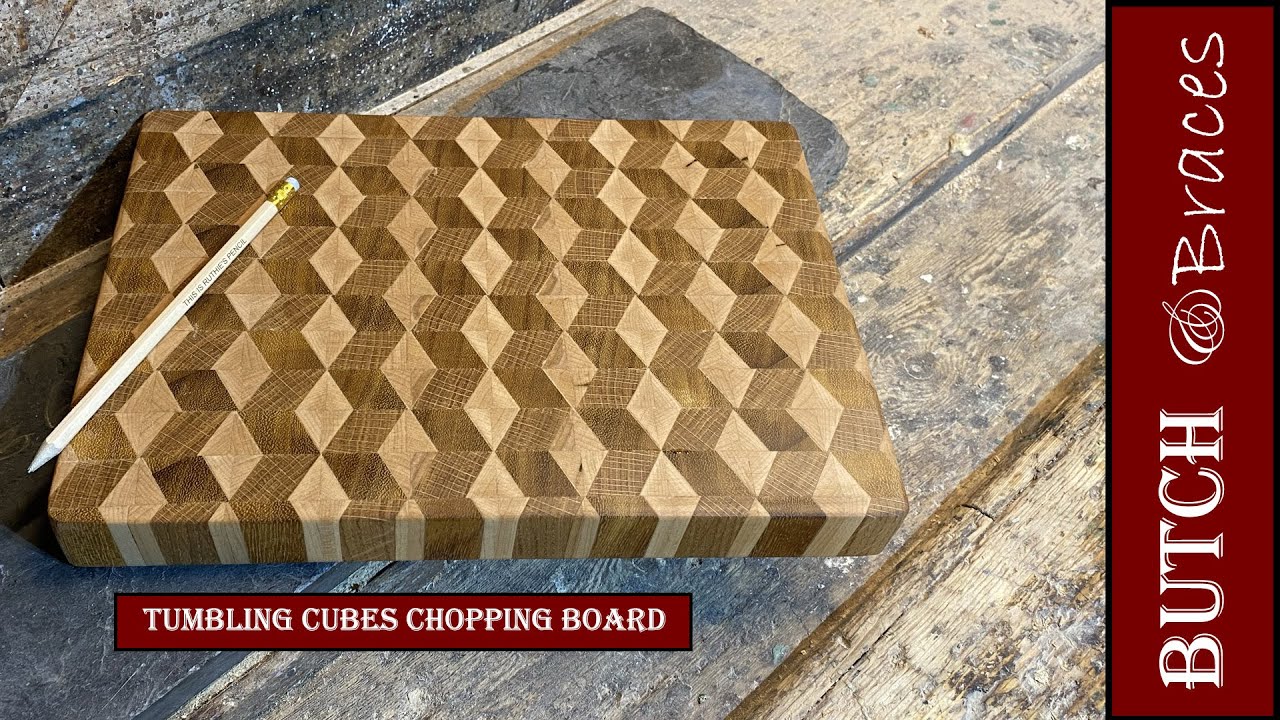
Tumbling Cubes Chopping Board
Автор: Butch and Braces
Загружено: 2020-11-15
Просмотров: 14573
Описание:
Tumbling Cubes Chopping Board made from Iroko, Oak and Maple.
There are a few videos that explain in more detail whats going on, and I encourage you to go find them. This is a time-lapse of how I made this, but the details are below.
This is the most complex board I have made to date, and it generates so much waste, I'm not sure I would do it again unless it was a commission.
Mill your boards so that the 2 darker woods (I used Oak and Iroko) are the same thickness. Then mill your lightest board (I used maple) to half the thickness of your two other boards. We'll be making a sandwich, two bit of maple surrounding oak, and another with two bits of maple surrounding Iroko.
You then need to slice these with a 30 degree angle on the table saw. The thickness of these cuts is a little tricky to dial in, and you can see in the video I made a mistake. You are trying to make fence twice the length of the middle board on the diagonal cut. Got it? No, nor did I. Do a few test cuts, and you'll find the right distance for your fence.
Once you've cut your diagonal slices, we need to cut these back down to square stock. Make your cut so you just barely take the corner off. You'll want to make sure the dark wood and light wood meet at the corner. Again, do a few test cuts to sneak up to the right distance on your fence. I went a little under here and sanded back flush, but just so I could make sure my boards were flat. Its been cold and damp in the UK, so I'm getting movement over night in my workshop. I really need a drum sander......
Now its time for glue up. You need to alternate your woods, an oak followed by a Iroko, followed by an oak......you also need to make sure you are making V shapes across your glue up. Oak goes one way, iroko leans the other on alternating boards.
Once its dry, now is time to slice for the final time ready for the final glue up. My board is about an inch thick, but make your slices however thick you want them. Take your slices and keep them in order. Take your first slice and lay it out. Take the next slice and flip it 180 degrees end on end, then 180 degrees length ways. Take the next slice and keep it the same and so on. This is the last glue up, so you'll see the pattern taking shape as you line the slices up, so you'll know if you've made a mistake.
Sand flat, soak in 100% mineral oil, leave over night, then buff with an oil and wax finish. Then find a project to use all the little bits of waste that are left over....
Повторяем попытку...
Доступные форматы для скачивания:
Скачать видео
-
Информация по загрузке: