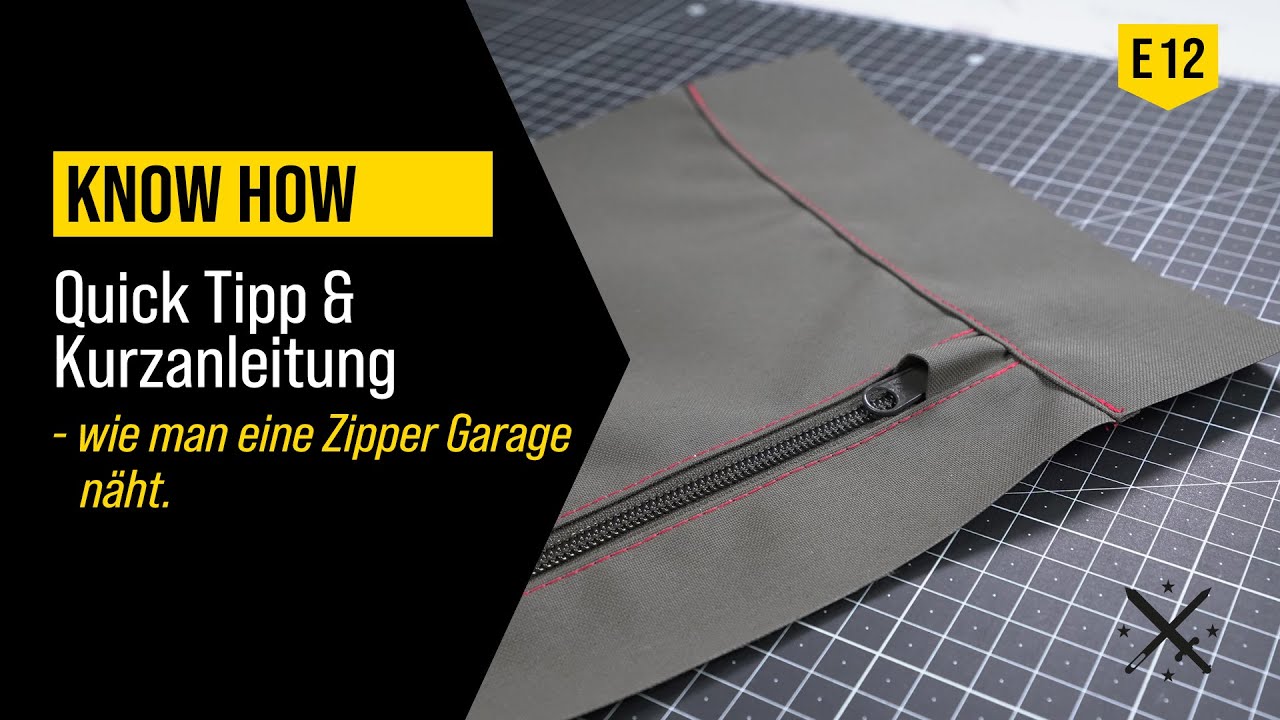
How To: Make A Zipper Garage
Автор: Ripstop by the Roll
Загружено: 2021-08-12
Просмотров: 7159
Описание:
In this video, Carter gives a (more) detailed tutorial on how to make a zipper garage.
We made this video based on comments from the first zipper garage video we posted. Viewers kindly pointed out that we could benefit from providing additional clarity.
Shop all zippers and fabrics here at:
www.ripstopbytheroll.com
Step 1: Prepare the Garage
First, we need to get the dimensions of the zipper garage.
TO make sure the zipper garage fits, we’re going to measure the width of the zipper tape. And then scale the width up on the garage by an inch on both sides.
To acquire the length, we have to make a decision. I want there to be no raw edges on this garage. I'm going to find the length, then double it, so I can fold the fabric in half, and have it finish cleanly. No wrong in scaling up a bit and just cutting it back later.
You can stitch down the sides of the garage so it's ready for later.
We’re going to put the zipper garage to the side for the next step
Step 2: Attach Zipper Tape
Now, we’re going to attach the zipper. We do that by going face-to-face and stitching it down.
Don't topstitch yet!
Step 3: Accordion Fold
The accordion fold is what gives you an easy slot to drop the zipper garage into while you do your topstitch.
You make the accordion fold by pinching 1” of fabric next to the zipper garage, and then folding half of that pinch (½”), and folding it over the zipper tape.
This will create a larger slot for you to fit the zipper garage into, as well as giving you a step later in the process to embed the zipper garage.
Step 4: Top Stitch (Part 1)
Now, you'll run a top stitch down the entire length of one zipper tape, including one side of the zipper garage.
Step 5: Add Zipper Sliders
This may seem out of order, but this is right! Now, you’ll attach the zipper sliders to the zipper coil.
Step 6: Embed + Top Stitch (Part 2)
First, you need to run a top stitch down MOST of the second zipper tape. Just leave enough space to embed the zipper garage.
When you finish the second topstitch, you'll need to fold back the underside of the fabric, so you can stitch down the other side of the zipper garage.
Step 7: Sew Sides Closed
Go ahead and flip your product inside out, so you’re now looking at the inside of your zipper pouch.
Your final stitches will be sewing the sides of the pouch closed.
If you choose to, this is a good time to embed a zipper tab on the opposite side that the zipper garage is on.
Step 8: Finishing Touches
Snip your threads, burn your edges, attach slider pulls, etc. Add your final touches, because you're done!
Повторяем попытку...

Доступные форматы для скачивания:
Скачать видео
-
Информация по загрузке:


![Как вшить молнию во внутренний карман сумки - легко шить [sewingtimes]](https://imager.clipsaver.ru/BuvHG3ZUQi4/max.jpg)