Alpine & Mountaineering: 27. The Kiwi Coil | Climbing Tech Tips
Автор: Climbing Tech Tips
Загружено: 2018-02-02
Просмотров: 24090
Описание:
Subscribe to our channel for the latest training videos, climbing tutorials and more! The kiwi coil allows you to adjust the amount of rope between you and your partner.
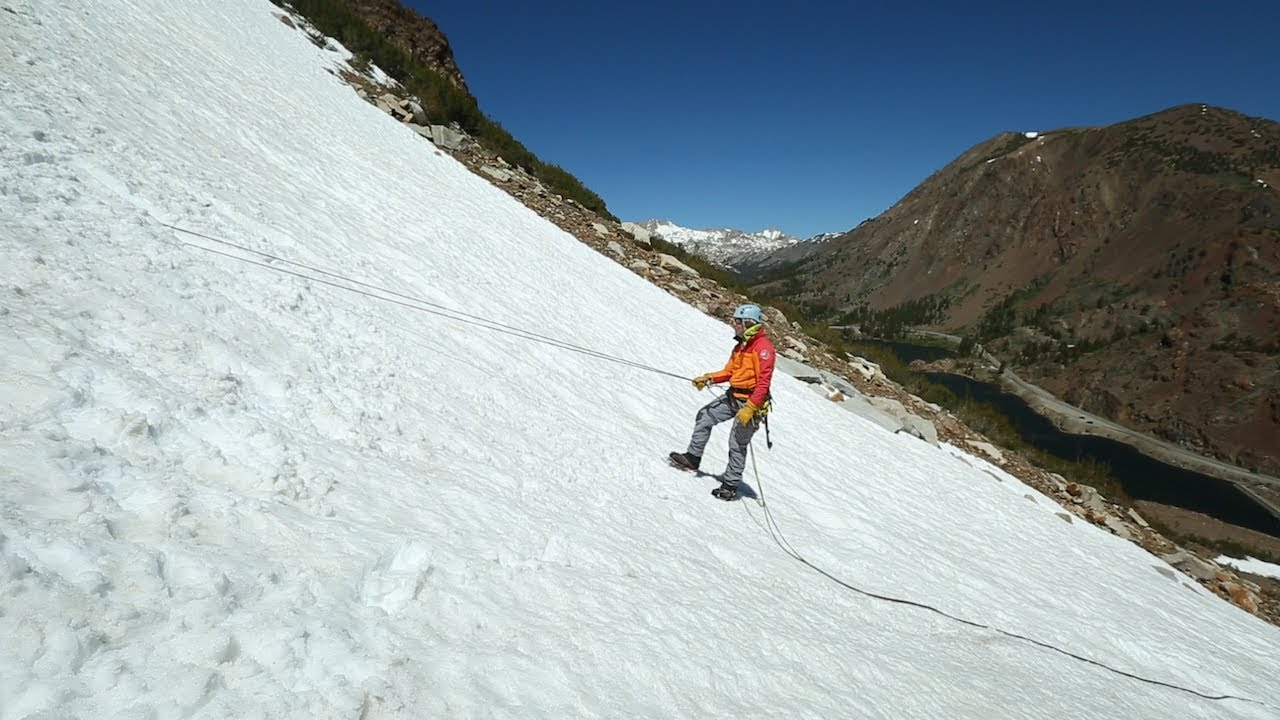
Many beginner or novice alpine climbers make the mistake of traveling with too much rope out. This mistake can cost you considerable time managing ropes, as well as decreased communication. The other negative aspect of having too much rope out is the possible rope drag, which in alpine climbing, can lead to pinched ropes or knocking off loose rocks.
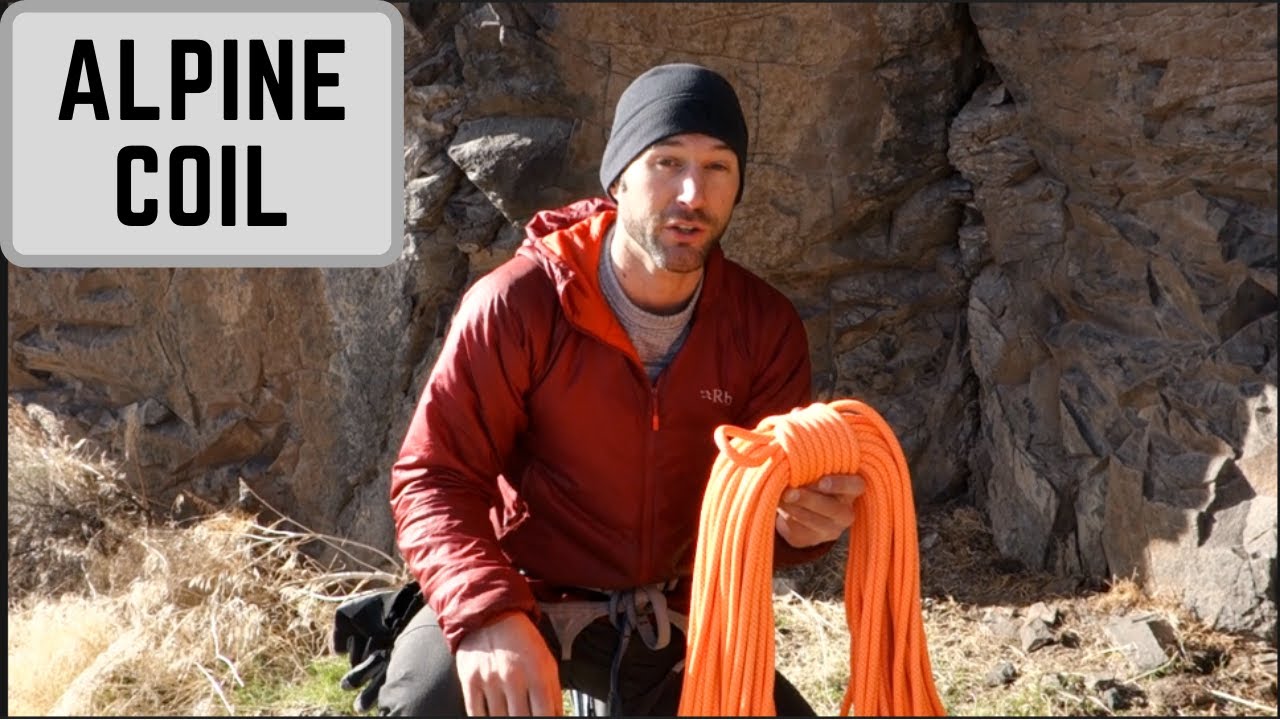
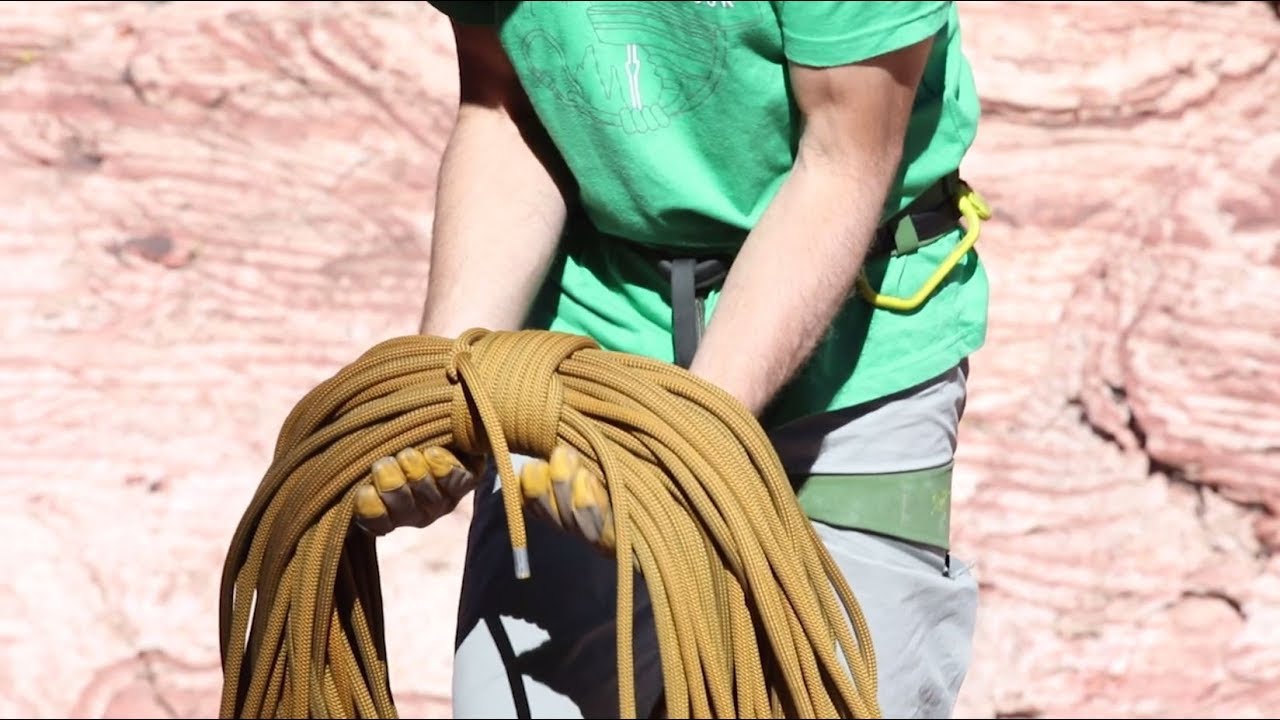
There are several ways to deal with shortening the rope, but in this video we will introduce the kiwi coil. This coil was first used by New Zealand climbing guides, and is an efficient method to shorten and lengthen the rope while traveling through alpine terrain.
The kiwi coil can be done over one shoulder, or can be split into two separate coils, with one on each shoulder. This two coil method is called the bandolier coil. The bandolier coil is great for smaller framed climbers, or those unfortunate alpinists who choose to climb with an excessively long rope for their objective.
Considerations for who will carry the coils should be made on the team dynamic, and the difficulty of the terrain. There are times when the leader will be more experienced and will carry coils, as well as lead the pitches. Other times the follower will carry the coils. And sometimes both teammates will carry some coils and adjust them at each end. This method works well if both teammates have equal experience and are swinging leads.
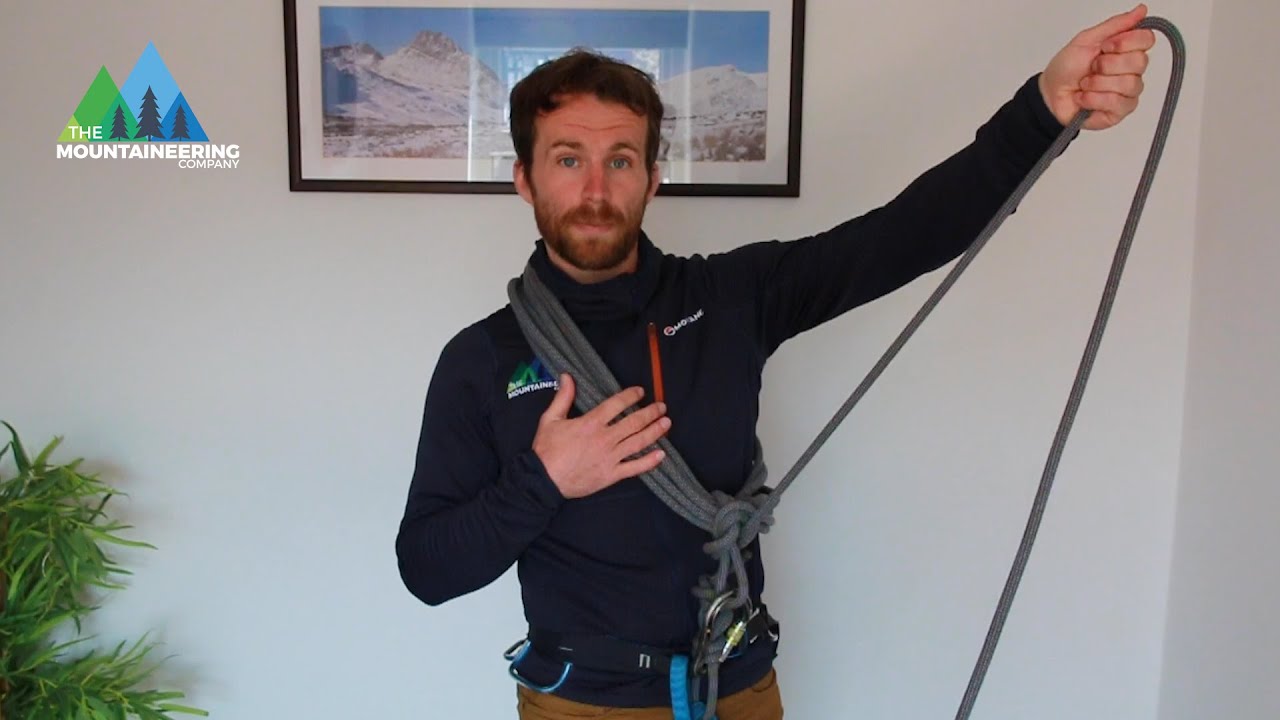
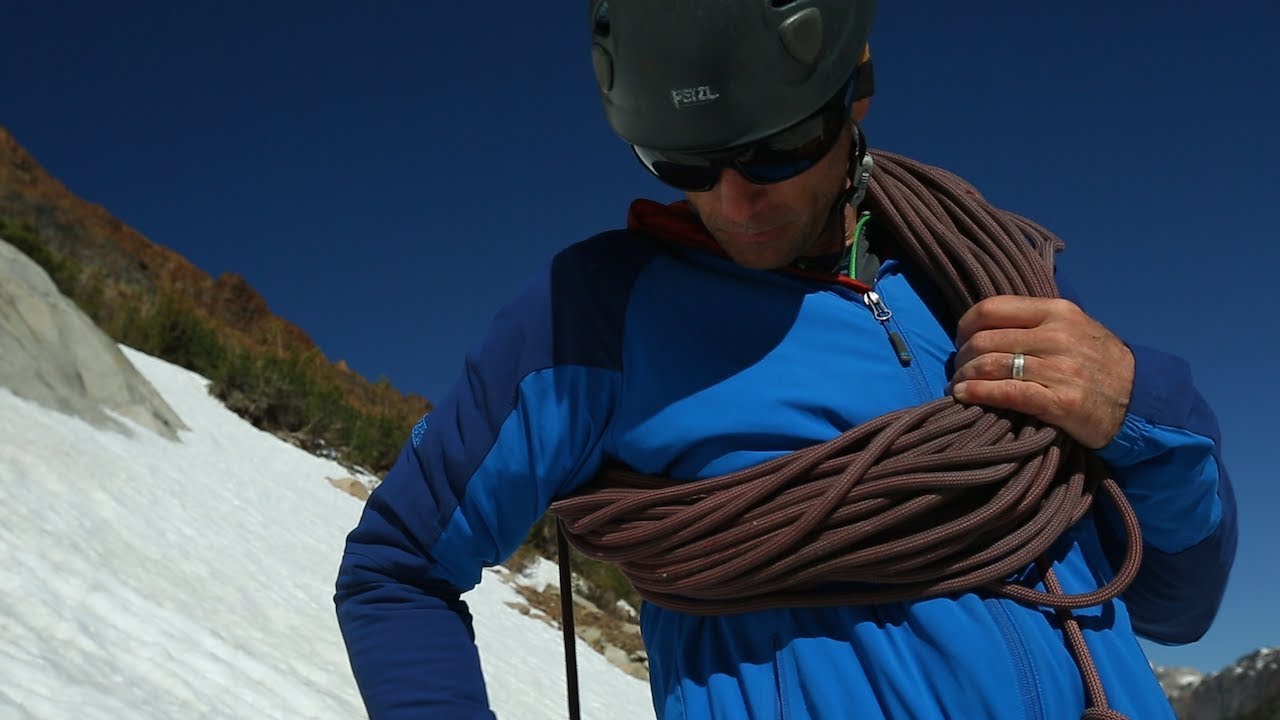
To begin a Kiwi coil:
Step 1: Tie into the end of the rope
Step 2: Bring the rope taut against your chest and over a shoulder.
Step 3: Stand up straight and tall, or your coils will end up a little short.
Step 4: Hold your non dominant hand by your hip and start forming coils over your dominant shoulder and non dominant hand, as seen in the video.
Step 5: Once you have reached the desired length of rope, slide a loop of rope through the belay loop or the loop created by the knot of your tie in. Then slide your hand underneath the coils like you were reaching into the chest pocket of a jacket and bring the loop that you have in your dominant hand underneath the coils.
Step 6: Finish this off with an overhand knot, using that loop of rope, tied around the rope going toward your partner.
If you are climbing 5th class terrain it can be a good idea to clip the loop of the overhand knot back into the belay loop with a small locking carabiner, to ensure the coils don’t become untied while moving through technical terrain.
Note: Falling with coils which are not tied off correctly can strangle the fallen climber and has been the cause of some fatalities in the mountains.
Once the coils are tied off, they can even act as a chest harness that distributes the force of a fall between your tie in point at the waist and the coils around your shoulders.
You can easily add or subtract coils in order to lengthen or shorten the rope as terrain or ability dictates.
We hope you found this video helpful.
Please remember, climbing and mountaineering are inherently dangerous. Climb at your own risk. Visit https://www.ClimbingTechTips.com for related comments, additional videos, and community feedback!
Повторяем попытку...
Доступные форматы для скачивания:
Скачать видео
-
Информация по загрузке: