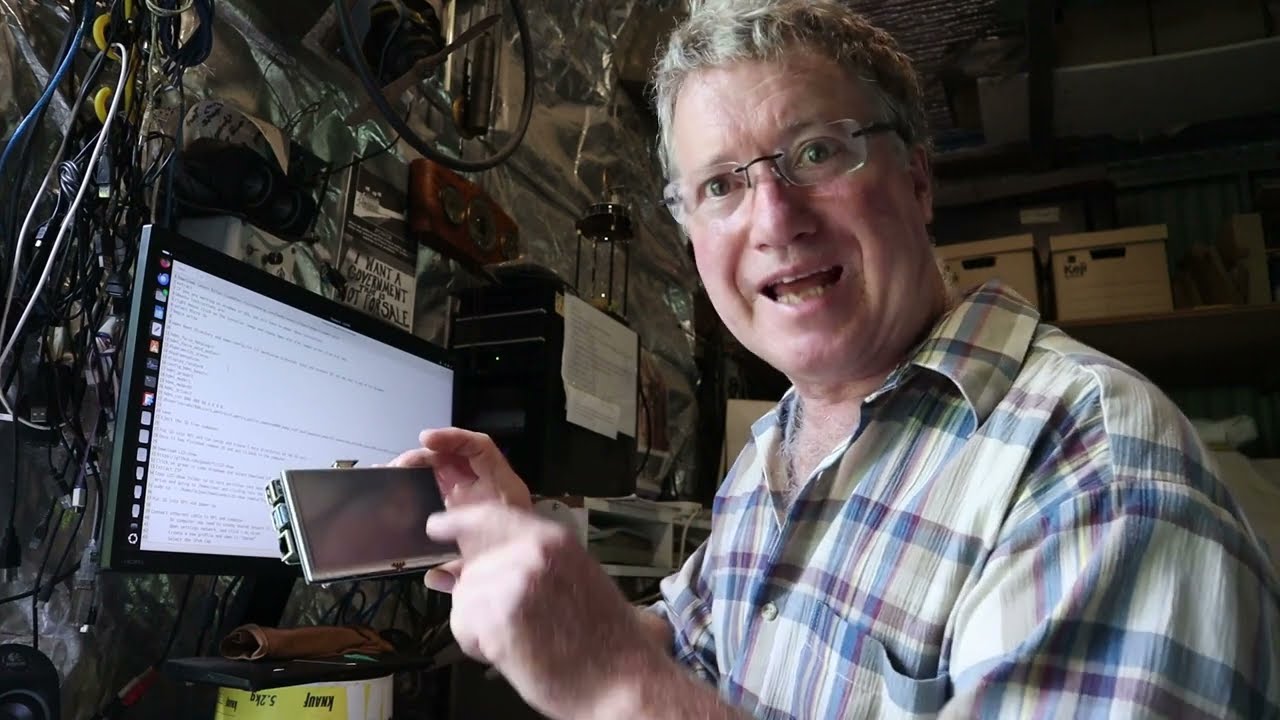
Victron Venus OS 5inch screen touch working with RPi 4
Автор: LB Joum
Загружено: 2025-03-06
Просмотров: 327
Описание:
After giving up and then coming back to it, I got the touch screen working. It took me 3 days, trying every suggestion I could find. I couldn't find any information for this specific touch screen so I posted this video.
The screen is xpt2046 5inch MPI5008.
Information on the screen: http://www.lcdwiki.com/res/MPI5008/5inch_H...
Text doc of my procedure: https://drive.google.com/file/d/1KwLnyxwHE...
1KwLnyxwHEYM2oV_NiDrzpXCP-KPSYUK5/view?usp=sharing
Download latest https://updates.victronenergy.com/feeds/ve...
extract
If you are working on windows or IOS, you will have to adapt these instructions.
Ubuntu instructions are:
right mouse click on the installer image and choose Open with disk images writer (from disk app)
select Micro SD
begin write
open boot directory and open config.txt (if permission protected. eject and reinsert SD) and add text to end of txt document:
hdmi_force_hotplug=1
hdmi_force_edid_audio=1
dtparam=i2c_arm=on
dtparam=spi=on
display_rotate=0
config_hdmi_boost=7
hdmi_group=2
hdmi_mode=1
hdmi_mode=87
hdmi_drive=2
hdmi_cvt 800 480 60 6 0 0 0
dtoverlay=ads7846,cs=1,penirq=25,penirq_pull=2,speed=50000,keep_vref_on=0,swapxy=0,pmax=255,xohms=150,xmin=200,xmax=3900,ymin=200,ymax=3900
save
Eject the SD from computer.
Put SD into RPi and run setup and create 2 more directories on the SD card.
Once it has finished remove SD and put it back in the computer.
Download LCD-show
https://github.com/goodtft/LCD-show
Click on green code dropdown and select Download ZIP
Extract ZIP
Copy LCD-show folder to SD card partition (not boot or root partition but one with home folder) /home/root. You will have to find the drive designation. I do this by opening the drive and going to /home/root and clicking into the address at the top of the folder.
sudo cp -r /home/lbjoum/Downloads/LCD-show /media/lbjoum/eb3f9f68-0304-4277-9406-ca1bdbf85217/home/root
Put SD into RPi and power up
Connect ethernet cable to RPi and computer
On computer may need to create shared network if not already done-
Open settings network. and click + on wired
Create a new profile and name it "Shared"
Select the IPv4 tab
Choose Shared to other computers
Click Apply
Open Browser and go to venus.local
Settings
General
Access level (hold right arrow) will go to superuser
root password 123456 (6characters) (spacebar for cursor and mouse to tick to enter)
SSH on LAN enable.
Set wifi and timezone/date if you want
Go back to Settings menu
Ethernet
Take note of IP address (10.42.0.112 or 10.42.0.118)
Go back to Settings menu
General
reboot
In terminal ssh [email protected]
*/----------
IF WARNING
@@@@@@@@@@@@@@@@@@@@@@@@@@@@@@@@@@@@@@@@@@@@@@@@@@@@@@@@@@@
@ WARNING: REMOTE HOST IDENTIFICATION HAS CHANGED! @
@@@@@@@@@@@@@@@@@@@@@@@@@@@@@@@@@@@@@@@@@@@@@@@@@@@@@@@@@@@
remove with:
ssh-keygen -f '/home/lbjoum/.ssh/known_hosts' -R '10.42.0.112'
OR
go to /home/lbjoum/.ssh, move known_hosts to temp folder (or delete) and retry ssh [email protected]
/*-------
type yes when it asks you.
You should now be in root@raspberrypi4:~#
ls
LCD-show
This will show that LCD-show is in the correct drive and folder
opkg update
opkg install tslib-calibrate
reboot
Log back into ssh [email protected]
ts_calibrate
rm /etc/venus/headless
reboot
You should have UI screen and touch screen
touch /etc/venus/headless
shutdown -h now
(type exit to leave ssh)
Повторяем попытку...
Доступные форматы для скачивания:
Скачать видео
-
Информация по загрузке:


![Почему работает теория шести рукопожатий? [Veritasium]](https://imager.clipsaver.ru/ggI1xKzoANs/max.jpg)